There’s a moment in every audit cycle where someone has to put a year of evidence into the system. A SOC 2 Type II report. Last quarter’s penetration test. The ISO 27001 certificate. A stack of vendor BAAs. The information security policy and the procedures that hang off it. Cyber insurance. Done one file at a time — upload, pick a type, fill the metadata, save, repeat — that’s an afternoon you don’t have.
Bulk Import collapses it into one pass. Drag the whole folder in, tell the wizard what each file is, fill the few details that document type actually requires, and import everything at once — with per-file validation so nothing lands half-described.
Who’s involved
- Compliance lead — loads the evidence library ahead of an audit: assessments, certs, reports, attestations.
- Security owner — drops the vendor certs, pen tests, and scan reports as they come in.
- Auditor-facing admin — keeps the metadata clean (issue dates, expirations, auditors) so the export reads well.
What’s on the page
Open Bulk Import from the Artifact Repository header (/app/artifact-repository, next to Upload Evidence and Add Artifact).
- The drop zone — drag a whole folder of files in at once.
- The staging table — one row per file; set each file’s Type, which drives the required fields it must carry.
- Add type inline — create a missing document type without leaving the importer.
- The readiness gate — Import stays blocked until every staged file has its required fields.
Step 1 — Open Bulk Import
Open the Artifact Repository (/app/artifact-repository). In the header, next to Upload Evidence and Add Artifact, is Bulk Import — the multi-file path.
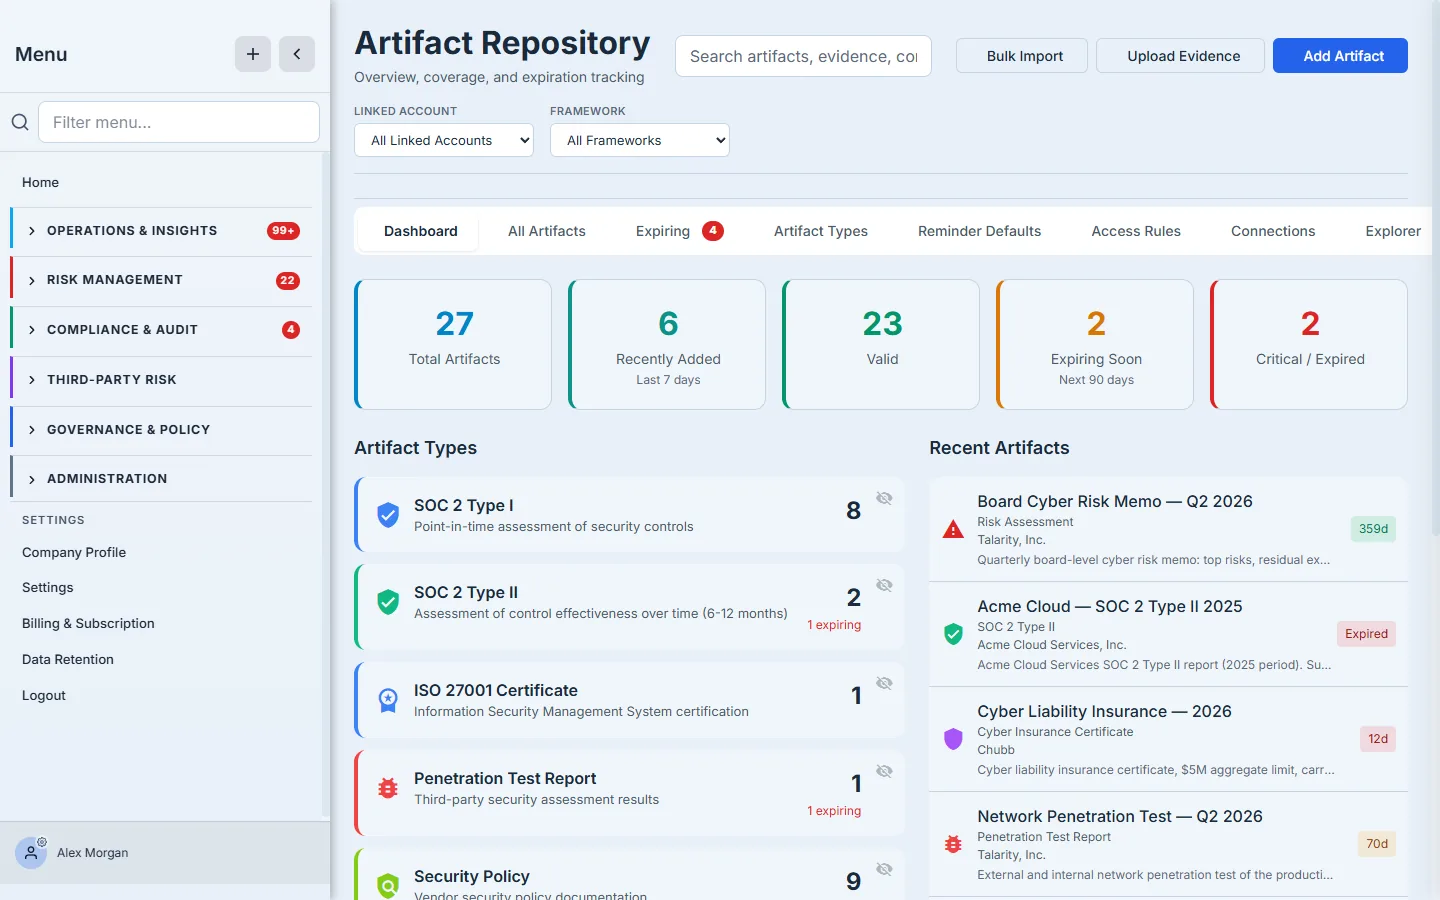
The single-file Upload Evidence flow is still there for one-off documents. Bulk Import is for the folder.
Step 2 — Drop the whole folder
The wizard opens to a dropzone. Drag in as many files as you like, or browse to them — any file type the repository accepts.
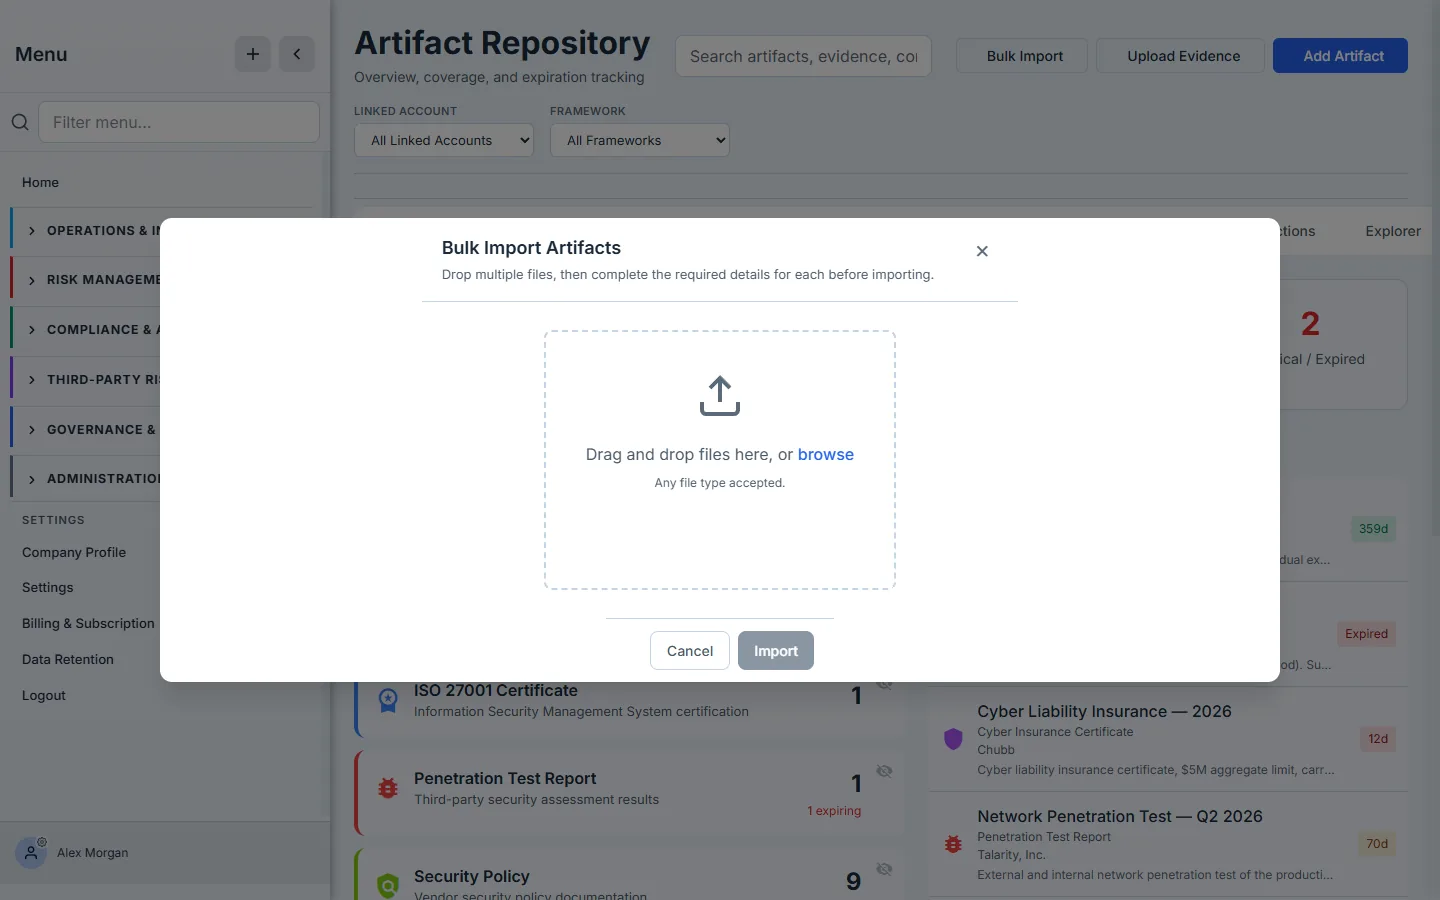
Each file becomes a row. Drop ten and you get ten rows, each one waiting for its document type.
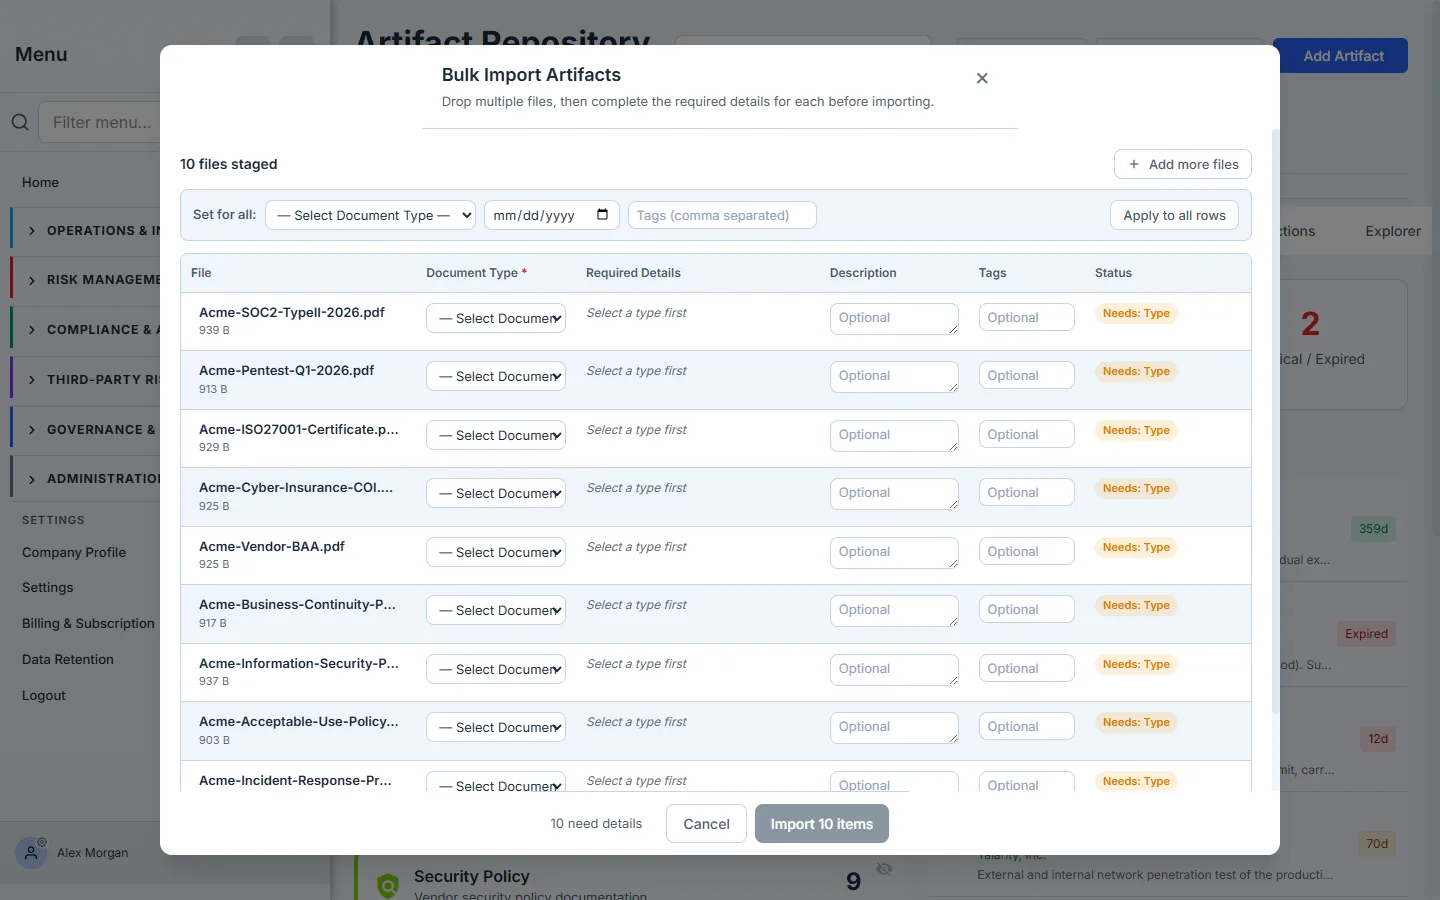
Nothing is uploaded yet. Files only stage on drop; the import happens later, when you say so — so there are no orphaned half-uploads if you change your mind.
Step 3 — Give each file its type — and the type tells you what it needs
This is the heart of the wizard. Pick a Document Type for each row, and the Required Details column re-renders to ask for exactly what that type needs — no more, no less.
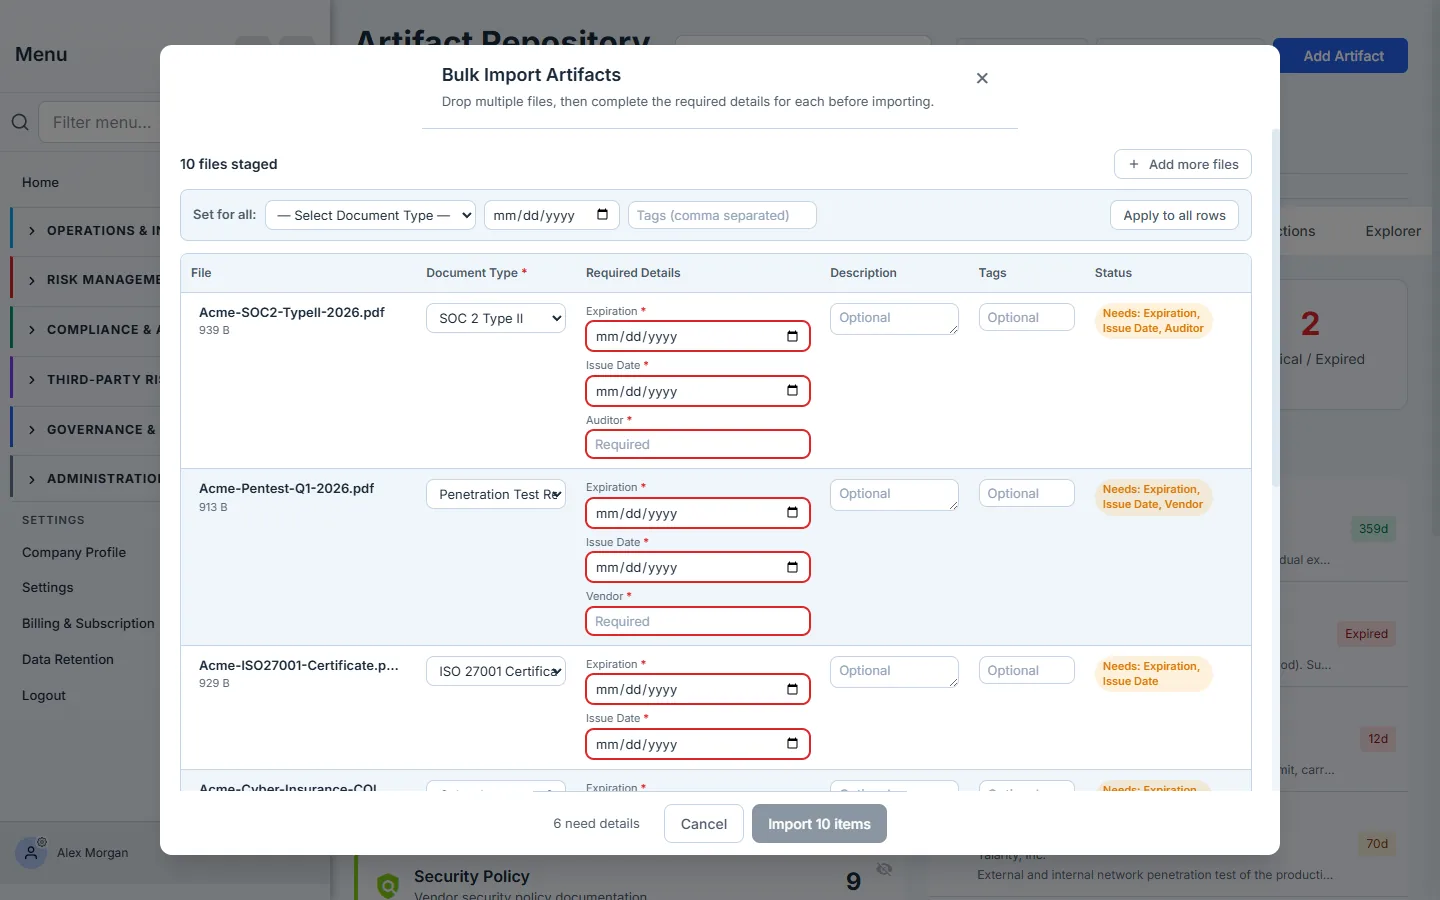
A SOC 2 Type II needs an issue date and an auditor; a penetration test needs a vendor; a certificate needs an expiration. The type drives the requirement — so the metadata that makes evidence useful later (expiry tracking, framework mapping, auditor attribution) is captured at the door instead of backfilled at audit time. The status pill on each row spells out exactly what’s still missing — “Needs: Expiration, Issue Date, Auditor” — so there’s no guessing what a row is waiting on.
The Set for all bar at the top applies a type, expiration, or tags to every row at once. Set the common case in one move — then override the exceptions row by row.
Step 4 — Need a type that isn’t there? Add it inline
The type list covers the usual evidence — SOC 2, ISO 27001, pen tests, vulnerability scans, BAAs, security policies, procedures — but eventually you’ll reach for something it doesn’t have. Pick ”+ Add new type…” on any row and name it.
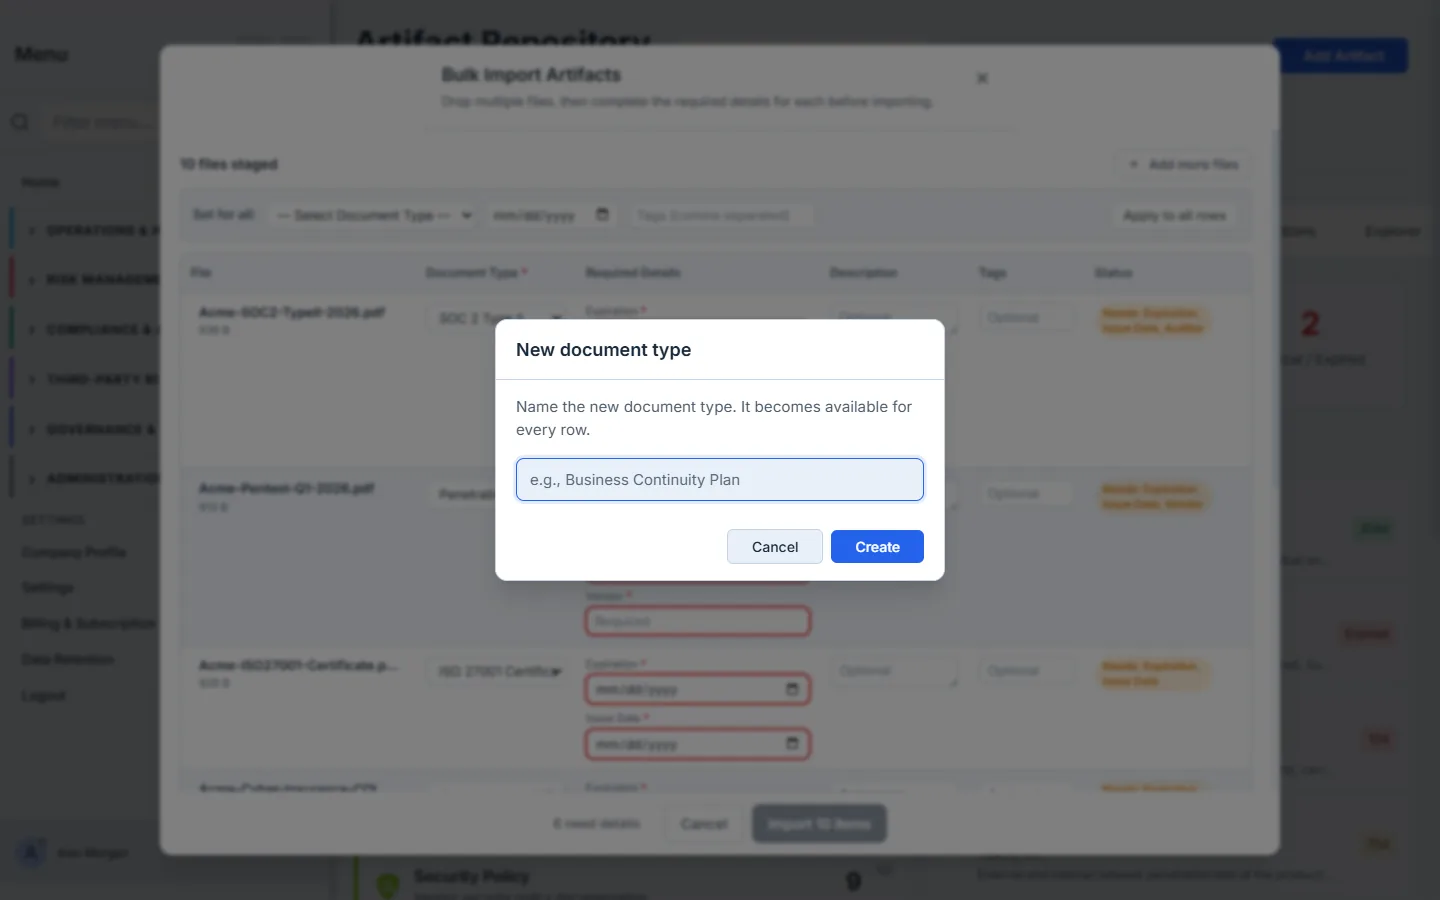
The new type is created once and immediately offered on every row in the grid — and it sticks around for next time. No leaving the wizard to go define a type first and starting over.
Step 5 — Read the readiness, then import
The footer keeps a running tally — how many rows are ready versus how many still need details — and the Import button stays disabled until every row is valid. When the last required field is filled, the count flips to “10 ready to import” and the button goes live.
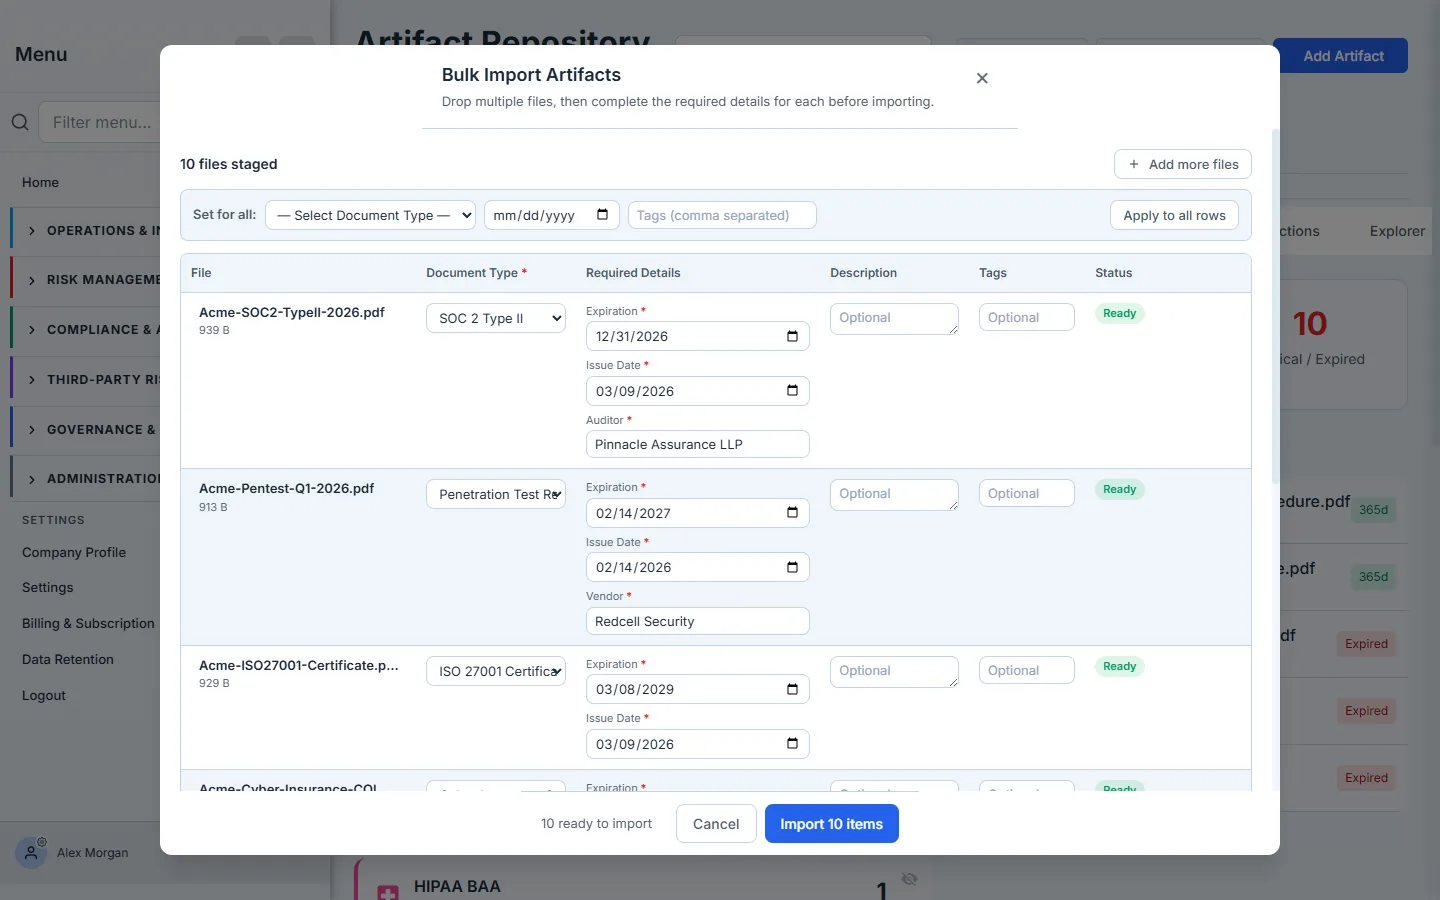
Click it, and the wizard commits each file — upload, then confirm — a few at a time, with a live “Importing X of N” counter. Each file is independent: if one fails its server-side check, it stays in the grid for a retry while the rest succeed, so a single bad file never sinks the batch.
Step 6 — They’re in the library
When the batch finishes, the wizard closes and the repository refreshes with everything you just loaded — typed, dated, and counted.
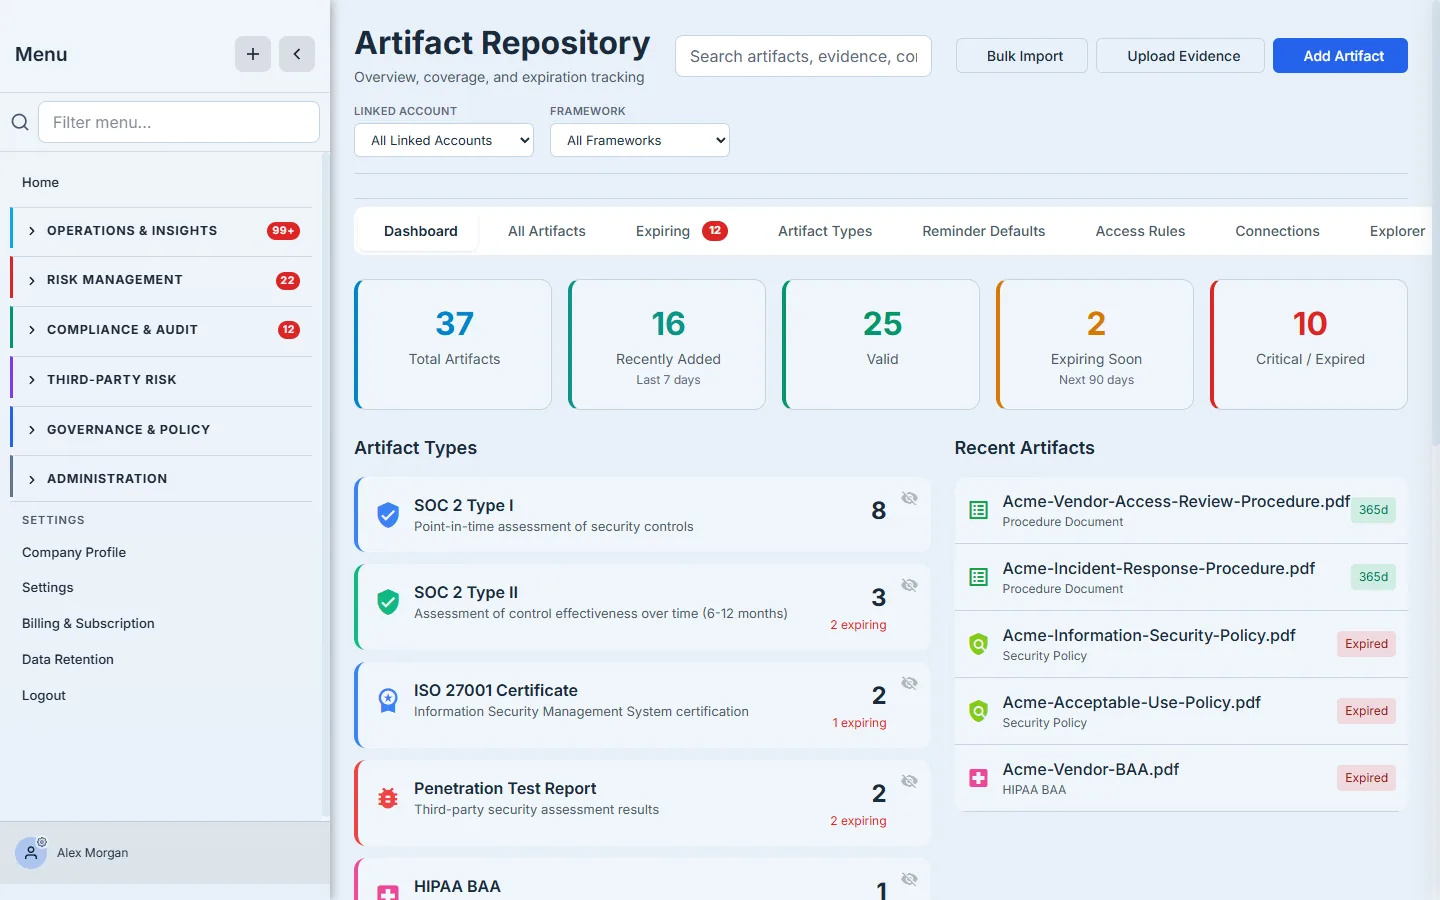
Every file landed with its type and metadata intact, so it’s immediately countable in the type breakdown, trackable for expiration, and ready to map to a framework — not a pile of untyped uploads to sort out later.
How the page works
The wizard is a staging buffer in front of the same upload pipeline a single file uses — that design is what makes a 50-file batch safe:
- Staging is local until you commit. Dropping files only builds rows in the wizard; nothing is uploaded, so abandoning the wizard leaves zero orphaned half-uploads behind. The actual transfer happens only when you click Import.
- The document type drives the form. Choosing a type re-renders that row’s Required Details to exactly the fields the type defines — a SOC 2 asks for issue date + auditor, a pen test for a vendor, a cert for an expiration. Required fields are validated per row, and the status pill names what’s still missing.
- The Import button is a hard gate. It stays disabled until every row is valid — there’s no way to commit a batch with a half-described file, which is why the metadata that makes evidence useful later can’t be skipped at the door.
- Each file imports independently. On commit, every file runs the same two-step upload → confirm flow a single Add-Artifact upload uses, a few at a time. Because each is its own transaction, a file that fails its server-side check stays in the grid for a retry while the rest succeed — one bad file never sinks the batch.
- New types persist. Adding a type inline creates it once on the org’s type list; it’s offered on every remaining row immediately and is still there next time, so the wizard never forces a detour to go define a type first.
What you walk away with
- A folder becomes a library in one pass — drag everything in, type it, import it, instead of uploading one file at a time.
- Metadata captured at the door — the document type drives the required fields, so evidence is audit-ready (issue dates, expirations, auditors) the moment it lands.
- Nothing half-imported — per-row validation gates the import, and a failed file retries on its own without blocking the batch.
Next time you’re staring at a folder of audit evidence, don’t load it one file at a time. Open the Artifact Repository, click Bulk Import, and drop the whole thing in.