Almost every framework that touches your security or compliance program expects a policy set that is organized and reviewable by topic — not a flat list. SOC 2 calls it out in CC2.3 (the entity communicates information to support the functioning of internal control). ISO 27001:2022 lays it down in A.5.1 (policies for information security must be defined, approved, communicated, and reviewed). When an auditor asks “show me every Access policy” or “which of these is HR-facing,” a single undifferentiated list is the wrong answer.
Most teams have exactly that — a flat list nobody can slice by domain. Talarity makes category a first-class, filterable property of every policy: one canonical taxonomy, applied from the Policies list, the policy detail page, or in bulk, and surfaced again as a badge in the Artifact Repository. Classify once; every view reflects it.
Who’s involved
- Compliance lead — assigns a category to each policy and filters the policy set by domain when running the program.
- Policy owner — sees their policy correctly classified, in the same bucket an auditor will look for it.
- Auditor — slices the policy set by category at audit time (“show me every Access policy”), and confirms nothing important is still left Uncategorized.
What’s on the page
Categories are set and read in two places that share one taxonomy:
- The Policies & Controls list — every policy with a Category column (some classified, some still Uncategorized) and a Category filter above it to narrow to one category — or to surface everything still Uncategorized.
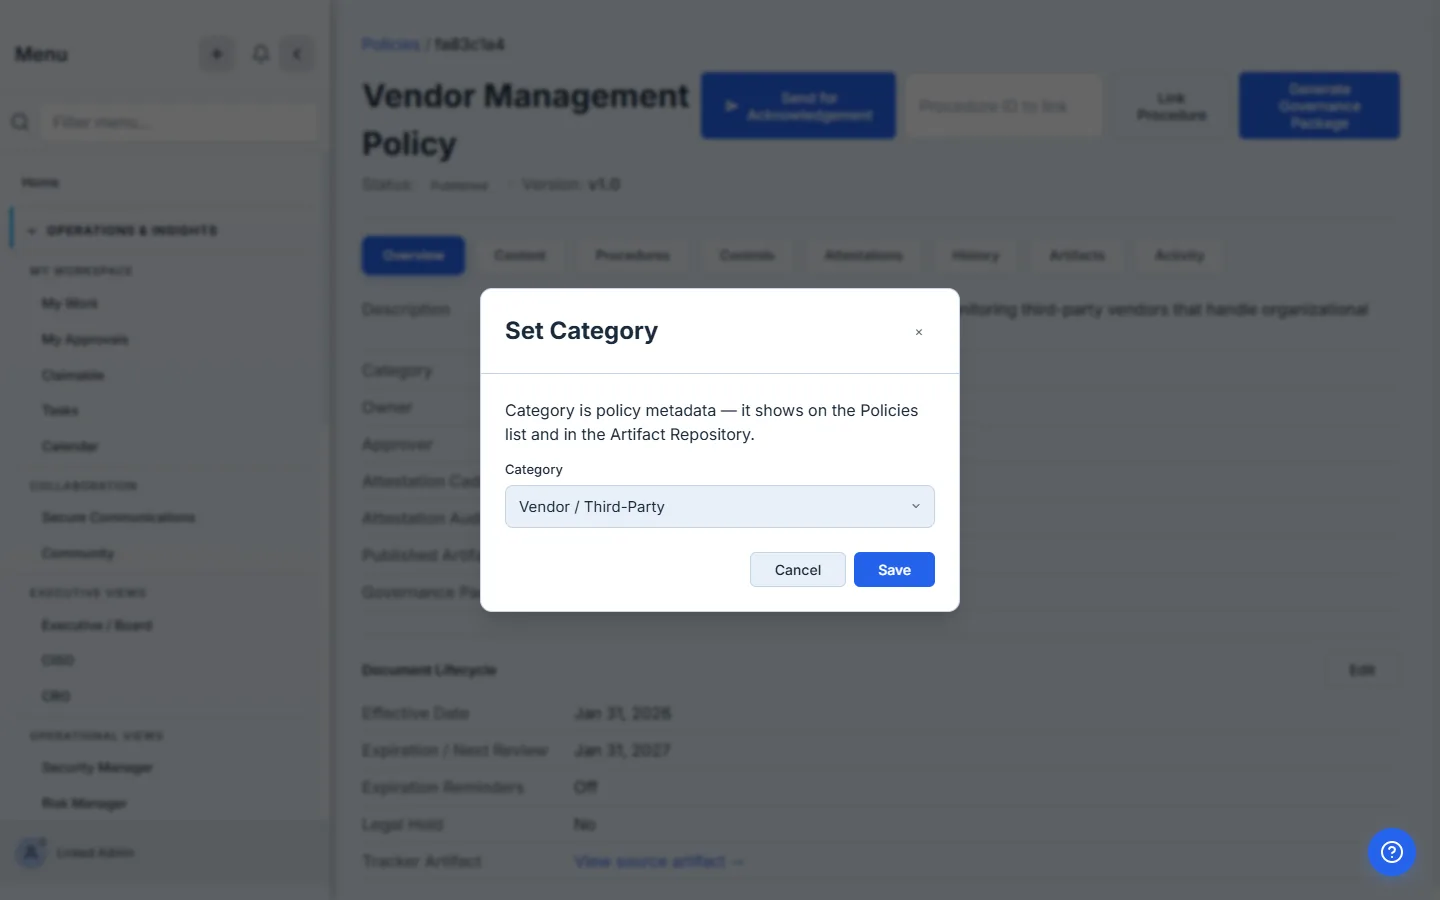
- The Set Category modal — opened on a policy (from the list inline, in bulk, or from the policy’s detail page): a dropdown of the canonical eight categories plus an Other (custom)… option that reveals a free-text field for your own category (e.g. “Operational Resilience”).
- The Artifact Repository — the same category taxonomy applies to artifacts, so a document and the policy it supports can be filed under one consistent label.
Step 1 — Open Policies & Controls
Head to /app/grc/governance and stay on the Policies tab. Every policy in your program is here, and the table carries a dedicated Category column right next to the policy name.
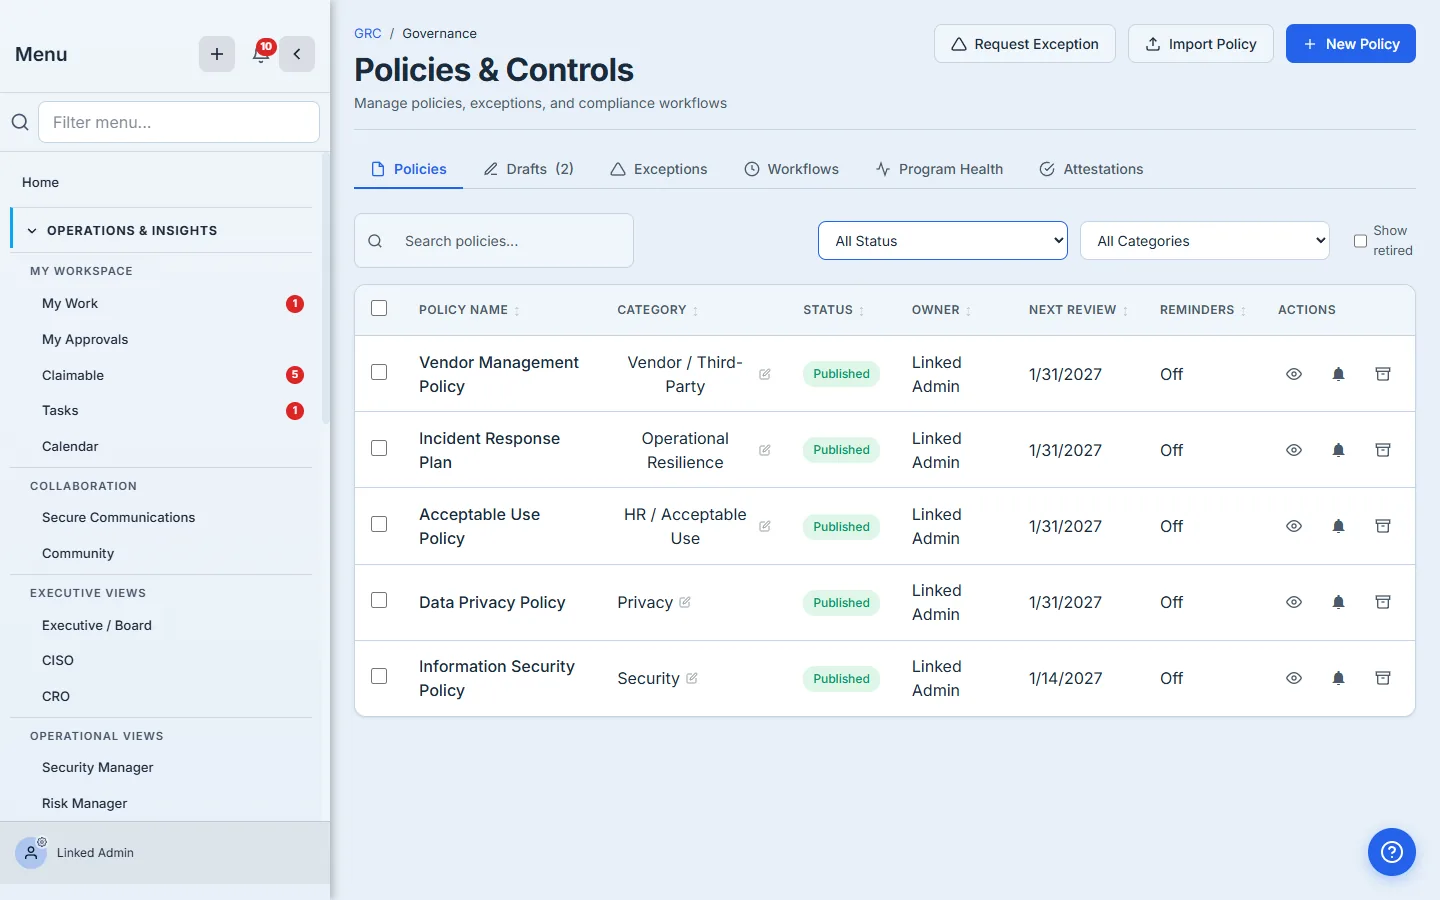
A freshly imported or newly authored policy starts life Uncategorized — that’s not a bug, it’s the honest default. The job of this workflow is to turn that column from a wall of “Uncategorized” into something an auditor can read.
Step 2 — Filter by category and status
Above the table sit two dropdowns. The Category filter lists All Categories, the eight canonical policy types, any custom categories your org has actually used, and an Uncategorized bucket. Pick one and the list collapses to the matching rows.
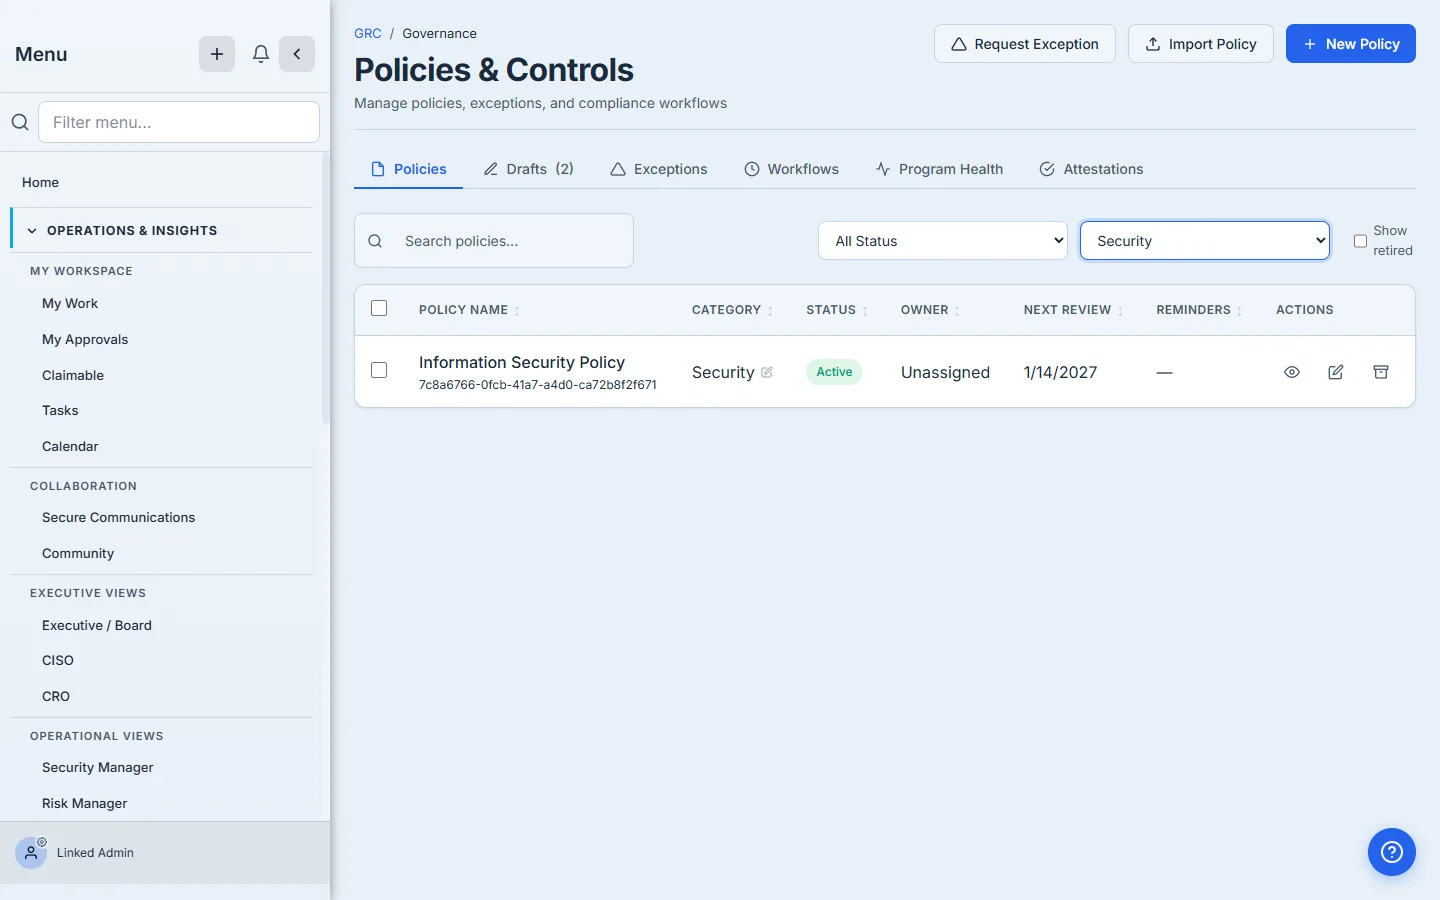
The most useful filter on day one is Uncategorized — it’s your worklist. It answers “what haven’t I classified yet” in one click, so nothing slips through before an audit.
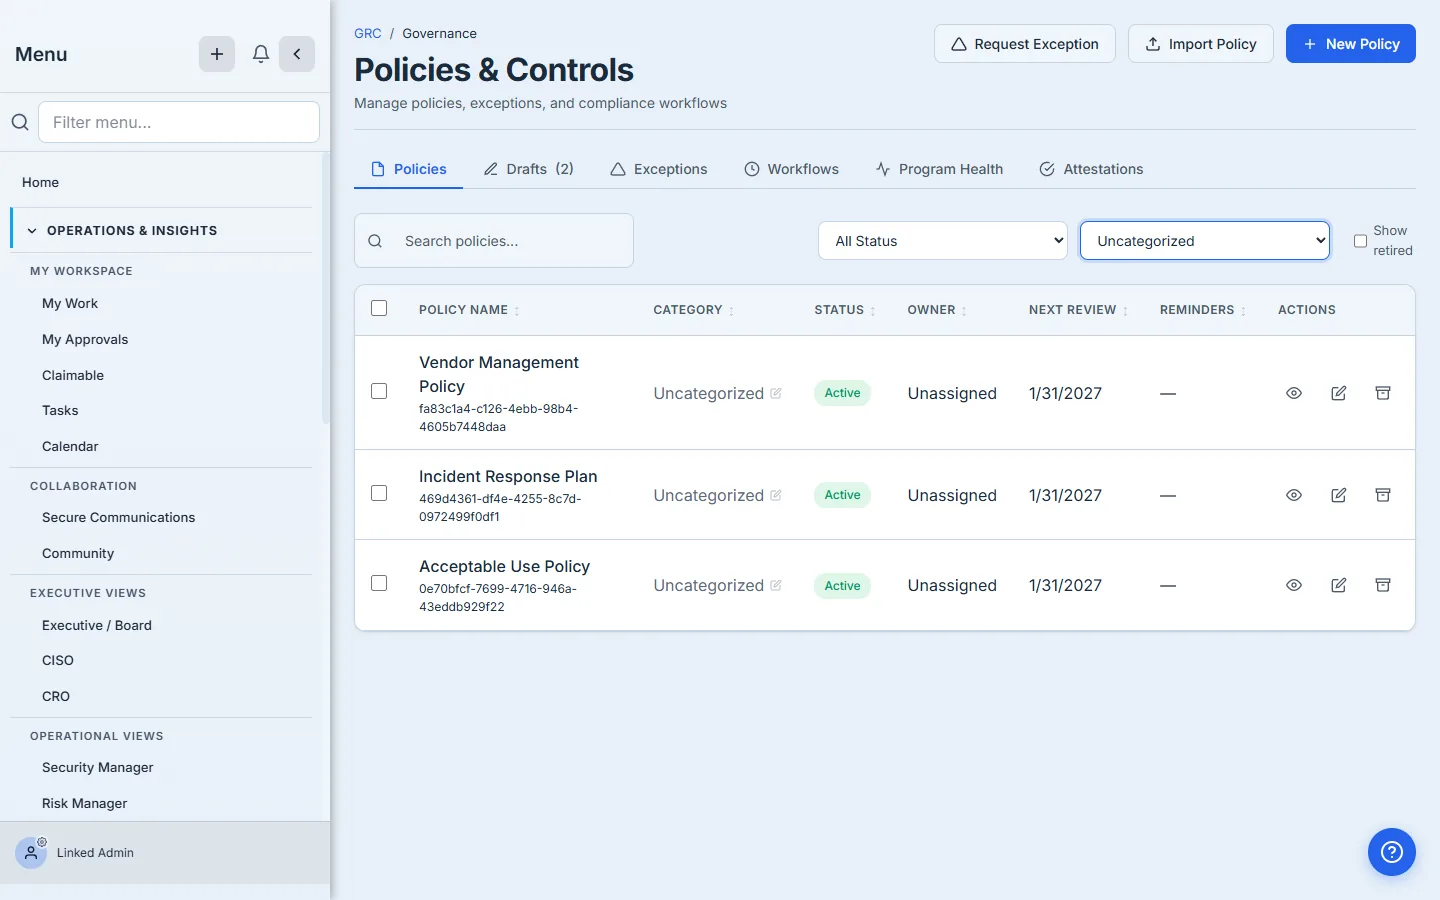
The Status filter sits right beside it — All Status, Draft, Pending Review, Approved, Published, Retired — and the two compose. “Every published Access policy” is a Category-plus-Status filter, not a spreadsheet sort. When a combination matches nothing, the table says so plainly instead of going blank.
Step 3 — Assign a category inline
You don’t need to open a policy to classify it. The Category cell on every row is a button — click it (the pencil icon) and the Set Category modal opens, scoped to that one policy.
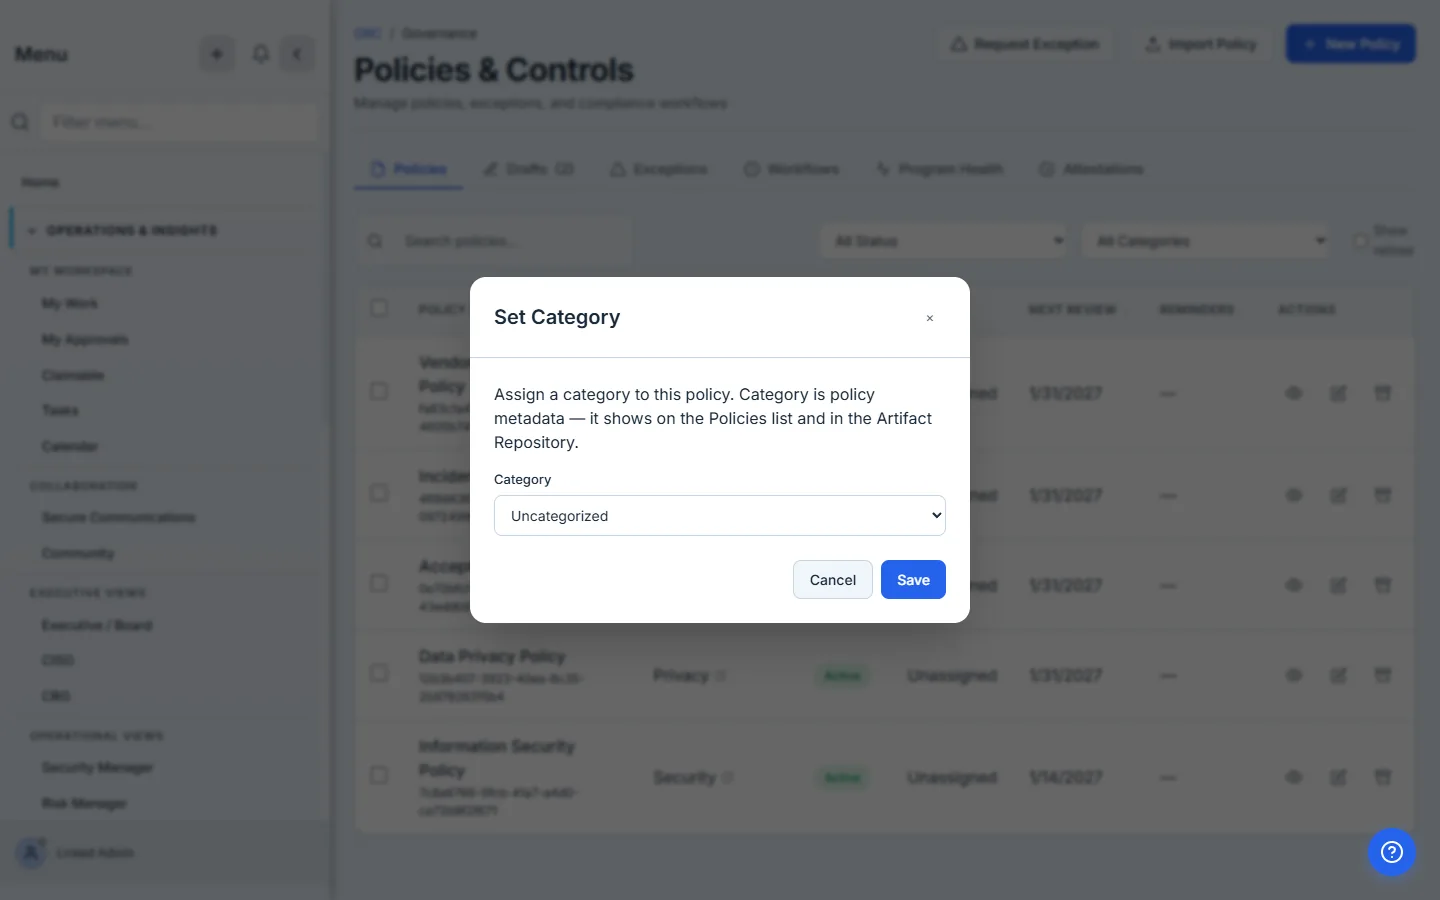
The dropdown offers Uncategorized, the eight canonical types, and an Other (custom)… option. Pick the type that fits — here, an Acceptable Use Policy belongs under HR / Acceptable Use — and Save.
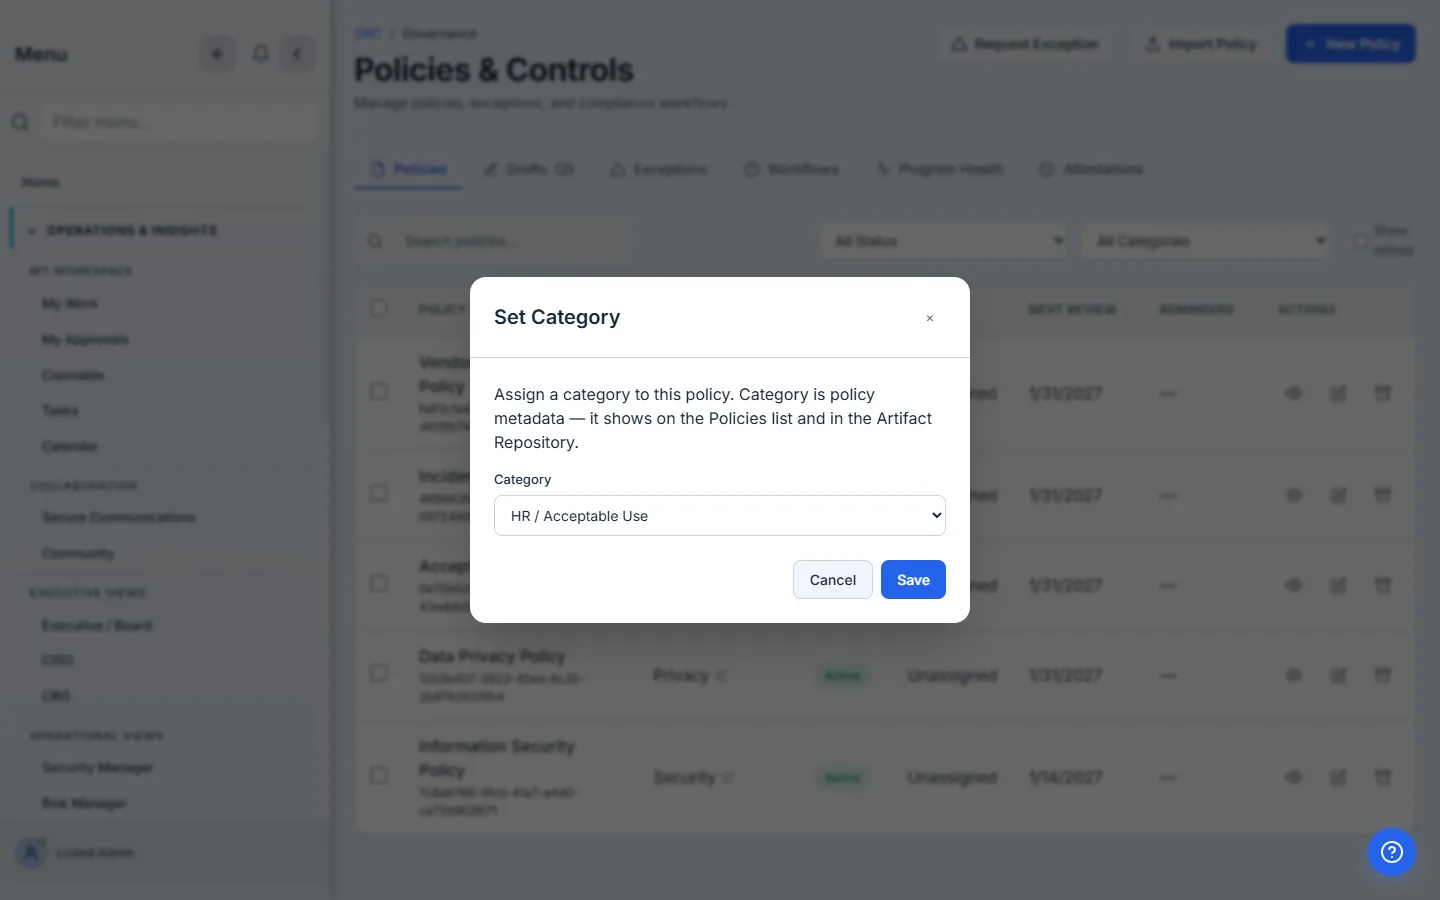
Behind the scenes Talarity keeps two fields coherent: a canonical taxonomy slug that drives reporting and rollups, and a display value. Pick one of the eight and both agree; the Category column on the list updates the moment you save.
Step 4 — The canonical eight, plus your own
The eight canonical types — Security, Privacy, Access, Incident Response, Business Continuity / Disaster Recovery, Vendor / Third-Party, HR / Acceptable Use, General — cover most policy sets. When yours needs something more specific, choose Other (custom)… and a free-text field appears.
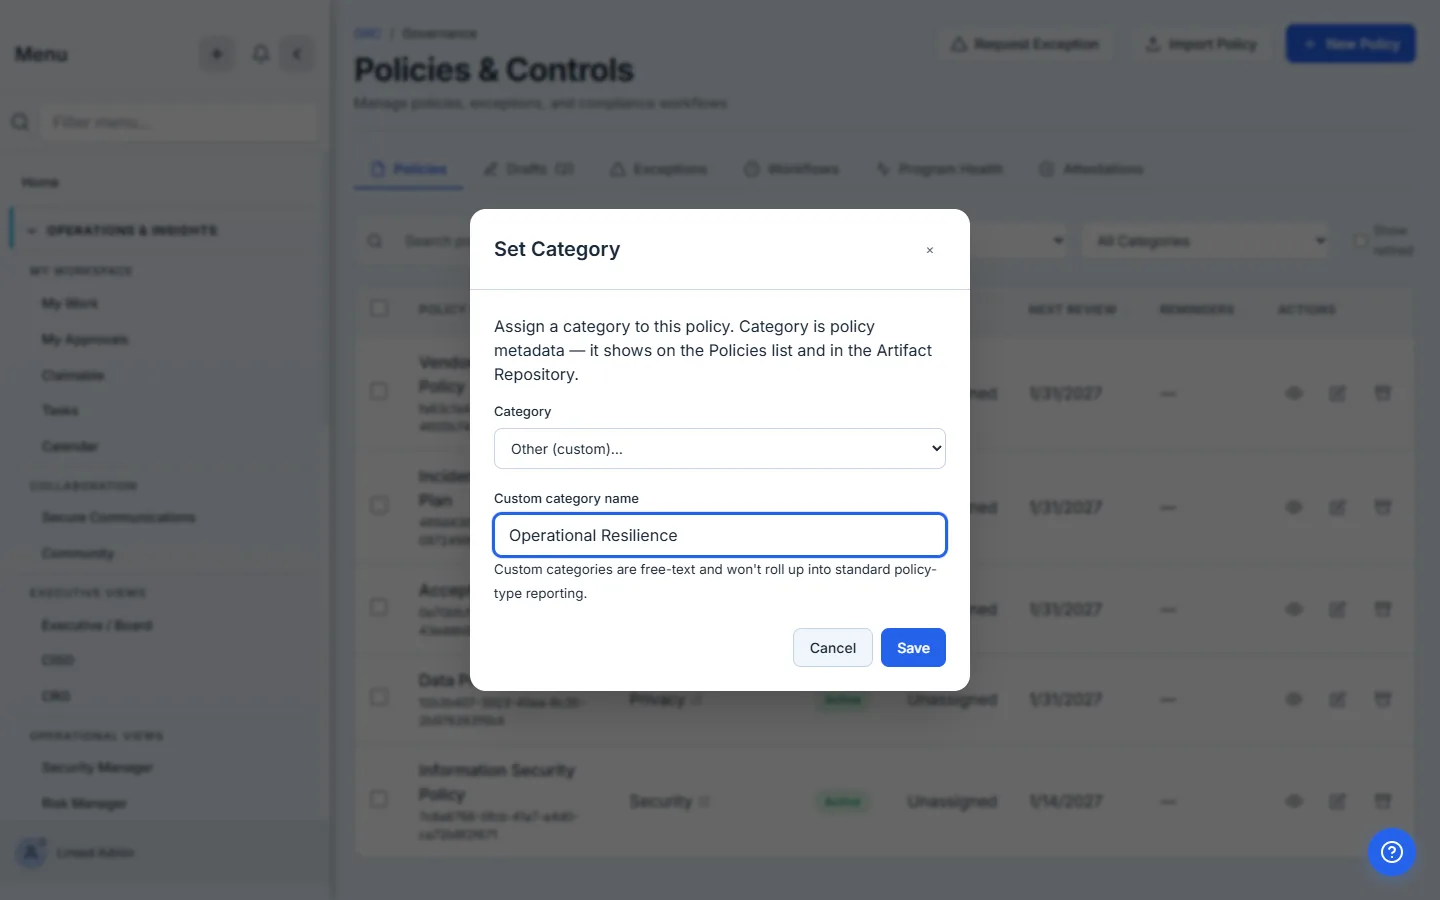
A custom category is yours to name and is reusable — once you’ve created one, it shows up as a direct pick in the dropdown and as its own option in the Category filter. The trade-off is shown right under the field: custom categories are free text, so they don’t roll up into the standard policy-type reporting the canonical eight feed. Use a canonical type when one fits; reach for Other when none does.
Step 5 — Set categories in bulk
Classifying a backlog one row at a time is slow. Select policies with the row checkboxes and a bulk action bar appears with a Set Category button.
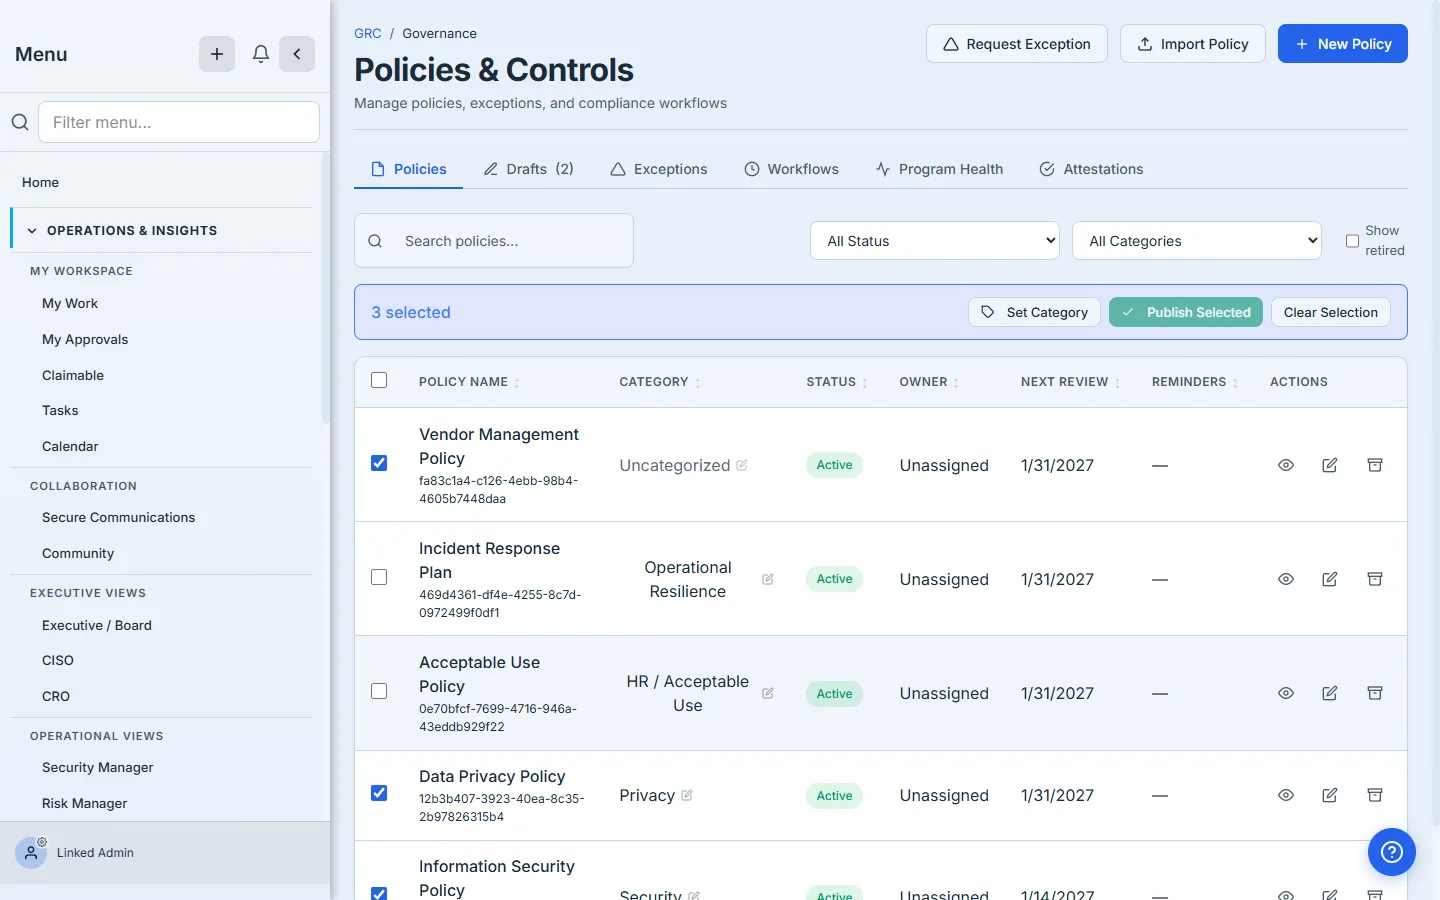
Set Category opens the same picker — but with one deliberate difference. Its default isn’t Uncategorized; it’s a non-destructive — Keep current category — sentinel.
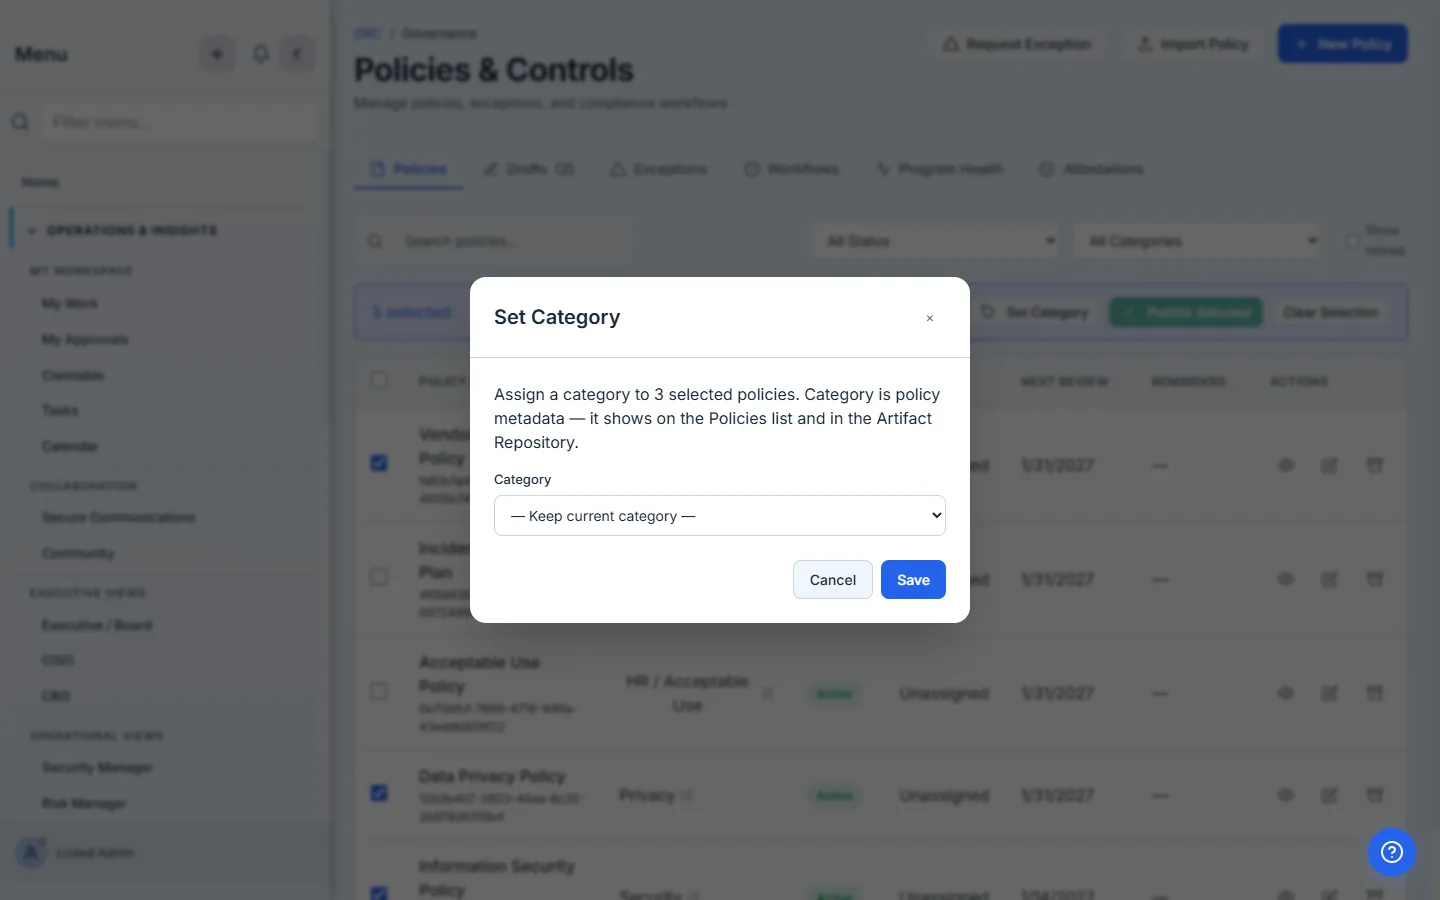
The ”— Keep current category —” default is the most important detail in this modal. A multi-select almost always mixes already-classified policies with unclassified ones. If the bulk modal defaulted to a real value, one accidental Save would silently overwrite every category you’d already set. The sentinel means a careless Save changes nothing — you have to deliberately pick a category for the bulk write to touch anything.
Pick a real category and Save, and Talarity applies it to every selected policy in one batched write — no per-policy round-trips. (A single bulk write is capped at 100 policies; for a larger backlog, filter the list and work it in batches.)
Step 6 — Set the category from the policy’s detail page
Category is metadata, so it’s editable wherever you meet a policy. Open any policy and the Overview tab carries a Category row with its own Edit button.
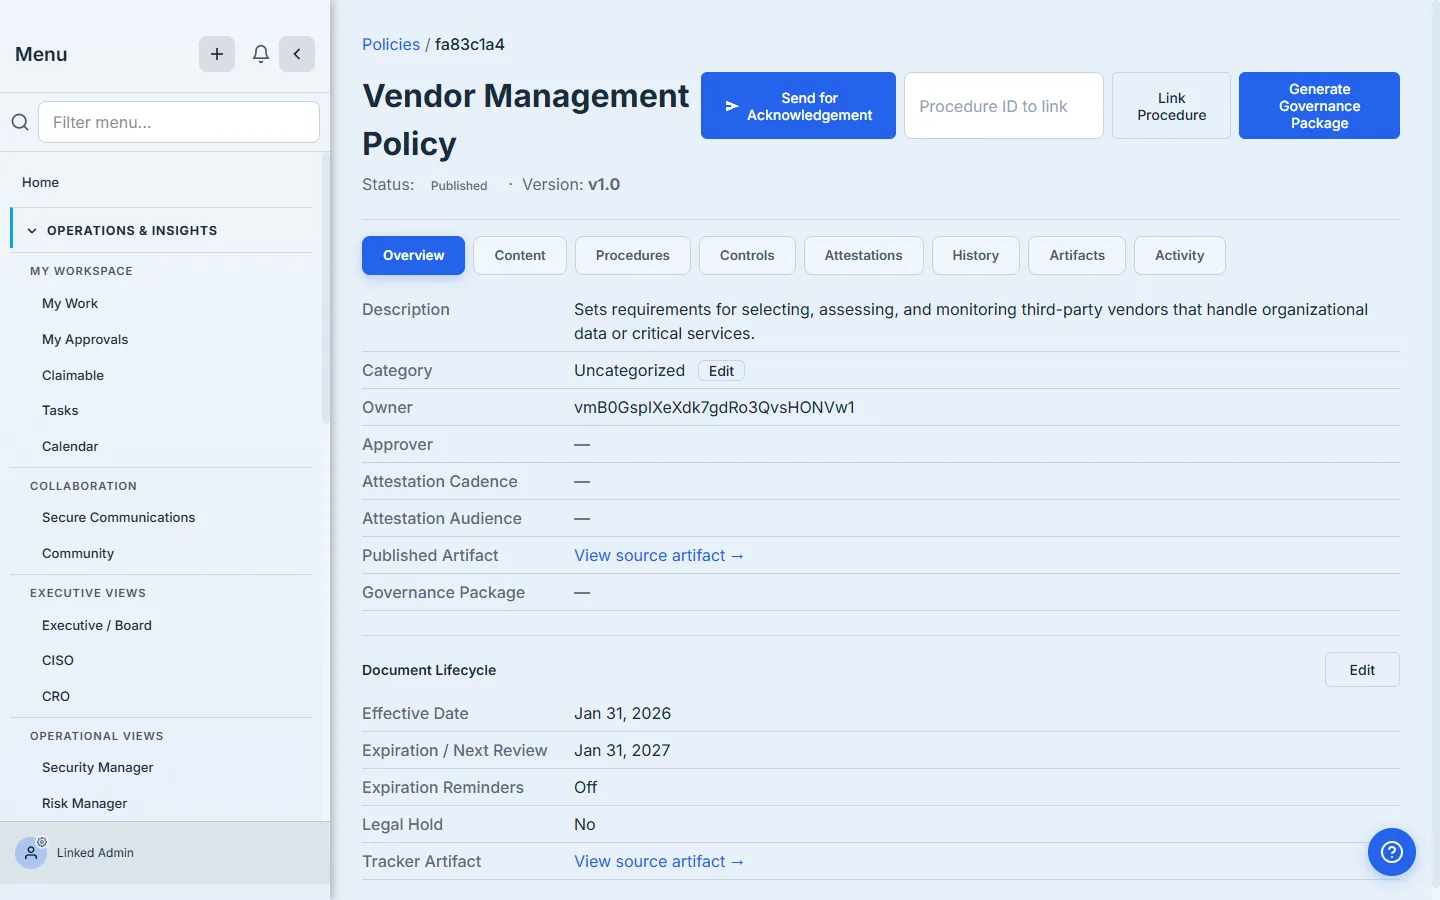
Edit opens the same category picker — the canonical eight, your custom categories, and the Other path. It works on a policy in any lifecycle status: a Draft you’re still writing, a Published policy in force, a Retired one. Category never depends on where the policy sits in its review cycle.
Step 7 — The same taxonomy in the Artifact Repository
Every file-backed policy is also an artifact in the Artifact Repository (/app/artifact-repository) — the evidence-side view auditors and evidence collectors live in. Set a policy’s category and Talarity mirrors it onto that artifact: the row carries a humanized policy-type badge.
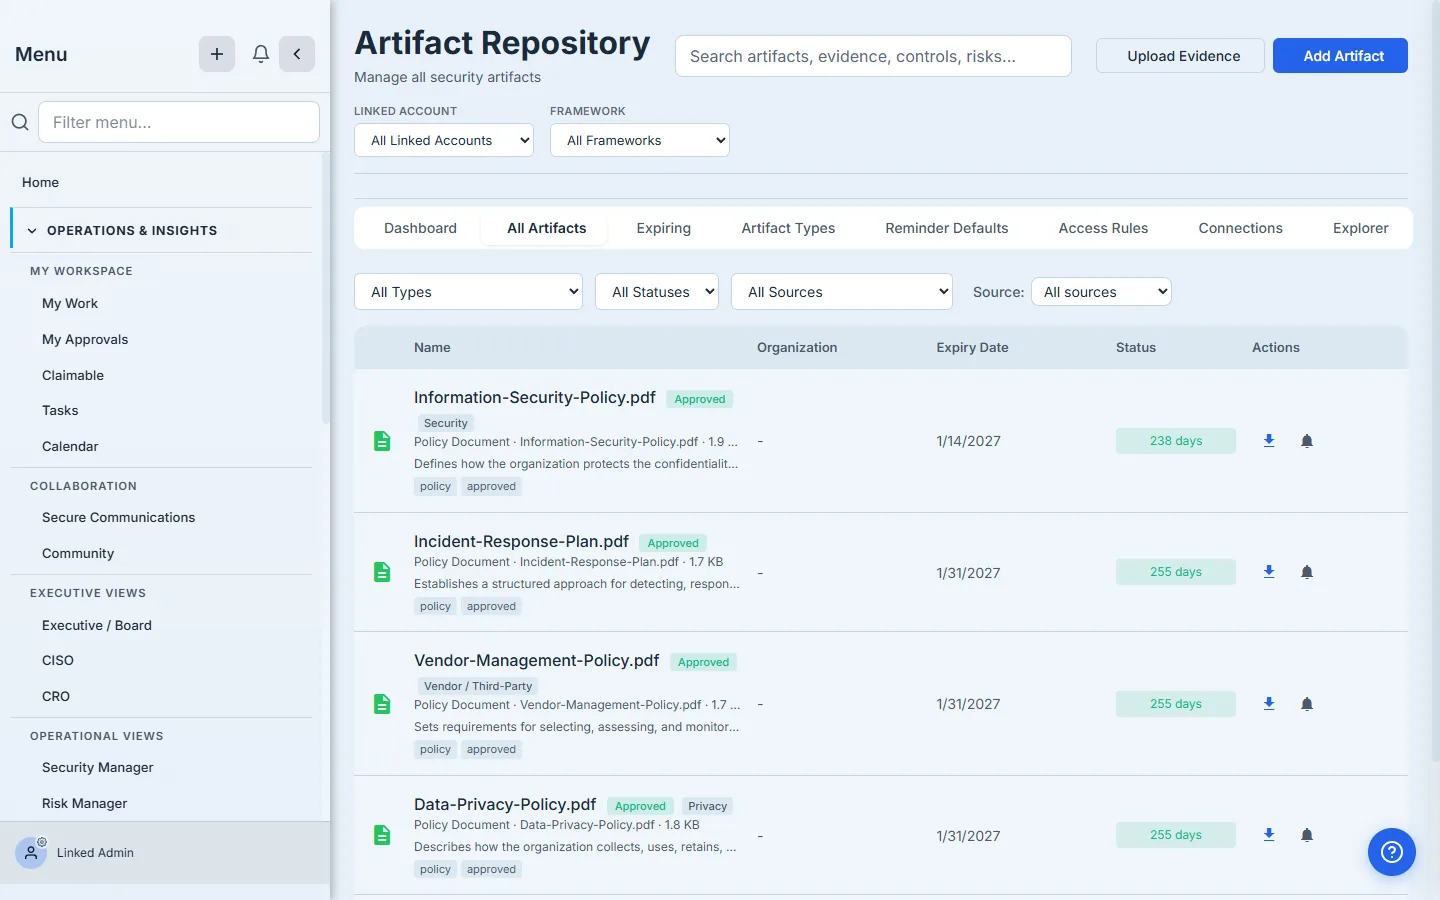
The badge always reads the human label — “Business Continuity / Disaster Recovery,” never the internal bcdr slug. It’s the same taxonomy, the same value, surfaced for the people who approach the policy from the evidence side rather than the program side. Classify a policy once and both views agree — no second pass, no drift.
What you walk away with
- One category on every policy, picked from a canonical eight-type taxonomy — or your own custom value when none fits.
- A filterable policy set — slice by category, by status, or both, with Uncategorized as a built-in worklist for what’s still unclassified.
- Inline, bulk, and detail-page editing — classify from wherever you meet a policy, in any lifecycle status.
- A non-destructive bulk default — the ”— Keep current category —” sentinel means a multi-select Save can never silently wipe categories you didn’t mean to touch.
- One taxonomy across every surface — the Policies list, the detail page, and the Artifact Repository all show the same category, kept in sync automatically.
Run yours this afternoon. Open /app/grc/governance, filter the Category column to Uncategorized, and click the first policy’s Category cell. The first one takes about ten seconds — and from then on, every view of your policy set is one you can actually slice.