Every framework that touches third parties now expects a program, not a folder of signed NDAs. SOC 2 puts it in CC9.2 — “the entity assesses and manages risks associated with vendors and business partners.” ISO 27001:2022 dedicates A.5.19 through A.5.22 to supplier relationships, supplier agreements, ICT supply-chain security, and ongoing monitoring of supplier services. NIST CSF 2.0 added an entire governance category — GV.SC, Cybersecurity Supply Chain Risk Management — and NIST SP 800-161 expands it into a full practice. For regulated entities, the 2023 Interagency Guidance on Third-Party Relationships makes a lifecycle — planning, due diligence, contracting, ongoing monitoring, termination — the baseline.
The problem isn’t knowing you need a program. It’s that the tools force a bad trade. Lightweight vendor trackers are a spreadsheet with a logo — fine until an auditor asks for the approval trail. Enterprise GRC suites have every field a Fortune 500 needs and bury a ten-person security team before they’ve onboarded their fifth vendor.
Talarity resolves the trade with one setting. Your vendor program has a complexity mode — Simple, Standard, or Complex — and that mode decides how much of the module the whole org sees. A five-vendor startup runs Simple and never trips over a concentration-analysis tab they’ll never use. A bank runs Complex and gets risk-matrix scoring, tiering policy, lifecycle-override governance, and concentration analysis. Same platform, same vendor records, same data — different amount of surface. When you grow, you raise the dial; nothing migrates, nothing re-imports, nothing is re-learned.
This article covers setting up the program itself — choosing the complexity mode and the vendor-intake gate. Each surface a mode reveals (tiering, assessments, monitoring, SLAs, renewals, the risk matrix, concentration) has its own companion article; the boundary notes at the end point to each.
Who’s involved
- Program owner / GRC lead — picks the complexity mode and decides whether vendor intake needs approval. Needs the
risk.vendor.writepermission (org admins have it by default). - Business / vendor owner — proposes new vendors and owns the relationship day to day. Sees only the surfaces the current mode reveals.
- Approver — when the intake gate is on, an org admin approves each proposed vendor before it enters the lifecycle. Gets notified the moment a proposal lands.
- Auditor — reads the lifecycle states and the proposal-approval trail to confirm the program runs the way the policy says it does.
What’s on the page
Open Vendor Program settings (/app/settings/vendors/program) — one control sets the shape of the whole program:
- Complexity mode — Simple, Standard, or Complex; each reveals more of the vendor lifecycle and rewires the vendor navigation.
- Intake-approval gate — optionally require an admin to approve each proposed vendor before it enters the lifecycle.
Step 1 — Open the Vendor Program settings
Go to Program Settings (/app/settings/vendors/program) — in the sidebar under Third-Party Risk → Vendor Inventory. This is an org-admin surface — the backend enforces risk.vendor.write on save, so a non-admin who opens it can look but can’t change the dial.
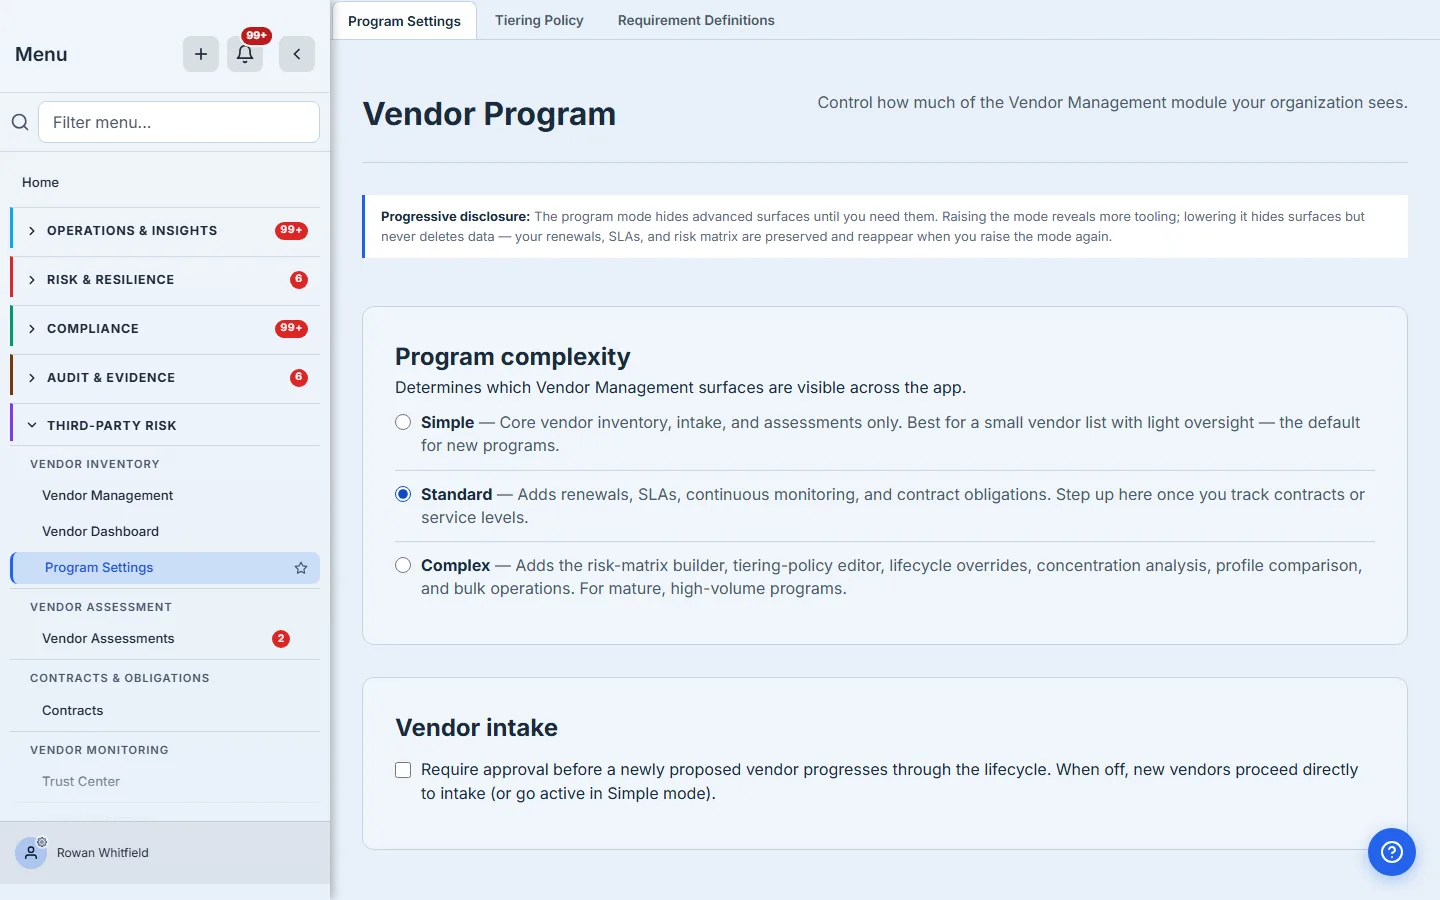
The page is deliberately short — two decisions, one Save button. The blue notice at the top states the contract the rest of the program depends on: raising the mode reveals more tooling; lowering it hides surfaces but never deletes data. Your renewals, SLAs, and risk matrix are preserved when you drop to Simple and reappear, intact, when you raise the mode again. That guarantee is what makes the dial safe to turn.
Step 2 — Pick your complexity mode
Three options, each with a one-line description of exactly what it unlocks. The decision isn’t “how sophisticated do we want to look” — it’s “how much of the lifecycle do we actually run today.”
- Simple — core vendor inventory, intake, assessments, and the contract list. Pick this when you have a short vendor list and light oversight: you want to know who your vendors are, capture a security questionnaire, keep the agreements somewhere findable, and not much else.
- Standard — the recommended default. Adds renewals, SLAs, continuous monitoring, and contract obligations on top of Simple. This is the right starting point for most mid-market programs — it covers the full operating lifecycle without the heavy governance tooling.
- Complex — adds the risk-matrix builder, the tiering-policy editor, lifecycle overrides, concentration analysis, profile comparison, and bulk operations. Pick this when your program is mature and high-volume, or when an auditor or regulator expects defensible, repeatable tiering and override governance.
Don’t over-buy on day one. A program owner’s instinct is to switch on everything “to be thorough.” Resist it. Every surface you reveal is a surface your vendor owners have to understand. Start at Standard, run it for a quarter, and raise to Complex when a specific need appears — a regulator asking for tiering rationale, a board asking about concentration. The dial turns up in one click; it never costs you data to wait.
Step 3 — Simple mode: the core program
Save with Simple selected and the Third-Party Risk nav collapses to five rows: Vendor Management, Vendor Dashboard and Program Settings, then Vendor Assessments, then Contracts. At that length Talarity drops the section headings altogether — grouping five items under three labels is ceremony, not structure — so what a Simple-mode org actually sees is one short, flat list. That’s the whole surface: everything a small team needs to answer “who are our vendors, have we assessed them, and what did we sign?” and nothing they don’t.
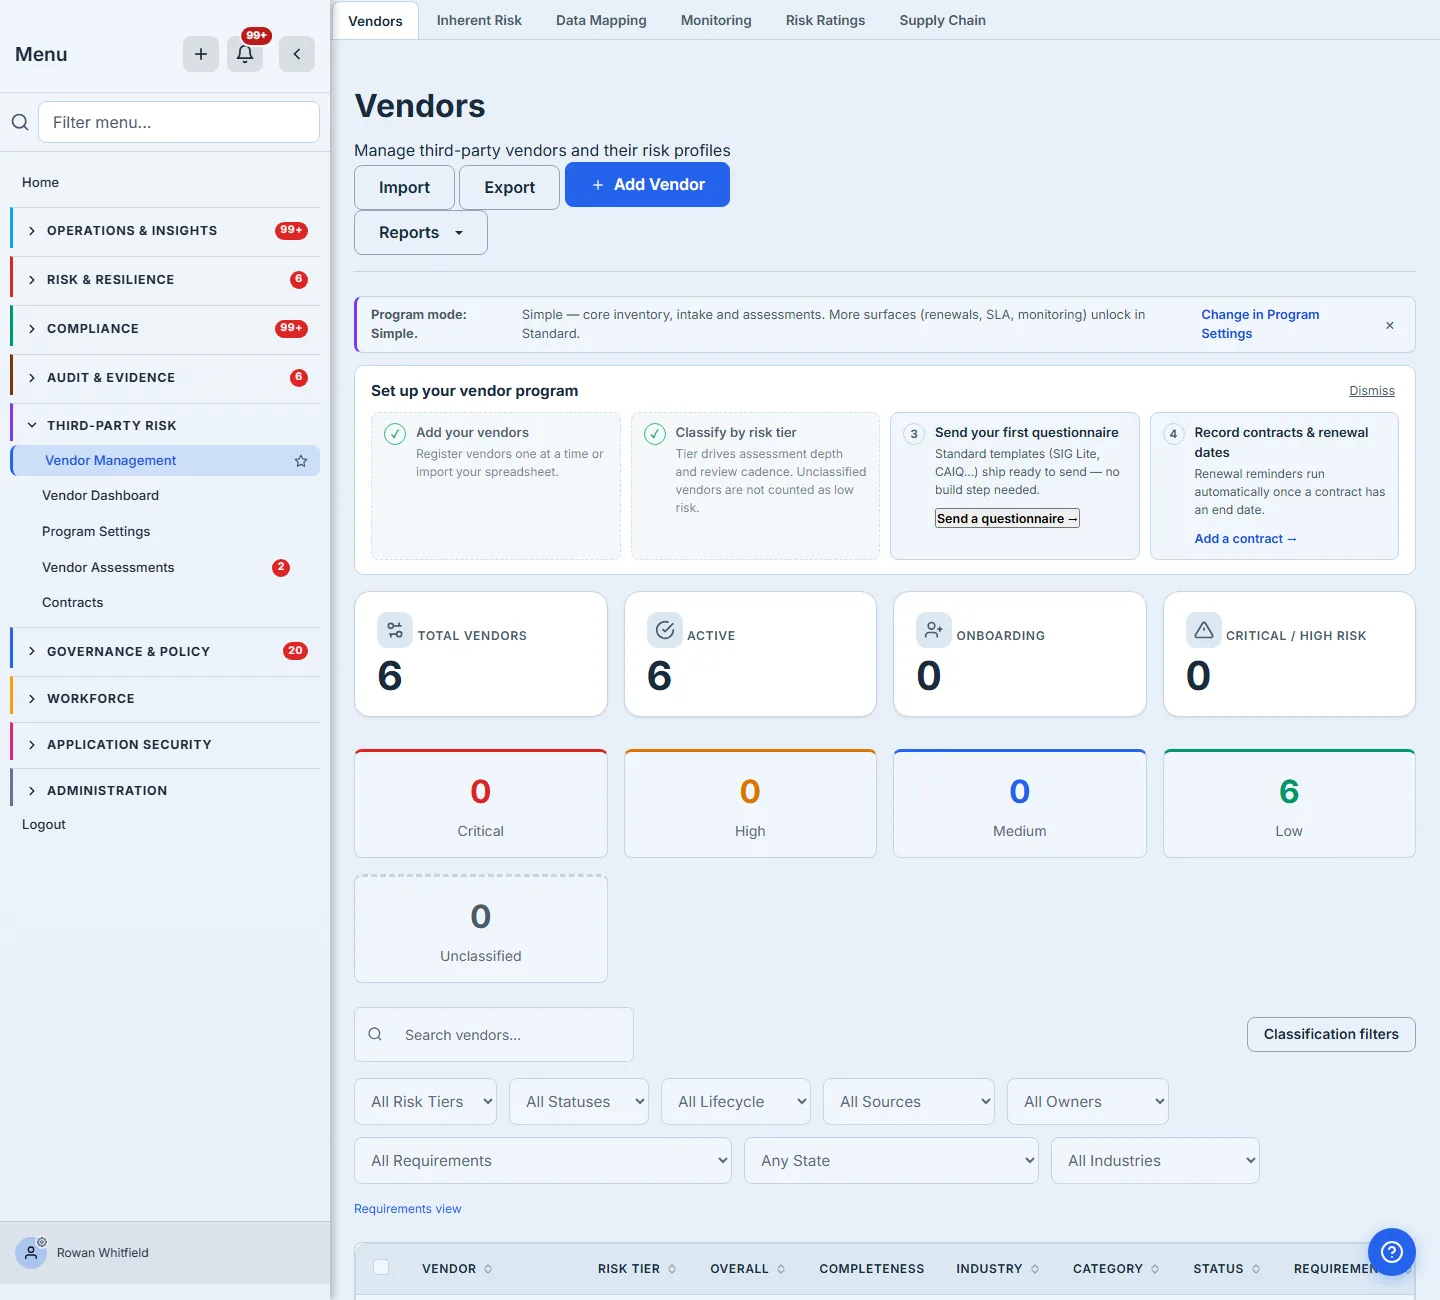
Notice what’s absent: no trust center, no SLA dashboard, no renewal queue, no obligations hub, no risk matrix. Contracts are the one lifecycle surface Simple keeps — even a five-vendor program signs agreements — but the machinery around a contract stays out of sight until you need it. A vendor owner in a Simple-mode org never sees a tab they have no process for. The cognitive load matches the program’s maturity. (Simple mode also streamlines the lifecycle itself — a vendor’s tier is computed at create time and it goes straight to active, so the separate Classify step and the intake-approval gate below only apply in Standard and Complex.)
Step 4 — Standard mode: the full operating lifecycle
Switch to Standard and the list is long enough to earn its structure back: the section headings return, and two new sections appear beneath the ones Simple already had — Vendor Monitoring, which brings in the Trust Center, and SLA Management. Contracts & Obligations was there all along; Standard is what fills it out, adding the obligations hub and the renewal queue alongside the contract list. This is the recommended default because it covers the day-to-day lifecycle — track what you owe each vendor and what they owe you, publish a trust center, hold them to their SLAs, and never miss a renewal window.
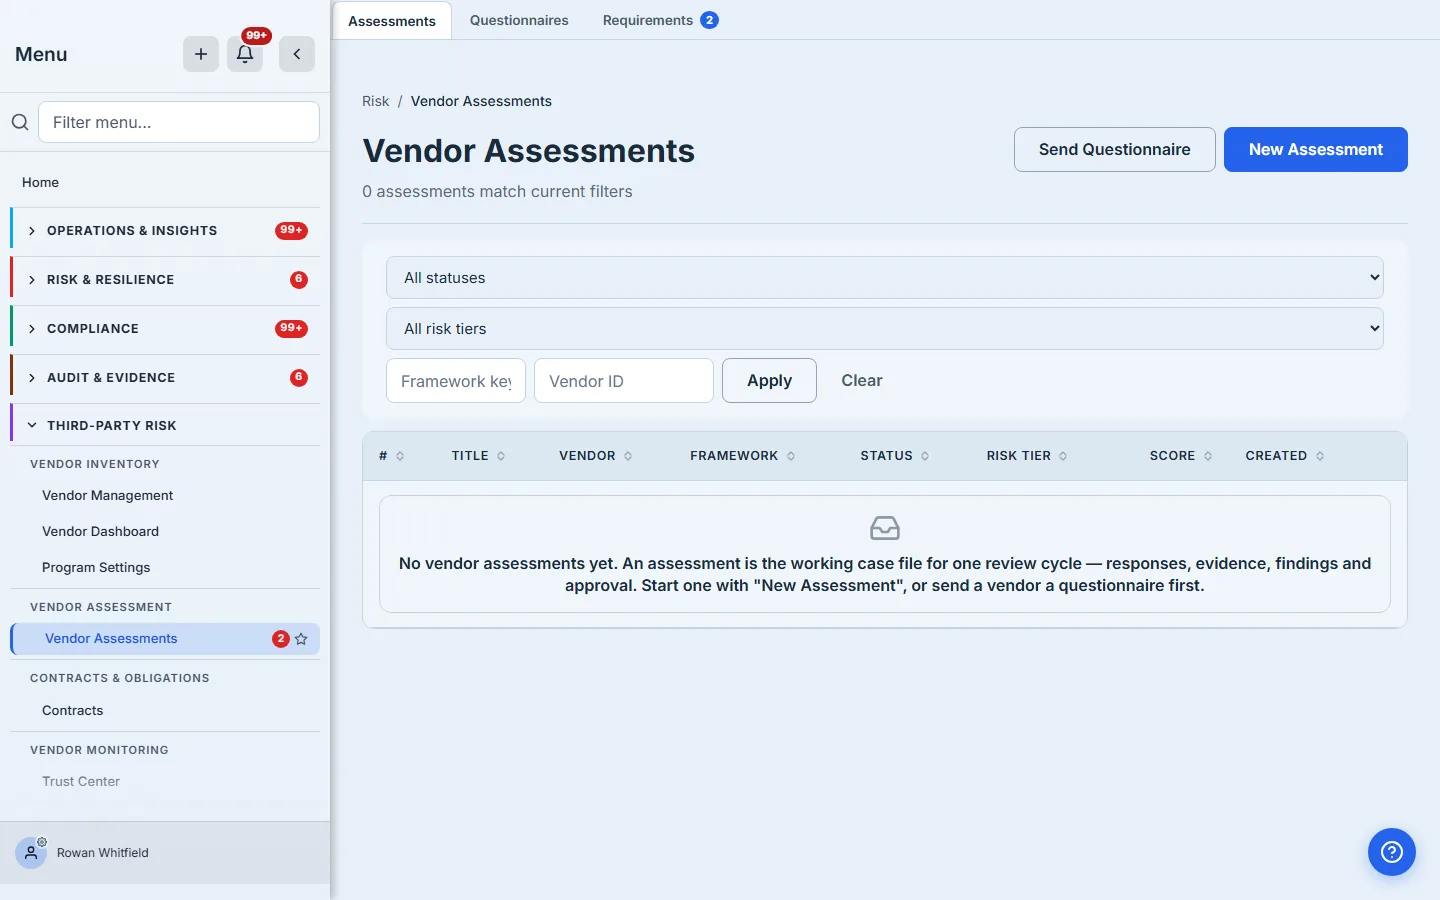
Look closely at Vendor Assessments. Opening it reveals a tab strip — Assessments, Questionnaires, Requirements — and in Standard that is the whole strip. The Risk Matrix, the visual scoring grid, is a Complex-mode surface and is not offered. That’s the dial working at the item level rather than the section level: a section can be fully present while an advanced tool inside it waits for the next tier. It is the more important half of the design, because it is what stops “raise the mode” from meaning “reveal everything at once.”
Step 5 — Complex mode: the enterprise defensibility layer
Switch to Complex and the program opens fully. The sidebar itself doesn’t change — Standard already showed every section — so the difference is one you meet inside the surfaces you already had: Risk Matrix joins the Vendor Assessments tab strip, and behind the scenes the mode also unlocks the tiering-policy editor (codify how vendors are classified into risk tiers, so the scoring is repeatable and explainable), lifecycle overrides with approval governance (when someone needs to move a vendor out of its normal lifecycle state, the override is requested, approved, and logged — not silently forced), concentration analysis (how exposed are you if one provider or one region fails), profile comparison, and bulk operations.
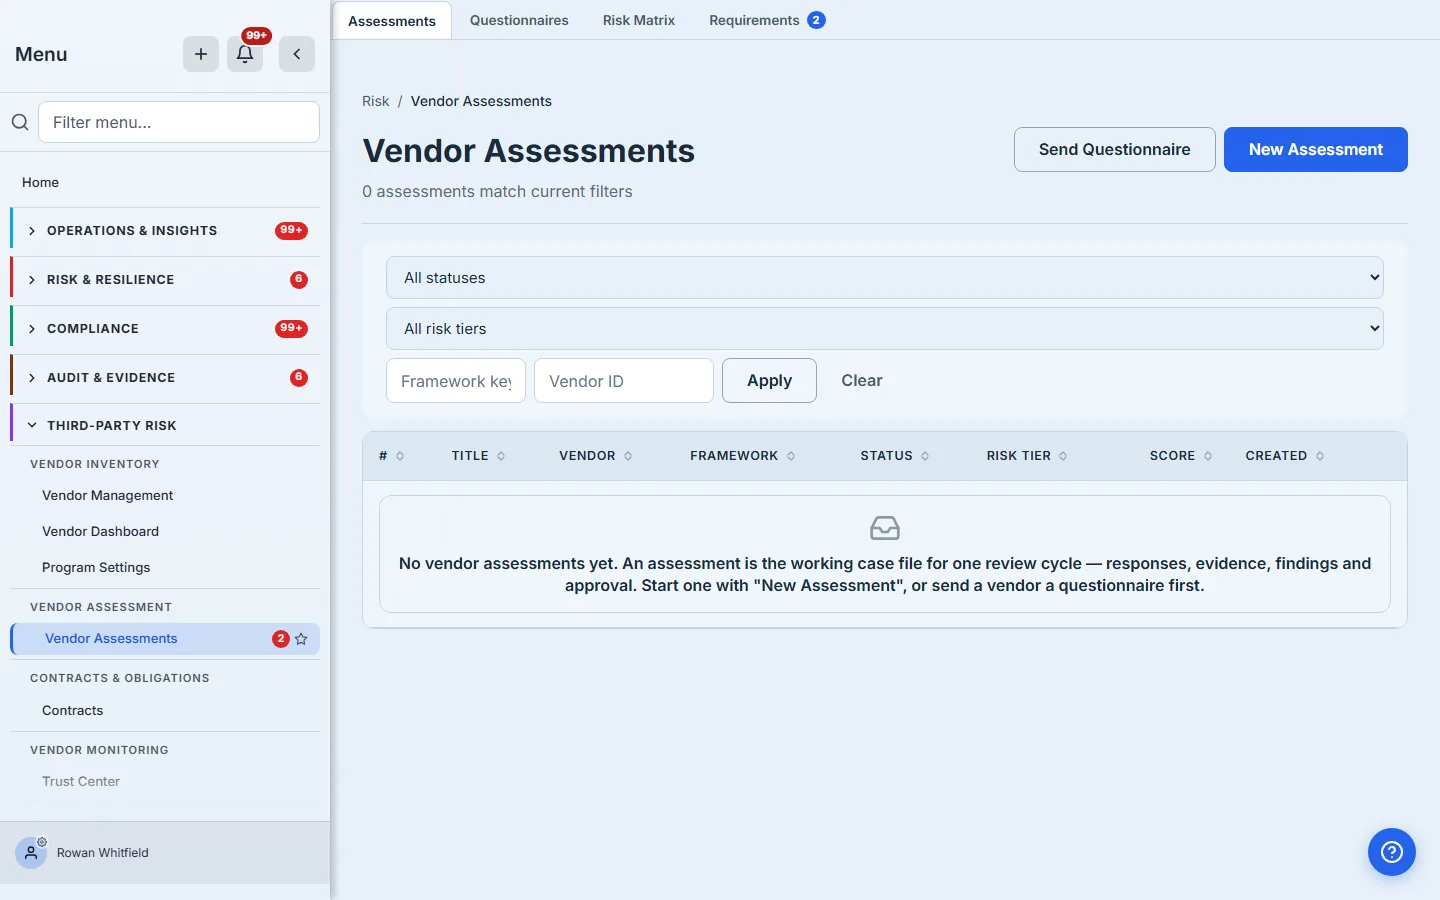
This is the layer that turns “we have a vendor list” into “we can defend our vendor program to a regulator.” The tiering policy makes classification a rule, not a judgment call. The override governance means every exception has a requester, an approver, and a timestamp. Concentration analysis answers the question a board actually asks after an outage — “how many of our critical services run through that one provider?” None of it is on by default, because most programs don’t need it on day one — but it’s one click away when they do, and the vendor records you’ve been keeping all along are already populated into it.
Step 6 — Set the vendor-intake gate
The second decision on the page is governance: should a newly proposed vendor need approval before it enters the lifecycle?
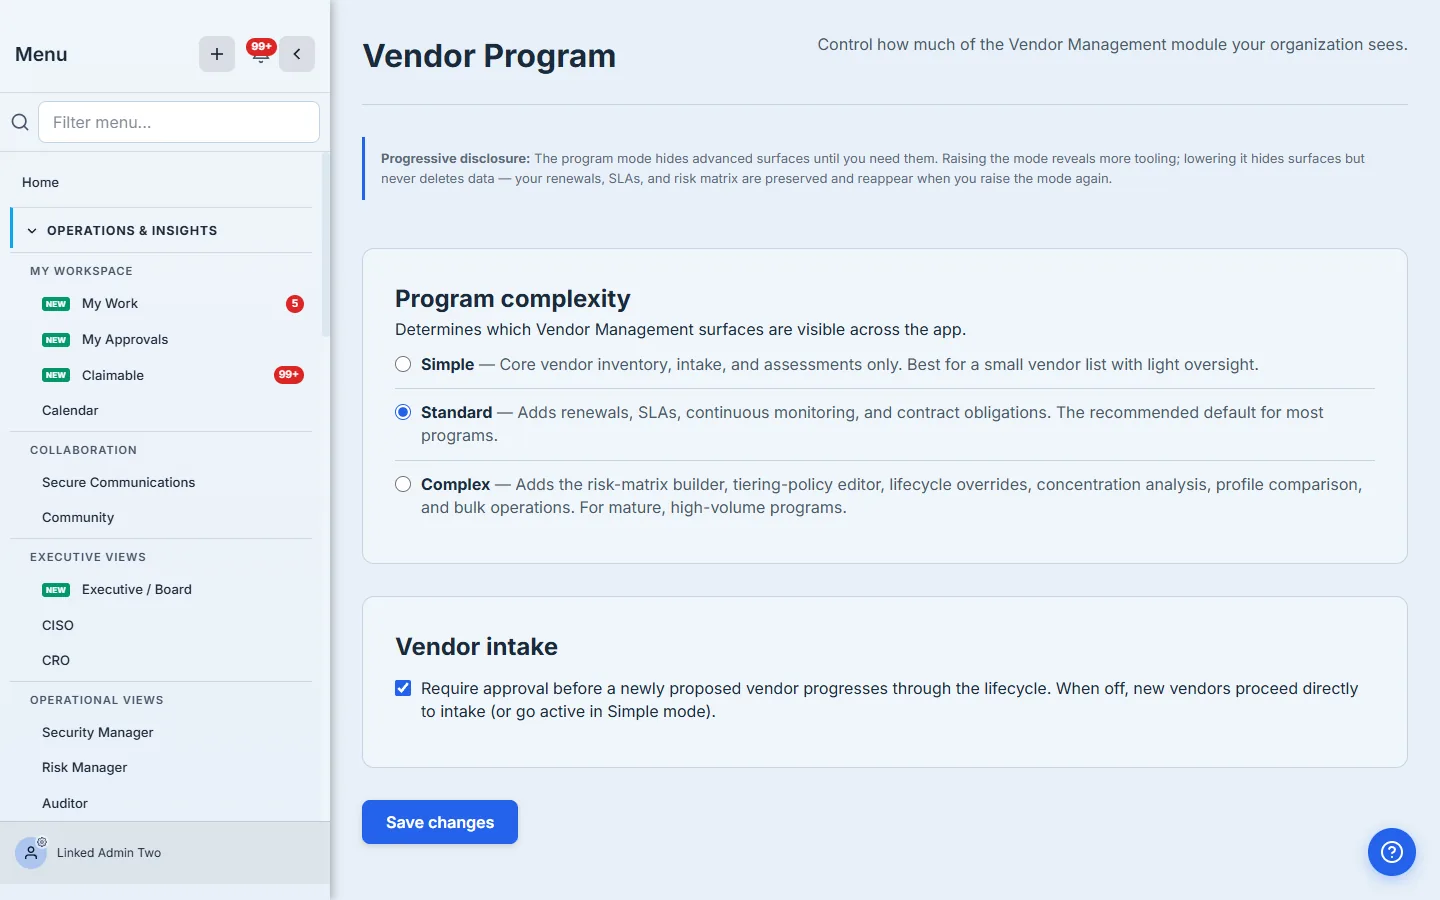
Flip “Require approval before a newly proposed vendor progresses through the lifecycle” on, and intake becomes a gated workflow:
- A vendor owner proposes a vendor — it lands in the
proposedstate rather than going straight to active. - The moment it lands, every active org admin gets a “New vendor proposal” notification with a deep link to the proposed-vendor queue.
- An approver reviews and approves — the vendor transitions to
intake, classification begins, and the original proposer gets a “your proposal was approved” notification. The approver and the timestamp are recorded on the vendor for the audit trail.
Leave it off and proposals proceed directly to intake (or straight to active in Simple mode) — the right call for a small, trusted team where the proposer is the approver. Turn it on when separation of duties matters: when the person requesting a vendor shouldn’t be the person who waves it into production. That’s the control an auditor looks for, and it’s a single checkbox.
The intake gate is the cheapest separation-of-duties control you’ll ever configure. One checkbox creates a documented request-and-approve step on every new vendor, with both halves of the conversation — the proposal and the approval — captured automatically. No workflow builder, no custom form.
Lowering the mode never costs you data
It bears repeating because it’s the fear that keeps teams from ever turning the dial: dropping from Complex to Standard, or Standard to Simple, hides surfaces — it does not delete anything. Your risk matrix, your tiering policy, your SLAs, your renewal schedule all persist in the database. They simply stop rendering until you raise the mode again, at which point they reappear exactly as you left them. The mode is a view over one program, not three separate programs you migrate between.
Where to go next
Setting the program is the front door. Each surface it reveals has its own walkthrough:
- Adding and onboarding vendors — proposing a vendor, the intake form, classification.
- Tiering and the tiering-policy editor — turning classification into a repeatable rule (Complex).
- Vendor assessments and the vendor portal — sending questionnaires and collecting evidence.
- Monitoring, SLAs, and renewals — the Standard operating lifecycle, tab by tab.
- Contract obligations — tracking what each side owes.
- The risk matrix, concentration, and lifecycle-override governance — the Complex defensibility layer in depth.
What you walk away with
- One program mode that scales the entire module up or down with a single setting — Simple for a short list, Standard for the full operating lifecycle, Complex for an auditable enterprise program.
- A progressive-disclosure guarantee: raising the mode reveals tooling, lowering it hides surfaces, and neither ever deletes a vendor record, an SLA, or a tiering policy.
- An optional intake-approval gate that adds documented separation of duties to every new vendor — proposed, reviewed, approved, and logged — in one checkbox.
- A program that starts in three minutes and never has to be rebuilt as you grow.
Open /app/settings/vendors/program, choose Standard, decide whether intake needs approval, and click Save. Then add your first vendor. When the program outgrows the mode — and a healthy one will — you’ll turn the dial, not change tools.
Related: the first decision a new program makes is how to tier its vendors, and the first thing it should send is a questionnaire from the library. For the shape of the whole program, see vendor risk management.