Most access models start permissive and never tighten. The first few employees get admin because it’s faster, and a year later half the org can edit the risk register, approve their own policies, and export the vendor list — because nobody went back to dial it in. Every framework has a control against exactly this: least privilege. CIS Control 6, ISO 27001 Annex A.5.15 / A.5.18, SOC 2 CC6.1, NIST 800-53 AC-6. The principle is simple — people get the access their job needs, and no more.
Talarity makes least privilege the easy path instead of the disciplined one. Access is defined once, on a group — page-by-page read/write, which dashboards a member sees, which data they can touch — and then you invite each user straight into the right group. Two pages, one mental model: build the access, then assign the person.
Who’s involved
- IT / Security admin — owns the groups: defines what “Compliance Analyst” or “Vendor Manager” can see and do.
- People manager / HR — invites a new hire and picks their group; the access follows automatically.
- Auditor — reads the group definitions to confirm least privilege is actually enforced, not just claimed.
What’s on the page
This is a two-page workflow — here’s what you’ll touch:
- Groups (
/app/groups) — the group list (member counts, status, Create Group), opening a five-facet group editor: Permissions (page-by-page Read / Write / Deny), Views (starting dashboards), Scope (data limits by asset category + org group), Types (per-registry Allow/Deny, with auto-grant), and Members. - Users (
/app/users) — the roster with a live seat counter in the subtitle (“4 / 5 users”), and the Invite User modal (email, name, title, License Type, Persona) whose Group Access section assigns membership with an Effective groups preview that blocks granting above your own access.
Step 1 — Build the group first
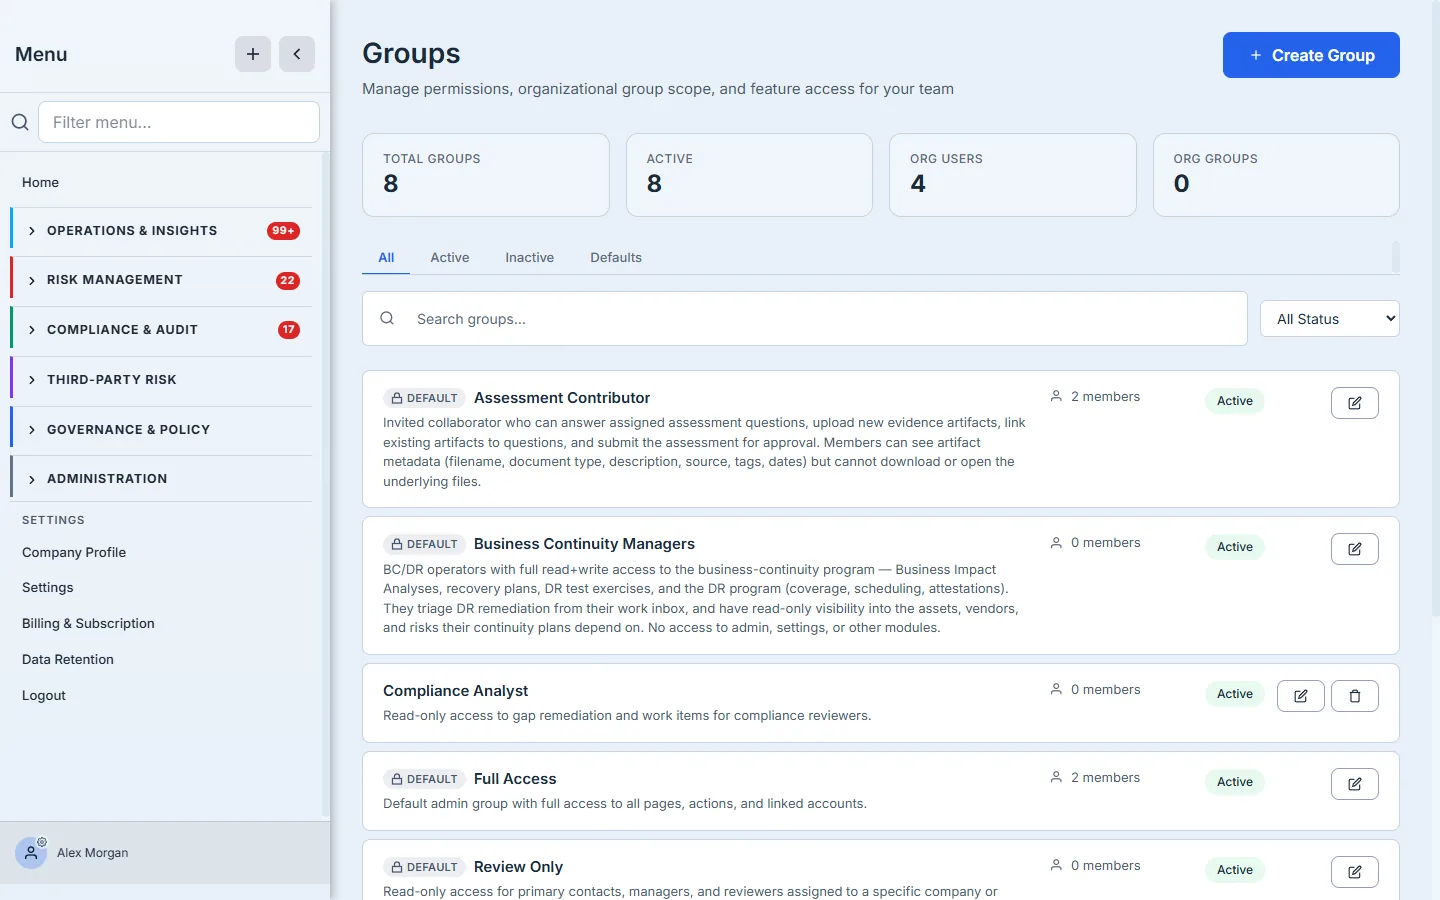
Access lives on groups, so start there. Open Groups (/app/groups) and click Create Group. Name it after a job, not a person — “Compliance Analyst,” “Vendor Manager,” “Review Only.”
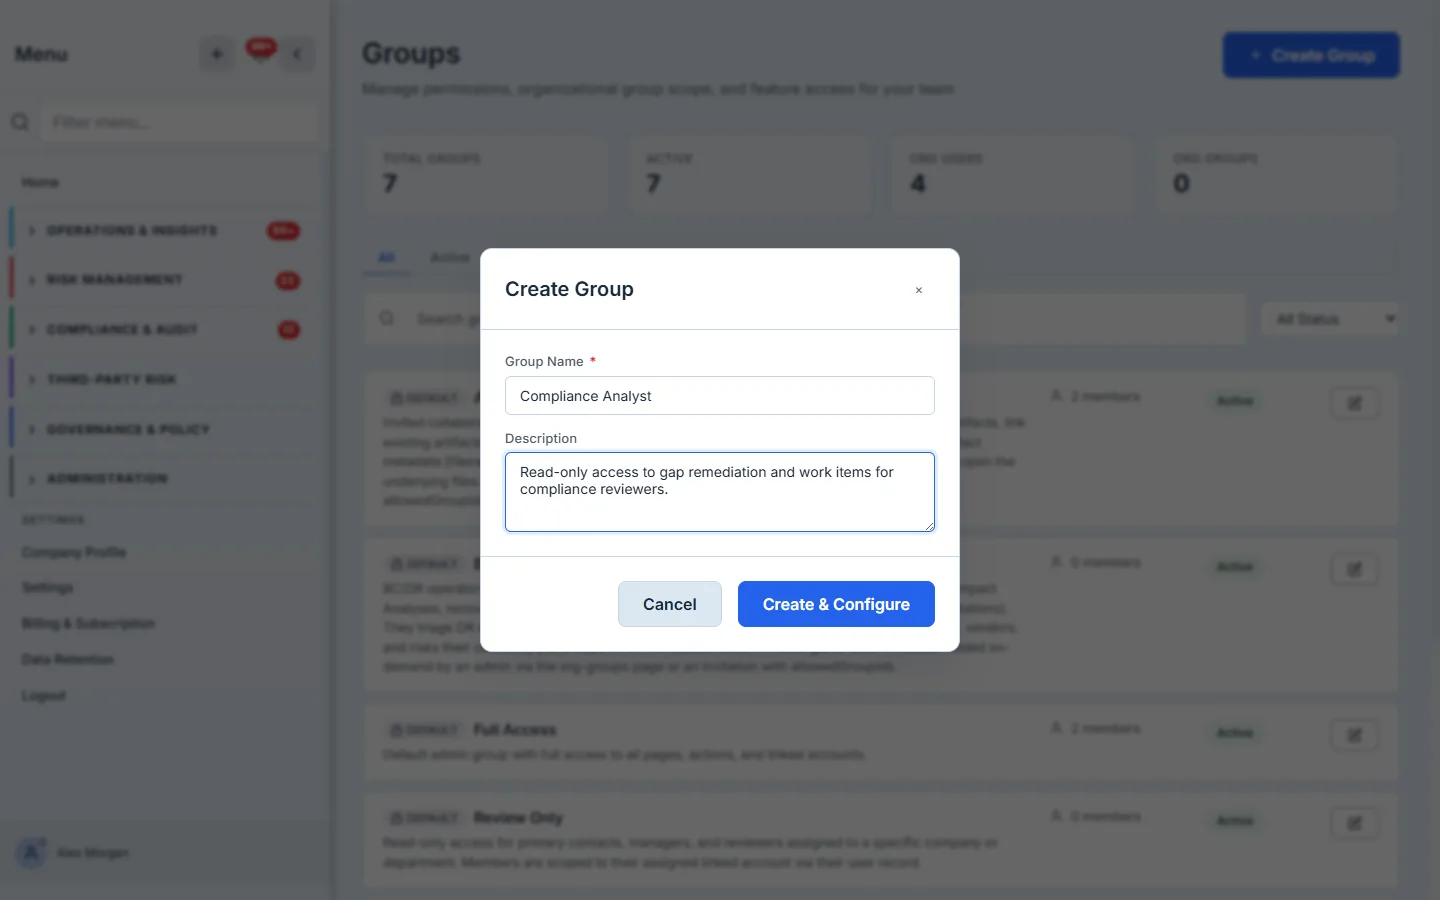
A name and a one-line description are all it takes to start; Create & Configure opens the group’s five-facet editor.
Step 2 — Set page-by-page permissions
The Permissions tab is where least privilege gets real. Every page in the app is listed, grouped by section, each row carrying three independent controls: Read, Write, and Deny.
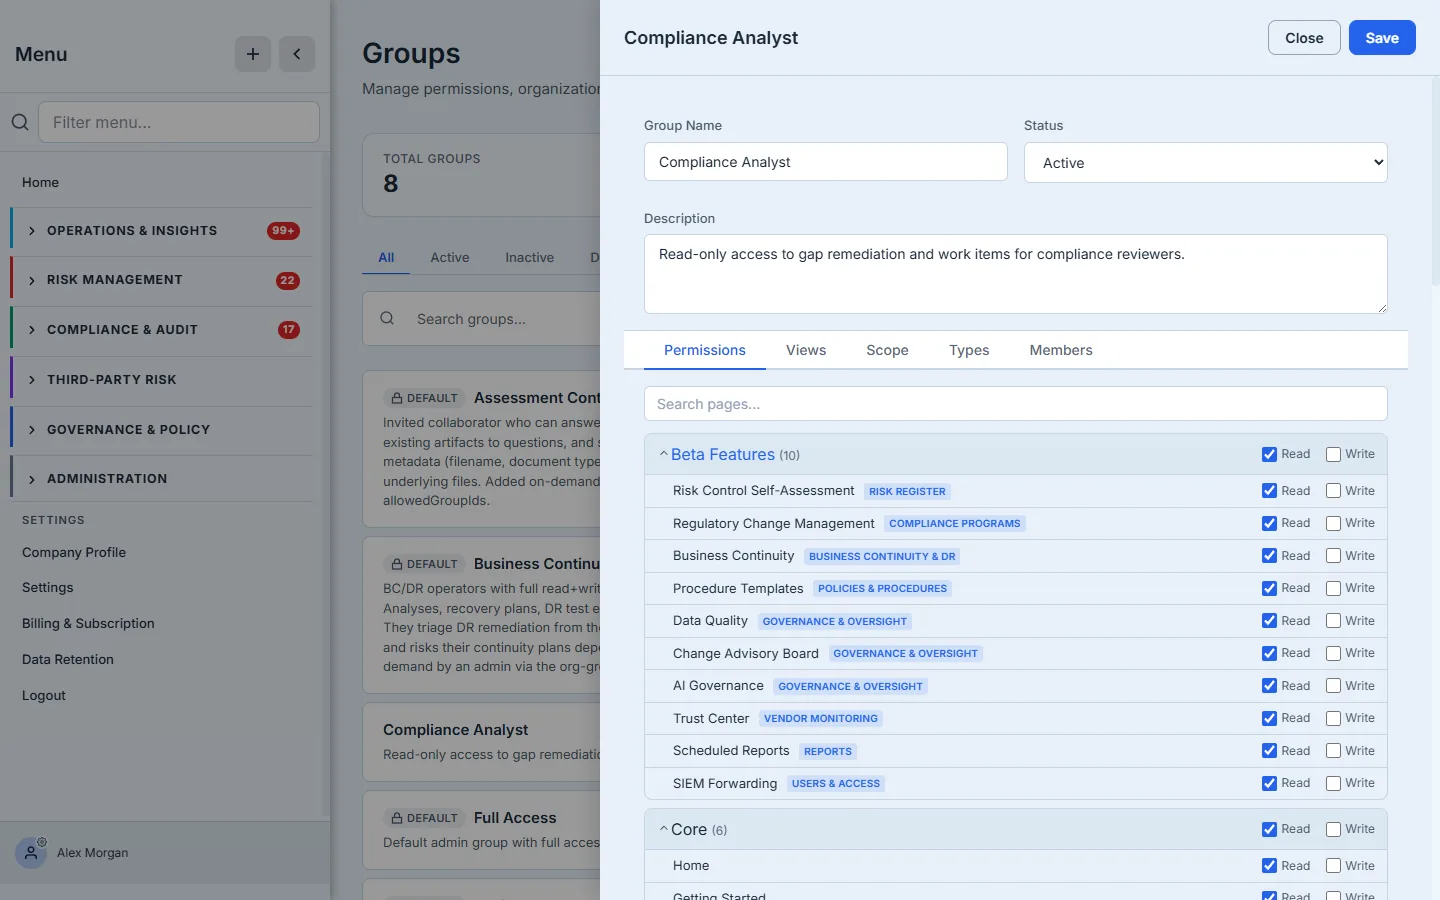
Here the Compliance Analyst group is read-only — Read is granted across the pages a reviewer needs, and Write is off everywhere, so members see the state of the program without changing it. Granting Read without Write is the whole point: visibility is not control, and most roles need far more of the former than the latter. The Reports row shows the third control in action — ticking Deny greys out its Read and Write, because a denied page is off-limits regardless of any other group. Each control also has a section-header equivalent (note the Read / Write / Deny toggles on the Core row), so you can grant — or deny — a whole section at once.
Each row has three states, and the distinction matters once a person is in more than one group:
- Read / Write — an Allow. The group grants this page (a sidebar item the member can open).
- Both unchecked — Undefined. This group has no opinion about the page. It doesn’t grant it, but it doesn’t take it away from another group either.
- Deny — an explicit block. The page is removed even if another of the member’s groups grants it. Deny wins over every Allow.
Groups are additive: a member’s access is the union of everything their groups Allow. Adding someone to a second group can only add — the new role’s pages appear alongside what they already had. The single exception is Deny, which you set deliberately when a page must stay off-limits no matter what else the person is in (a contractor group that denies Billing, say). Nav visibility follows the same rule automatically — a sidebar item shows when any group grants its page and no group denies it, so you never reconcile a separate “what can they see” list against “what can they do.”
Step 3 — Four more facets of access
Permissions are page-level. The other four tabs shape the rest of what a group member experiences:
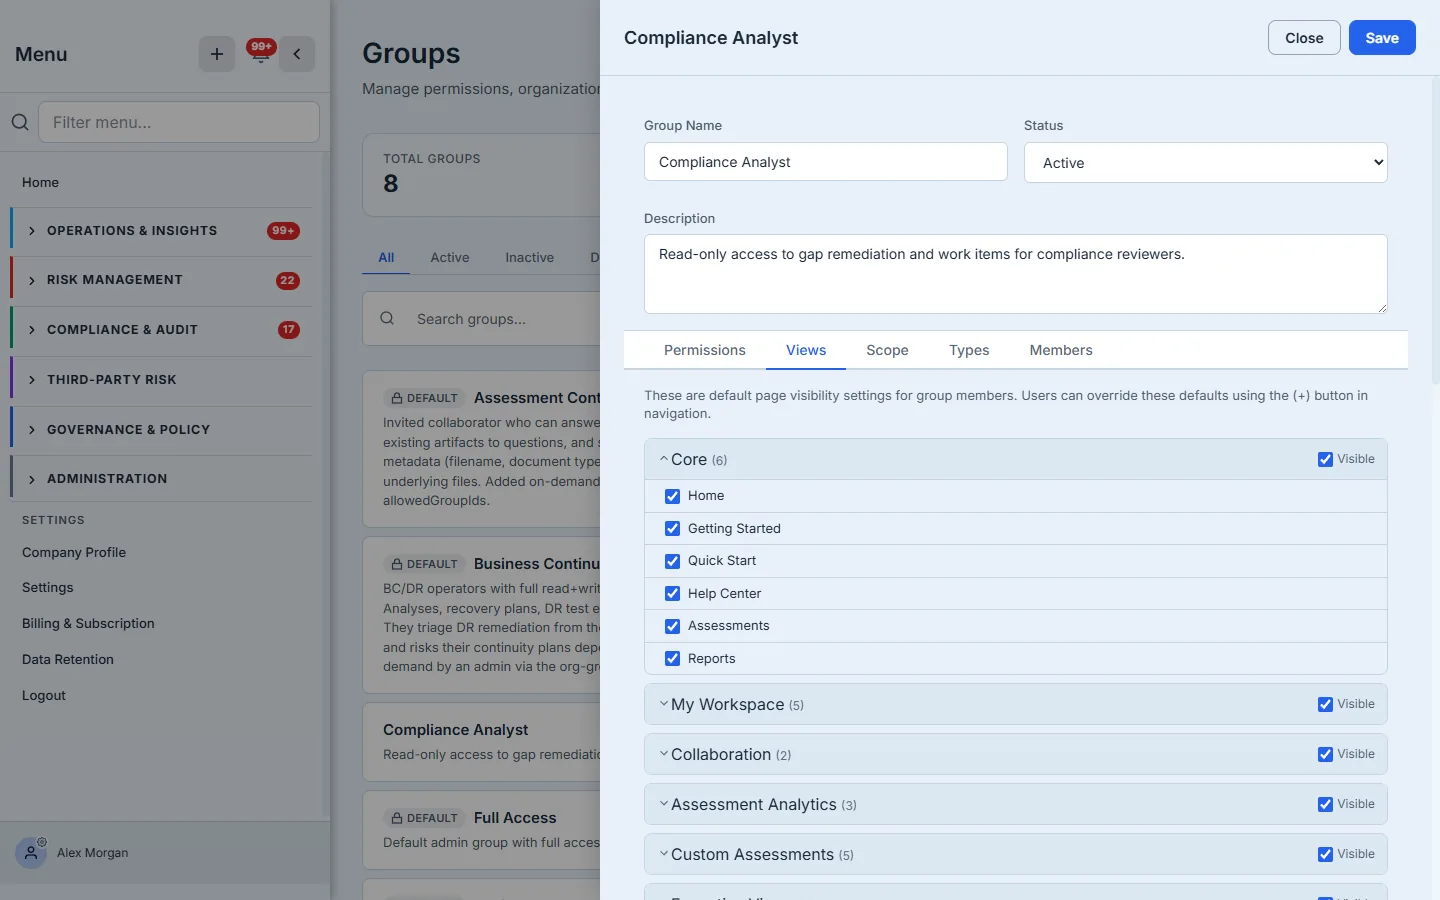
- Views — the default dashboards and page visibility a member starts with (they can still pin more via the + in navigation).
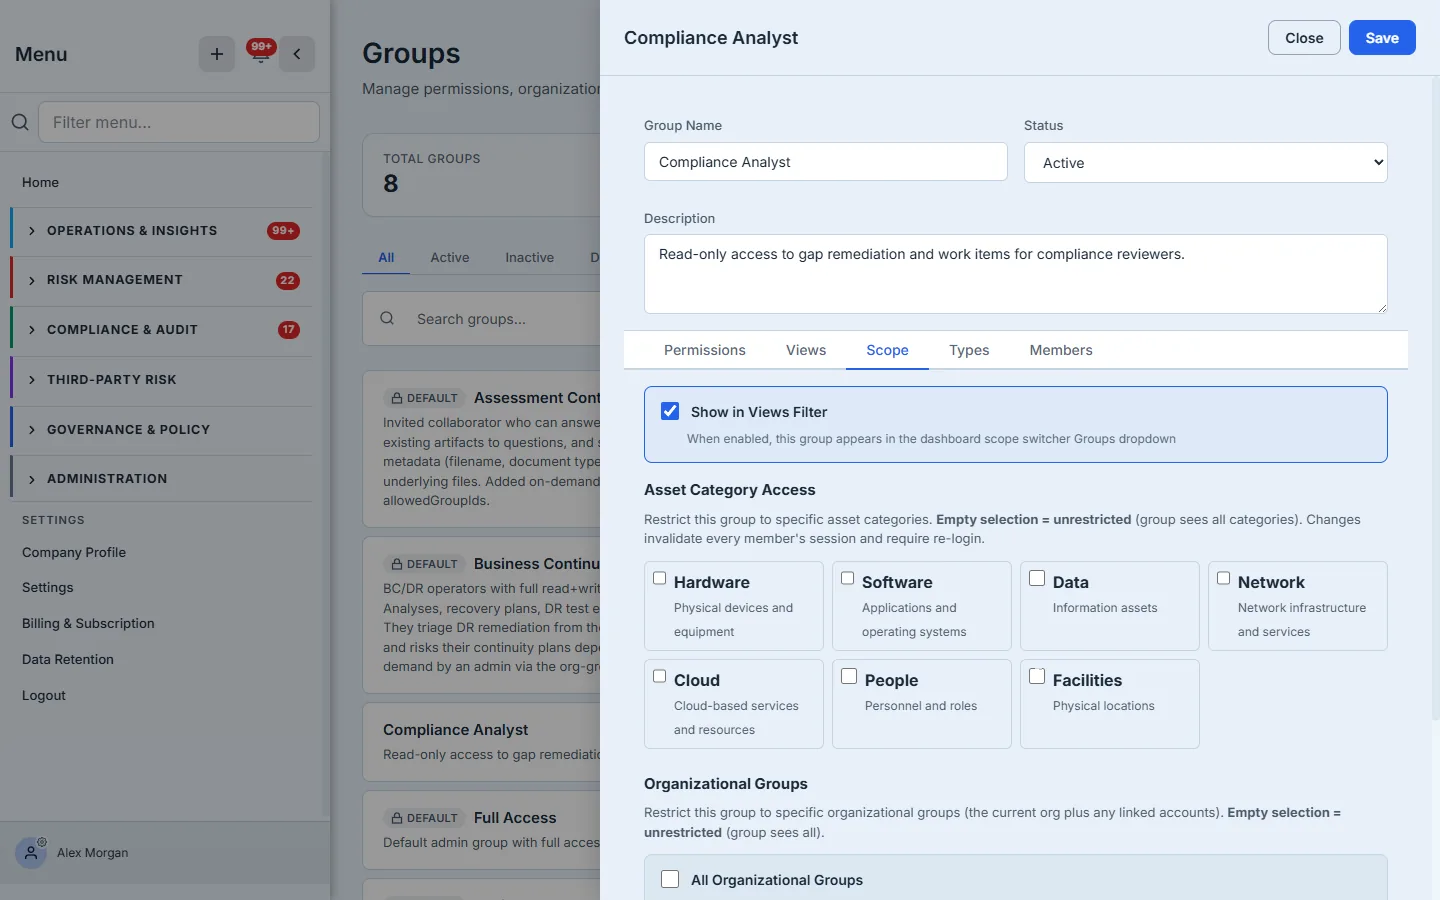
- Scope — restricts the data a member can touch: by asset category (Hardware, Software, Data, Network, Cloud, People, Facilities) and by organizational group. A vendor team scoped to “Software” never sees the facilities risk register.
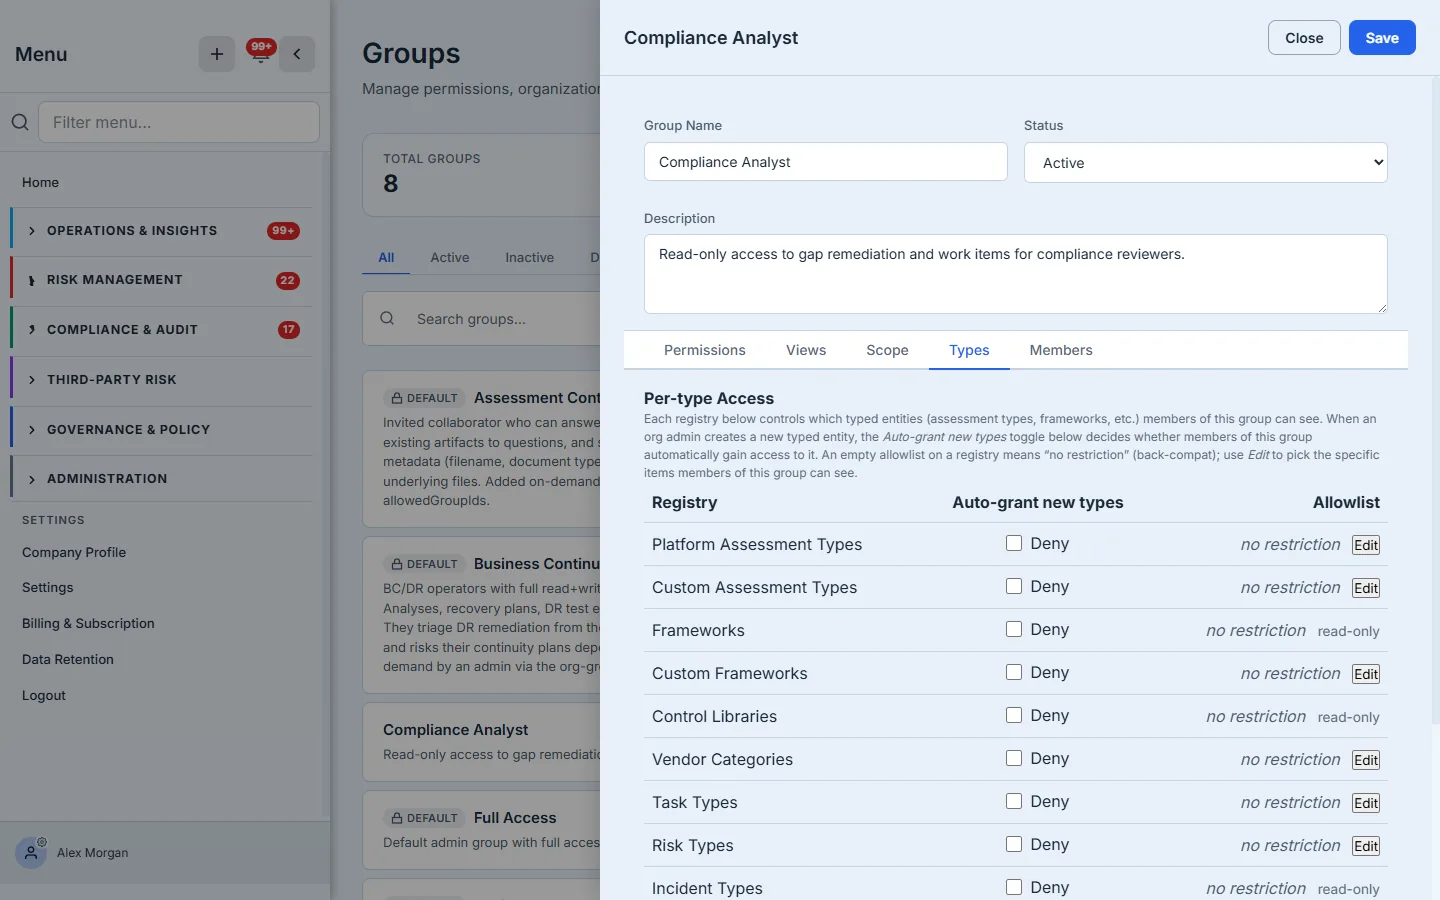
- Types — per-type access to the registries (frameworks, control libraries, assessment types, vendor categories, task and risk types), each Allow/Deny, with an “auto-grant new types” switch so the group keeps pace as your catalog grows.
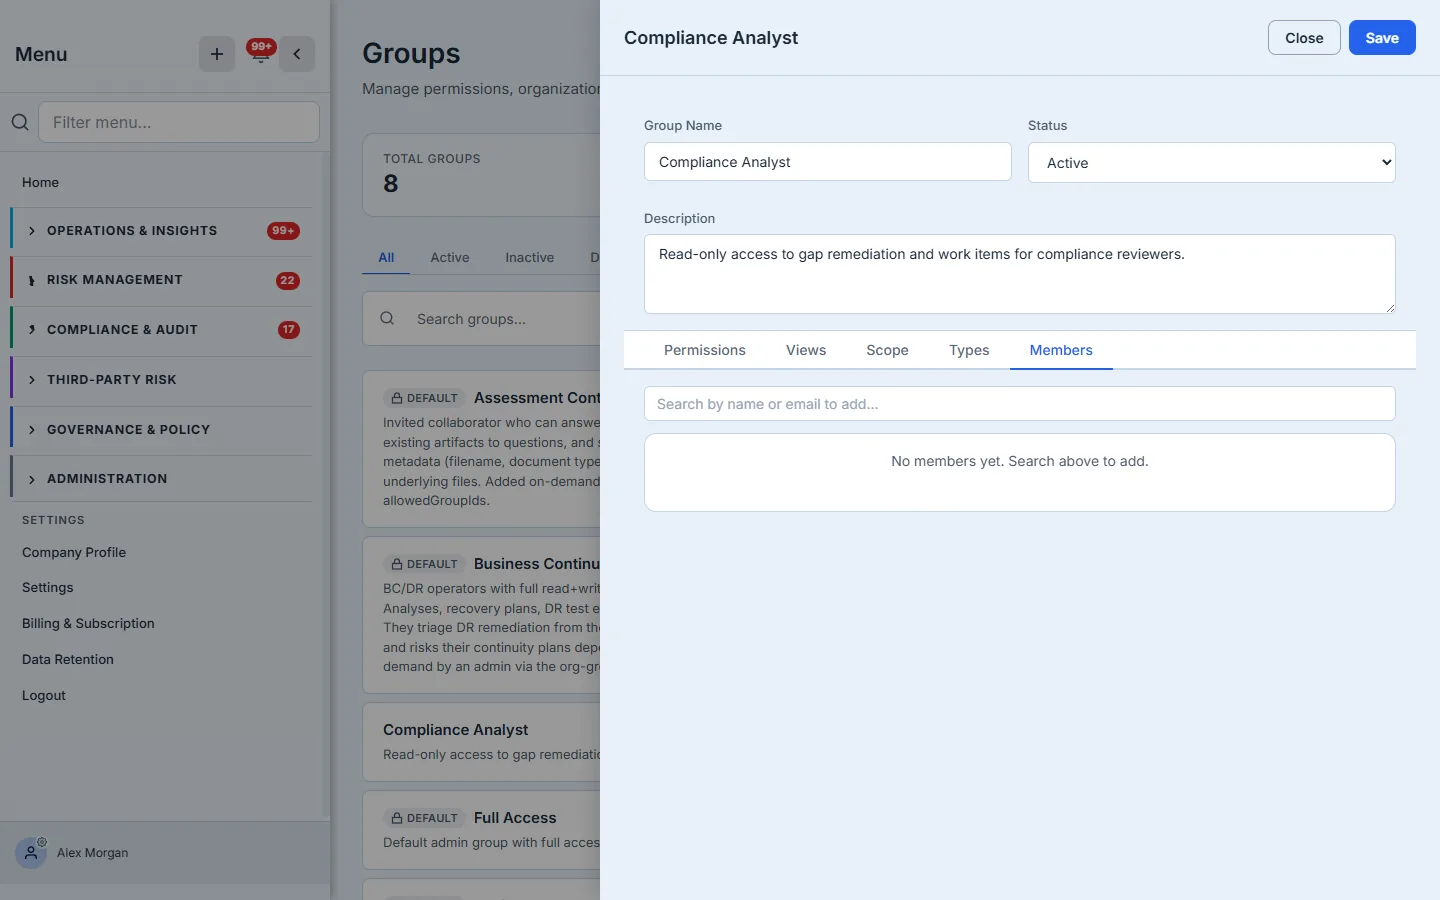
- Members — who belongs to the group. You can add people here directly, or — more naturally — assign membership at invite time, which is the next step.
Step 4 — Invite the user
Now the people half. Open Users (/app/users) — the header tracks your seats right in the subtitle (“4 / 5 users”). Click Invite User and fill the invitee’s details — email, name, title, License Type (Standard = full platform access; Guest = a limited seat for outside collaborators), and an optional Persona that sets their starting dashboards. The modal shows your seat budget at the top: “1 seat remaining (3 active + 1 pending of 5).”
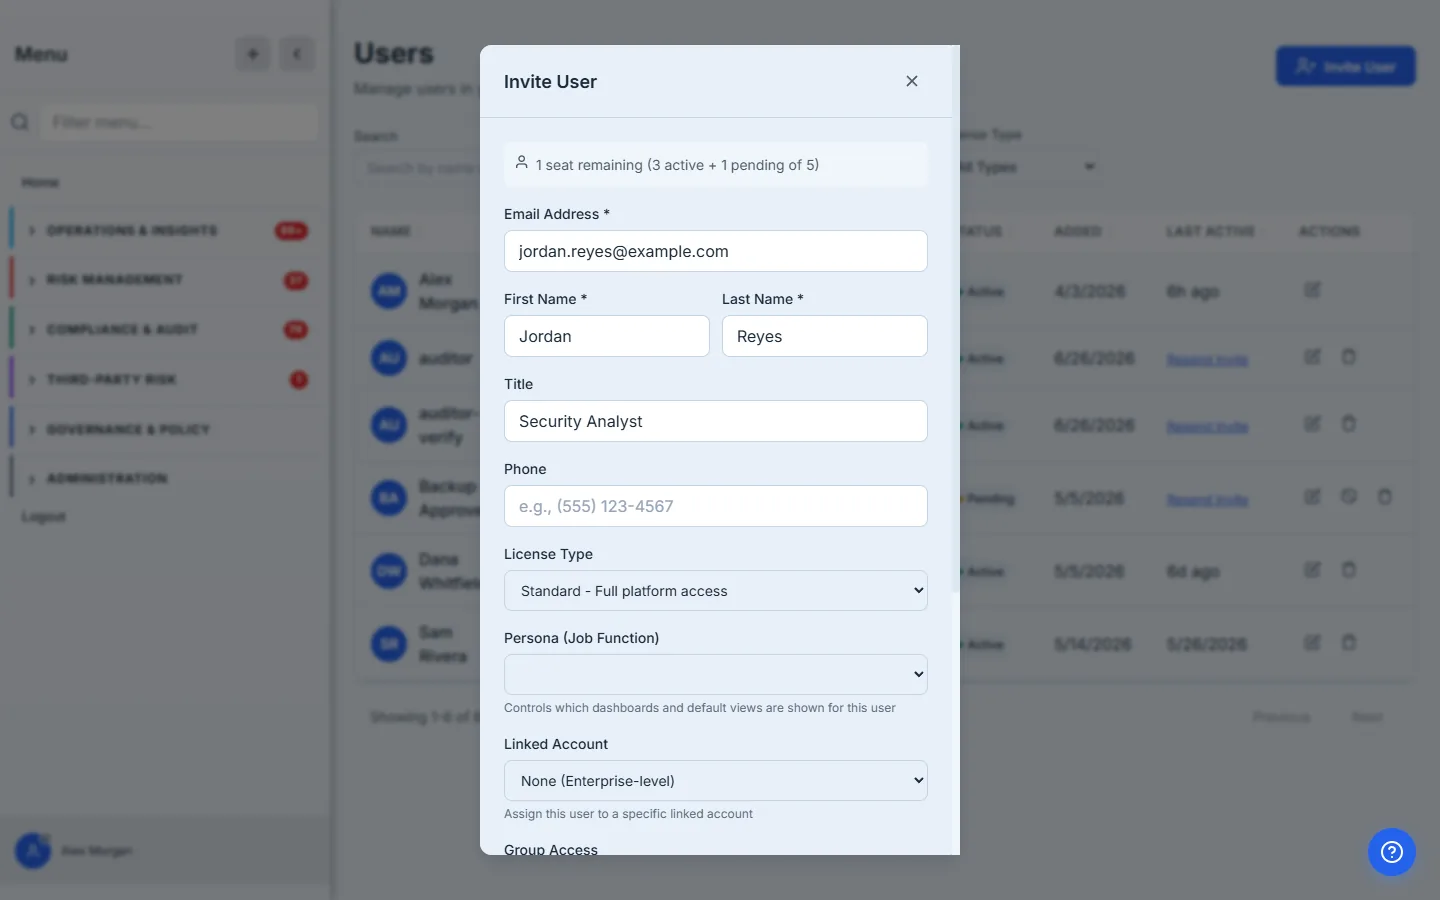
Guests don’t work inside the full app — they sign in to the login-gated guest request portal to submit and track requests. Guest management is where you grant and revoke a guest’s portal access; the groups and seat rules in this guide are for your Standard users.
Step 5 — Assign the group in the same step
Scroll to Group Access and check the group you just built. This is the bridge: the user lands in exactly the access you designed, with no second trip to a permissions screen.
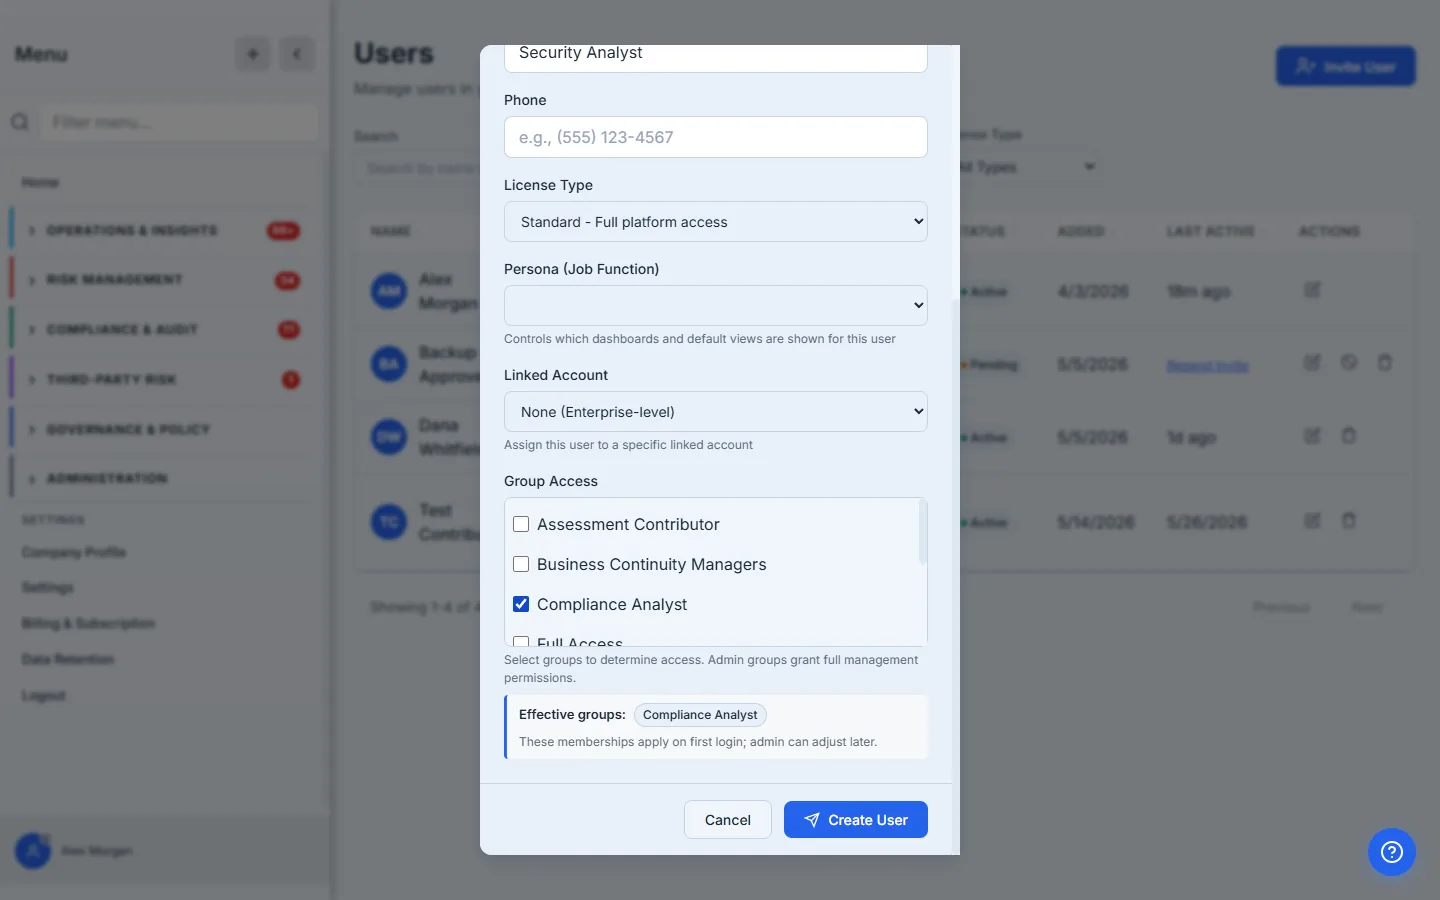
The Effective groups preview shows what the user will actually have on first login — and any group beyond your own access is marked, so you can’t grant more than you hold. Click Create User and the invitation goes out; the membership applies the moment they accept.
Seats are a hard cap: accepted users plus pending invitations can’t exceed your plan’s standard seats (a linked child org gets 5). At the cap the invite is blocked with a clear next step — a linked org sees “Contact [parent]”, everyone else “Contact Sales.” No silent failures, no surprise overage.
How the page works
The two pages share one model — access lives on groups, people inherit it — and a few rules make that safe to operate:
- A group is five facets, applied together. Permissions (page-level Read/Write), Views (starting dashboards), Scope (data limits by asset category + org group), Types (per-registry Allow/Deny, with auto-grant for new types), and Members. A member gets all five — so “read-only reviewer scoped to Software” is one coherent definition, not five settings you reconcile by hand.
- A user’s effective access is the additive combination of their groups. Put someone in two groups and they hold the union of what those groups Allow — being added to a group only ever adds. The one subtractive control is an explicit Deny on a page, which wins over every Allow; you set it deliberately, and the system groups never do, so a stock role can’t quietly strip access from a custom one. The Effective groups preview on the invite resolves the whole picture before you send, so there’s no “wait, why can they see that?” after the fact.
- You can’t grant access you don’t hold. Any group beyond your own access is marked and unselectable on the invite — an admin can’t escalate a new user past themselves, which is what stops least-privilege from leaking at the point of onboarding.
- Membership is deferred until accept; seats are checked before send. The invite reserves a seat as pending immediately (so the cap counts accepted plus pending), but the group membership only takes effect when the user accepts — so a never-accepted invite never silently grants access, and the seat frees if you revoke it.
What you walk away with
- Least privilege by construction — access is defined on a group, page-by-page, and the person inherits it. No per-user permission sprawl to audit later.
- One onboarding move — invite and group assignment happen in a single modal, so a new hire starts with exactly the right access, not “admin for now.”
- Seats you can see — the cap is visible at every step and enforced before the invite goes out, not discovered after.
Onboarding a new analyst this week? Build the group once. The next ten hires are a single checkbox.