Since Executive Order 14028 and OMB Memorandum M-22-18, “do you have an SBOM?” has become a procurement gate, not a nice-to-have. A software bill of materials lists every component that ships inside a release — the direct dependencies you chose and the transitive ones you inherited. The NTIA’s minimum-elements guidance and CISA’s SBOM work set the baseline: component name, version, supplier, unique identifiers, and dependency relationships, in a machine-readable format (CycloneDX or SPDX).
Most teams can generate an SBOM — syft, cdxgen, and Trivy all do it in one command. The hard part is everything after: correlating those components against the vulnerabilities you already track, telling the world which CVEs actually affect you (and which don’t) in a format a machine can read, proving how the artifact was built, and handing a buyer a single bundle that answers all of it. Talarity treats the SBOM as the spine of that whole workflow.
What’s on the page
Everything below happens on one route — /app/appsec/sbom — organized into three tabs:
- Documents — the SBOM inventory: ingest a bill of materials, browse its component inventory, correlate findings, author and publish VEX, record provenance, archive a document you uploaded in error, and export a procurement bundle.
- Products — group a series of releases so you can diff any two of them, and choose whether one of them is published to your public Trust Center.
- Composition policies — license/package rules that flag components you don’t want shipping.
If your organisation has linked accounts, the Documents tab may be narrowed to the ones you can see, and a band under the header says so. Products and composition policies are deliberately organisation-level — a release series and a licence rule belong to the company, not to one subsidiary — so they are never narrowed and carry no band.
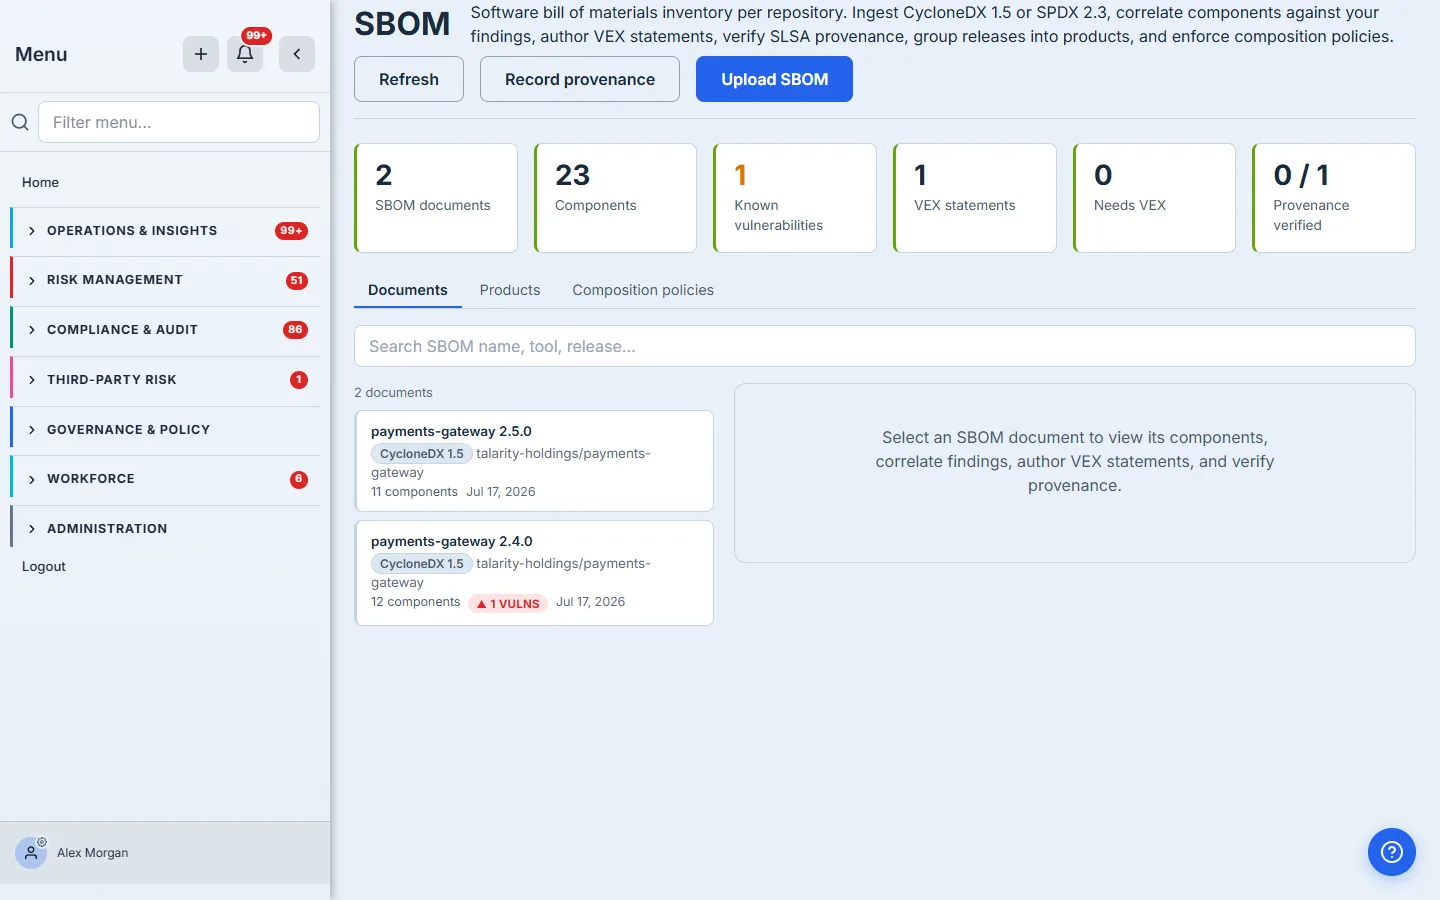
Two of those cards are worth reading slowly, because their wording is the product being careful rather than being coy. Correlated vulnerabilities counts component-vulnerability pairs matched from your own findings register — it is not a public-database check, and the card says so. And Provenance recorded reports how many attestations passed structural checks, not how many are cryptographically verified; full DSSE signature verification needs your organisation’s builder public keys, which is an integration you own. A card that could only ever read “0 verified” would tell you nothing.
Step 1 — Ingest a bill of materials
Click Upload SBOM and paste a CycloneDX 1.5 or SPDX 2.3 document, or pick a file. Talarity auto-detects the format, so you don’t choose a type. Optionally link the document to a repository — a real picker of the repos you already track, not a raw ID to hunt down — and give the release a name.
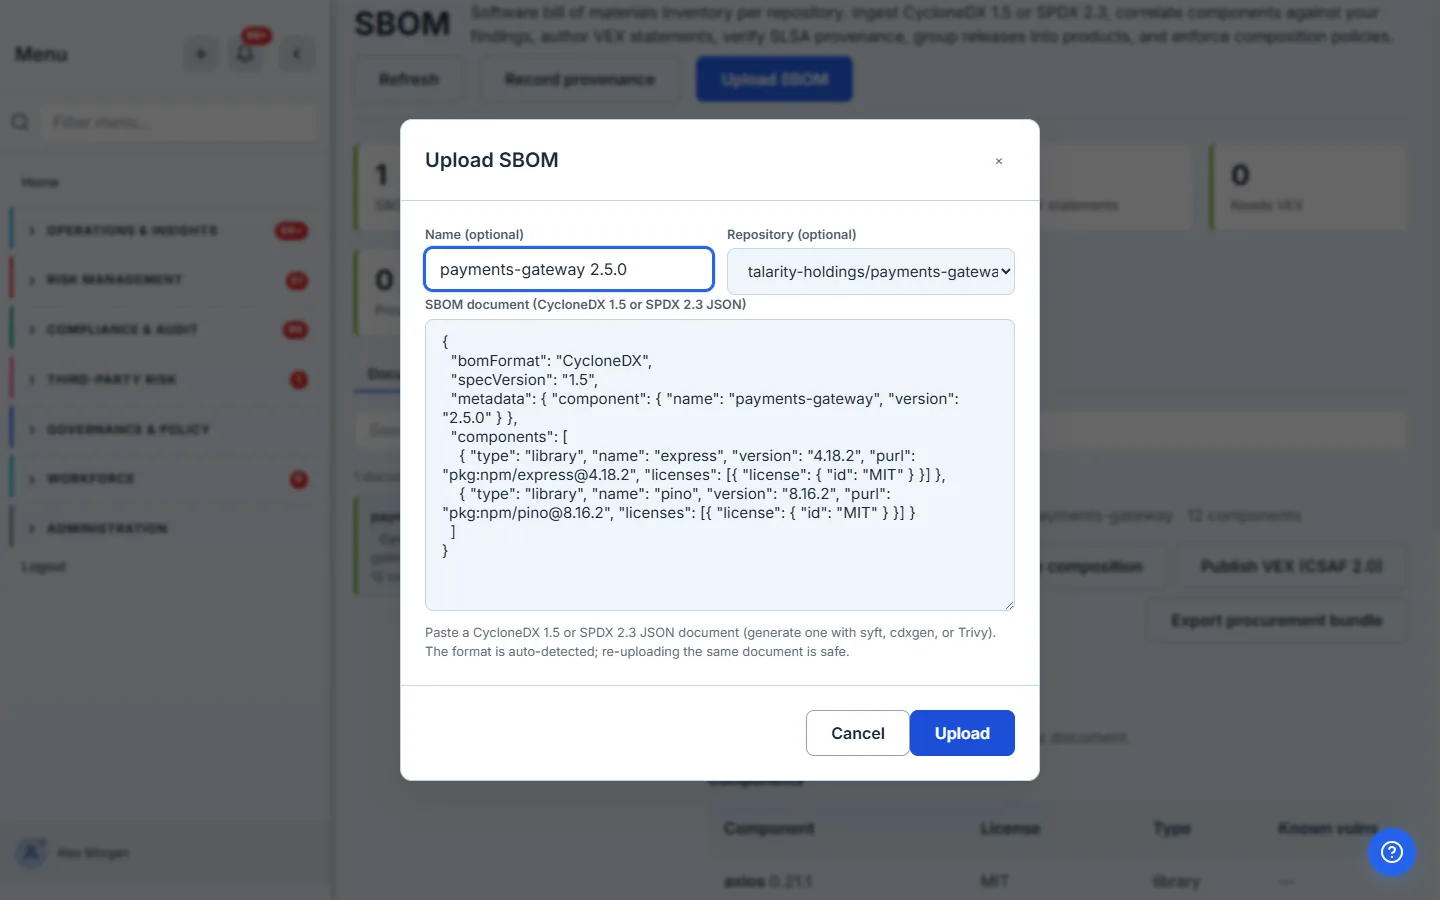
Re-uploading the same document is safe — Talarity de-duplicates on the document’s SHA-256, so a nightly pipeline that pushes the same bytes won’t pile up duplicates. Ingest parses every component into a normalized inventory.
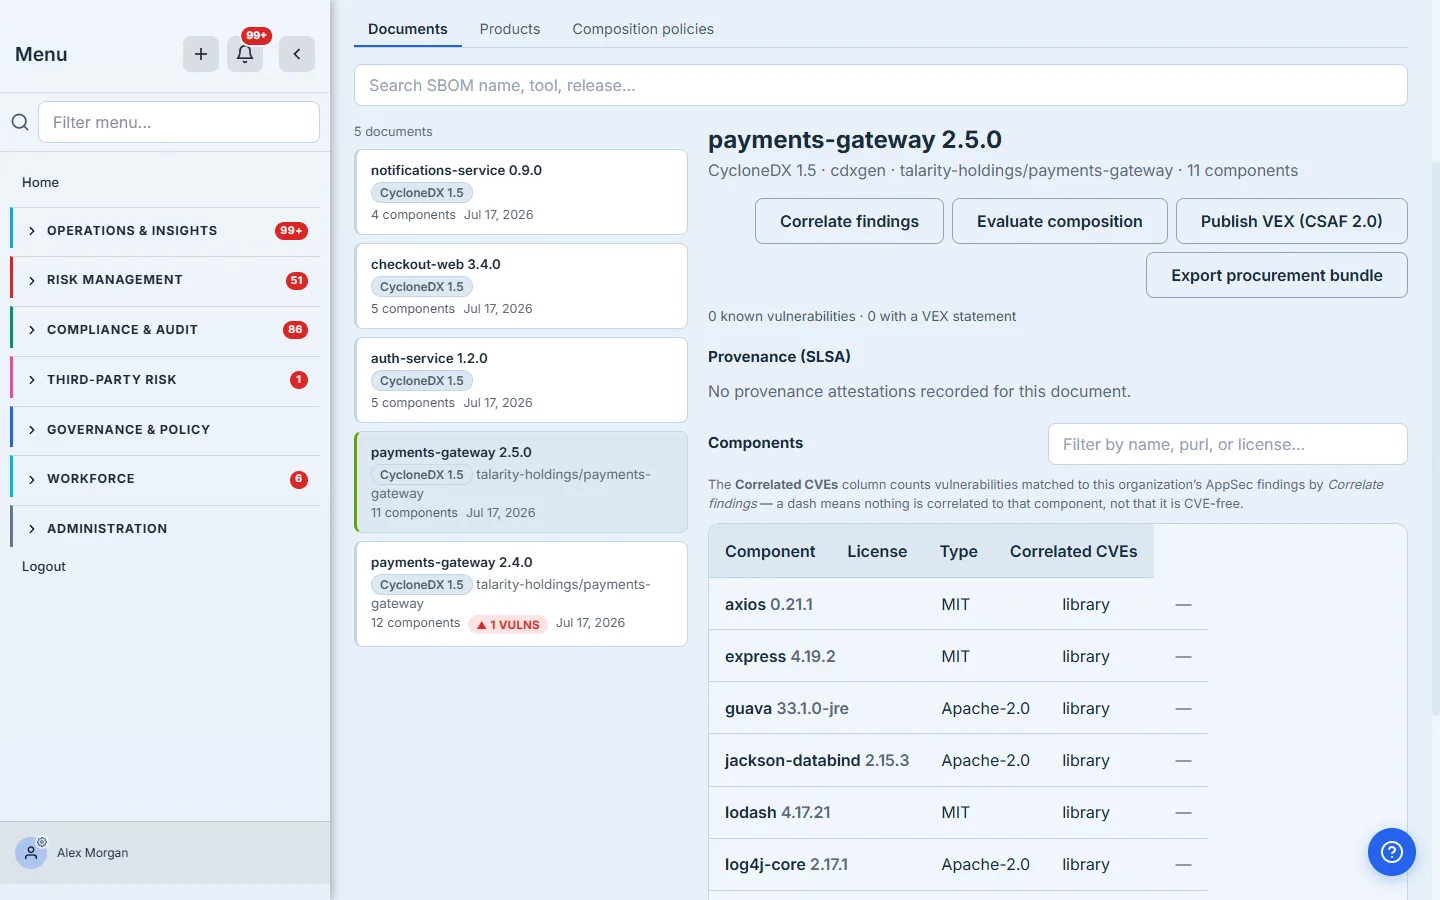
A document uploaded in error is not stuck there: Archive document takes it out of the inventory and out of every count on the page, while keeping its correlated findings, published VEX statements and provenance trail intact. Archiving records who did it and when.
Step 2 — Read the component inventory
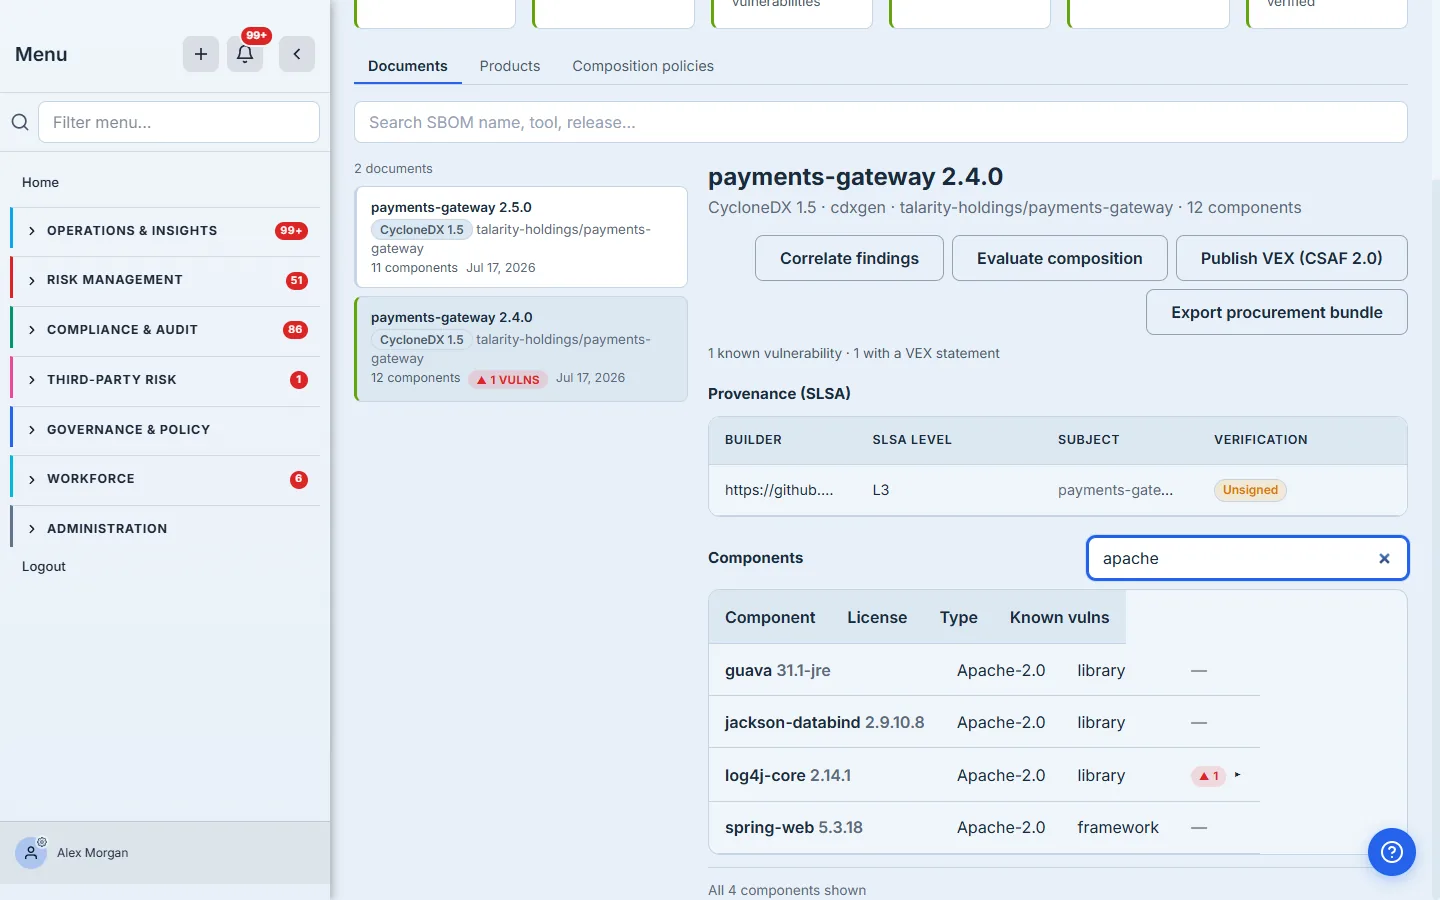
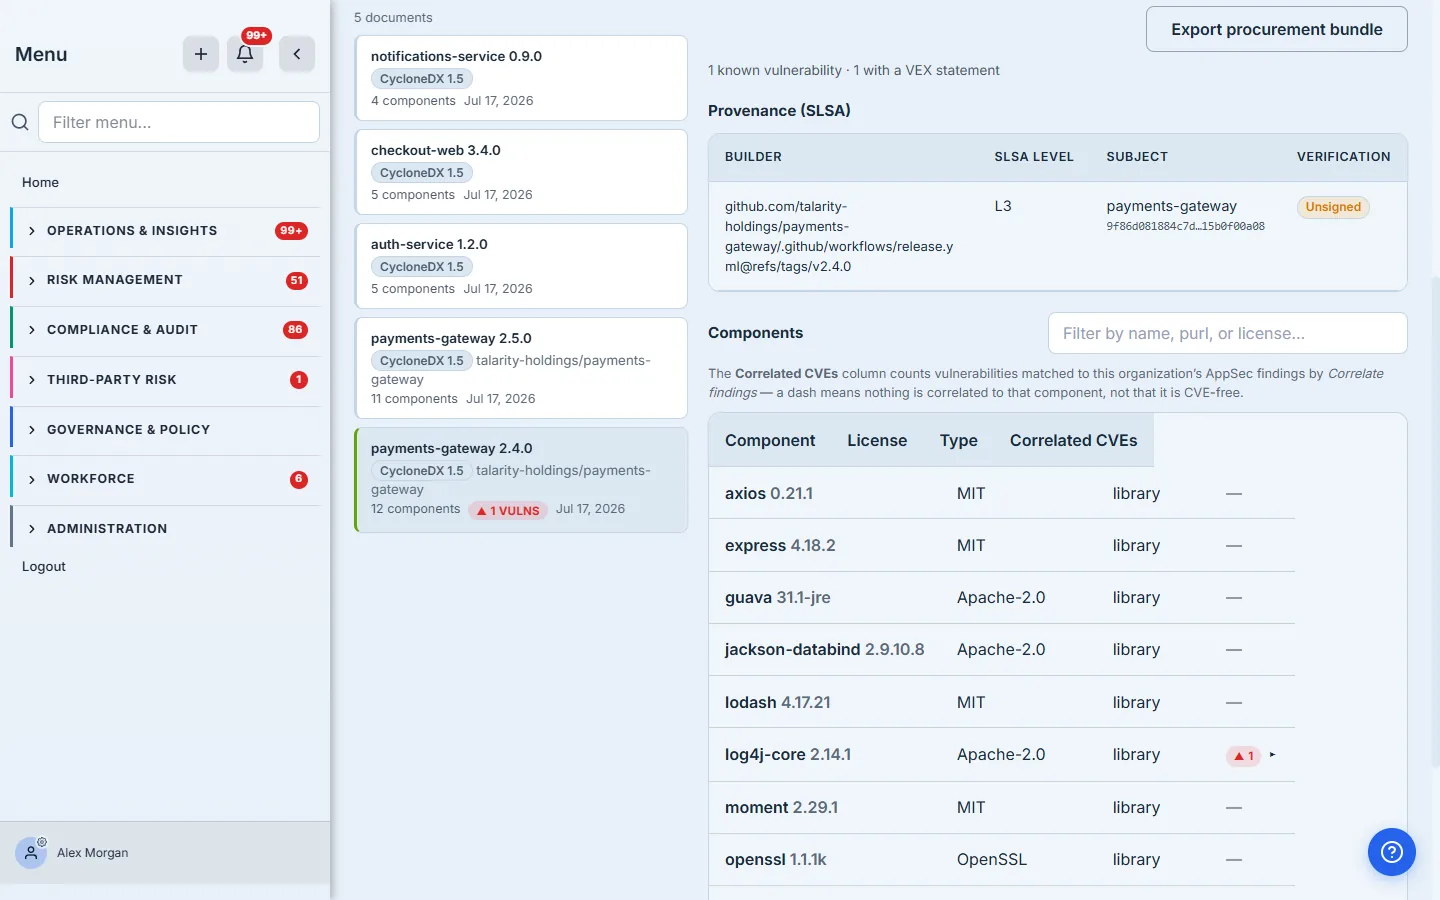
Each component lands with its version, license, type, and — once you correlate — its known vulnerabilities. A container image SBOM can carry thousands of components, so the inventory has a filter: type a name, purl, or license and the list narrows server-side. Below, filtering on apache cuts a twelve-component release down to the four Apache-2.0 packages.
Step 3 — Correlate against your findings
Talarity does not run a second vulnerability scanner or call an external feed behind your back. Instead, Correlate findings matches the SBOM’s components against the SCA findings already in your AppSec findings register — the ones that arrived through your real SARIF and scanner imports. Every CVE it attaches is one you already track; a release with no matching findings honestly correlates zero.
The match compares versions, not just package names. A finding is a statement about one package at one version, so matching on name alone would flag a release in which you had already fixed the problem — the worst direction for this to fail, because it buries the fix.
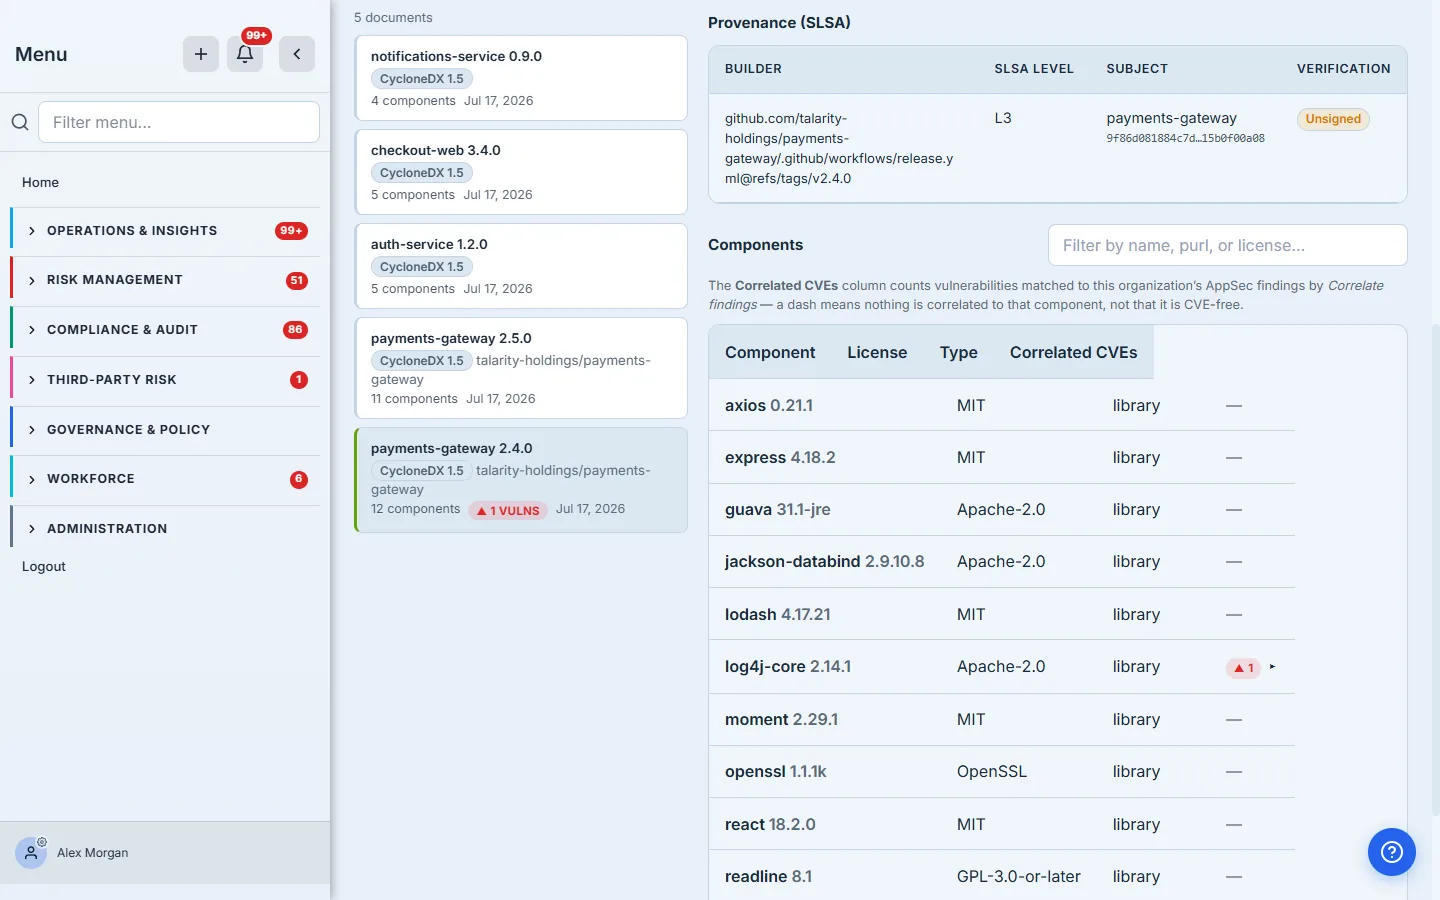
Expand the affected component to see the CVE, its severity, and its CVSS score, with an inline editor for the next step.
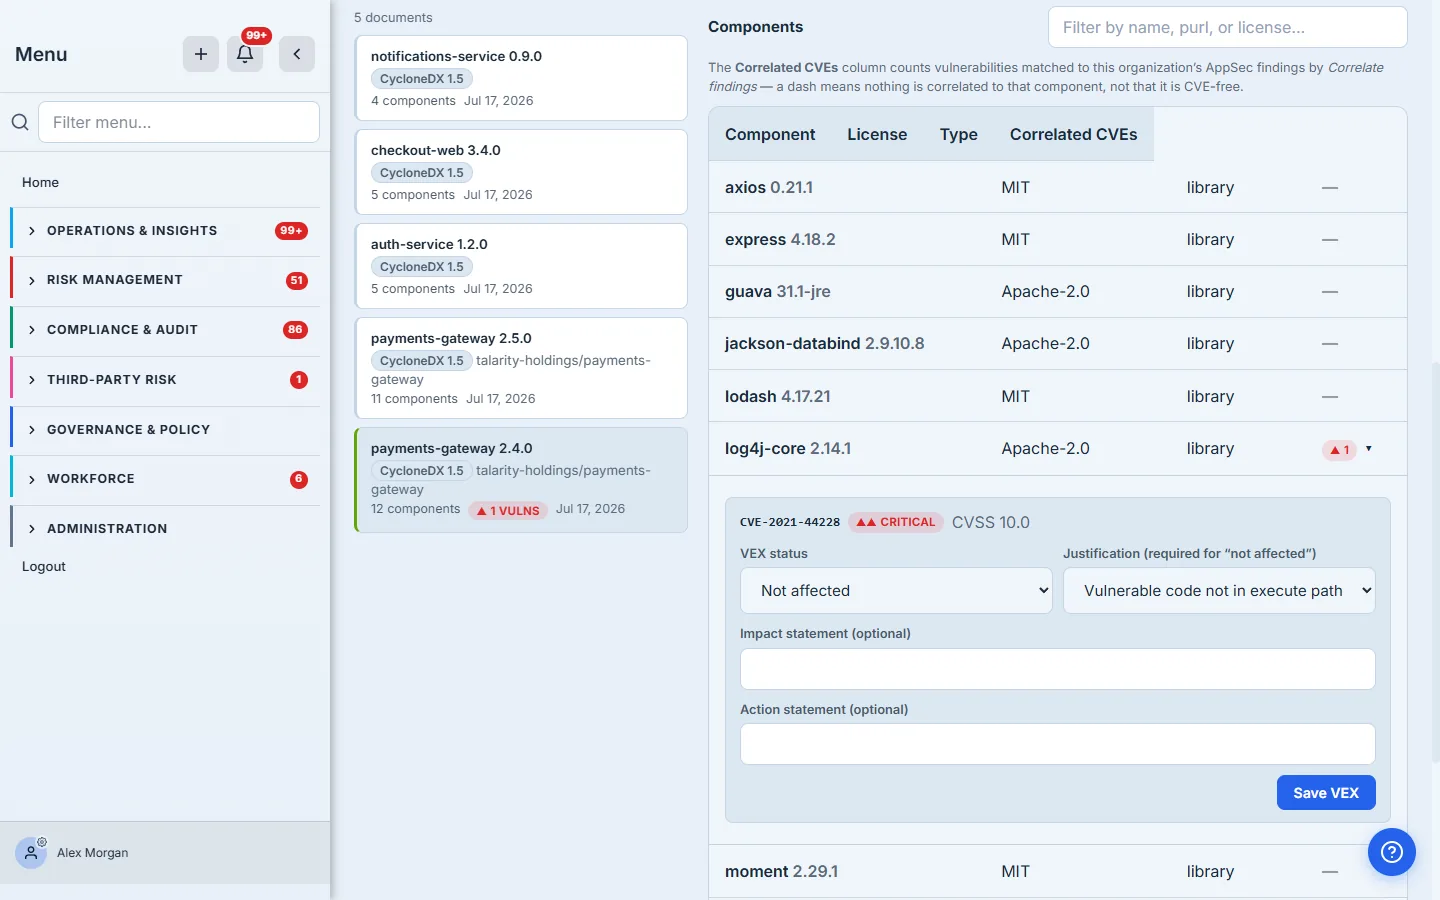
Step 4 — Author VEX (and say what doesn’t affect you)
A vulnerability appearing in your dependency graph is not the same as your product being exploitable. VEX — a Vulnerability Exploitability eXchange statement — is how you say so in a way a buyer’s tooling can consume. Talarity follows the OASIS CSAF 2.0 model: set a status (not affected, affected, fixed, under investigation), and when you claim not affected, a justification is required — one of the standard CSAF reasons, like “vulnerable code not in execute path.”
The editor is attached to a specific vulnerability on a specific release, which is what a VEX statement is: a claim about one CVE in one artifact.
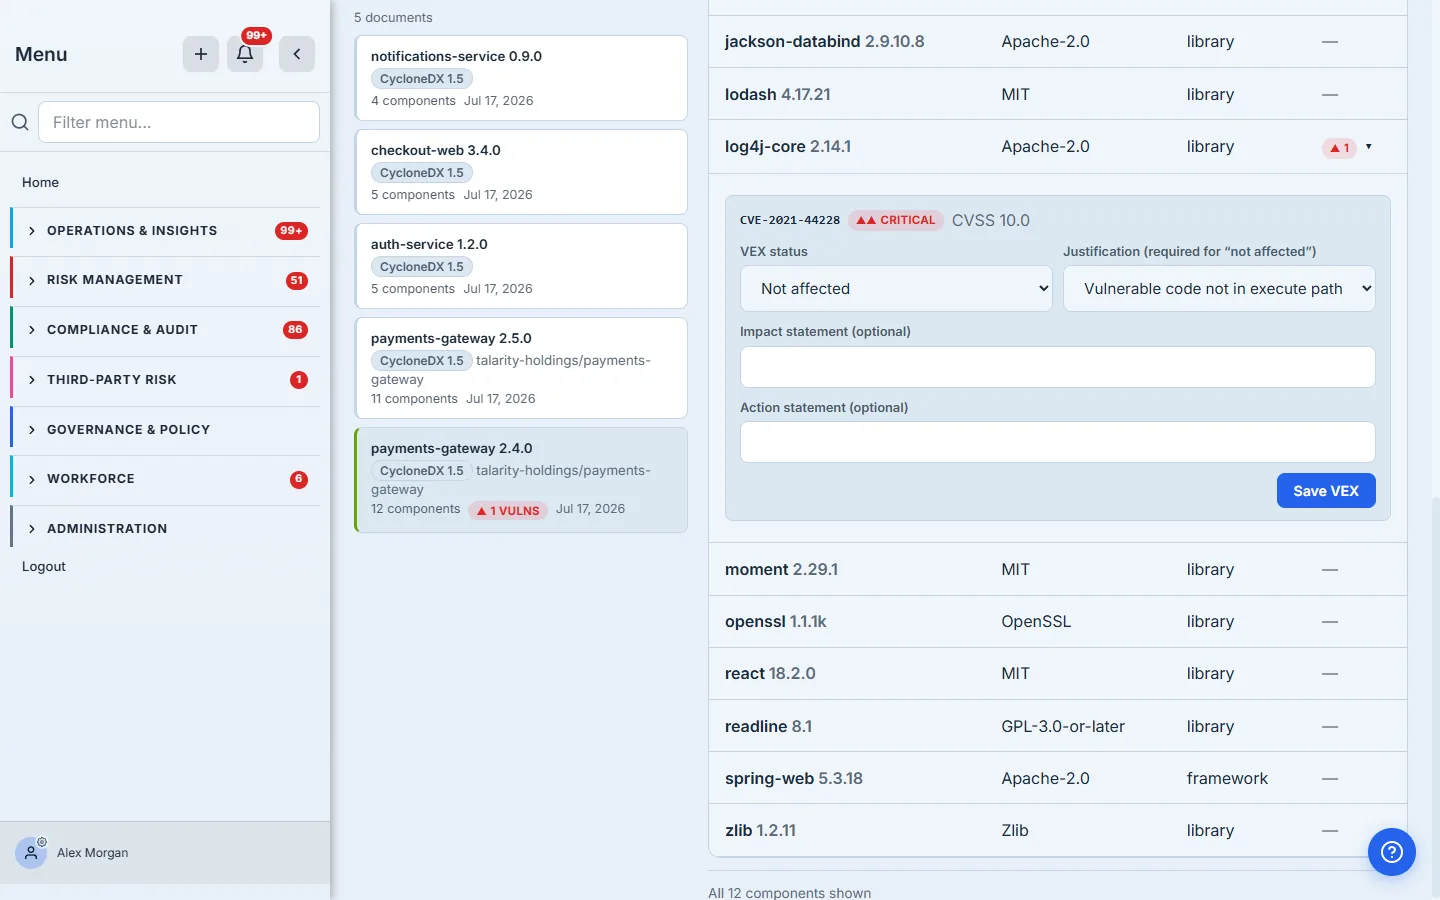
When you’ve authored your statements, Publish VEX (CSAF 2.0) assembles them into a real OASIS CSAF 2.0 VEX document and downloads it — the same builder Talarity uses for security advisories, recast to the csaf_vex profile. It refuses to publish an empty document, and the button stays disabled until at least one statement exists, with the reason printed underneath rather than hidden in a tooltip.
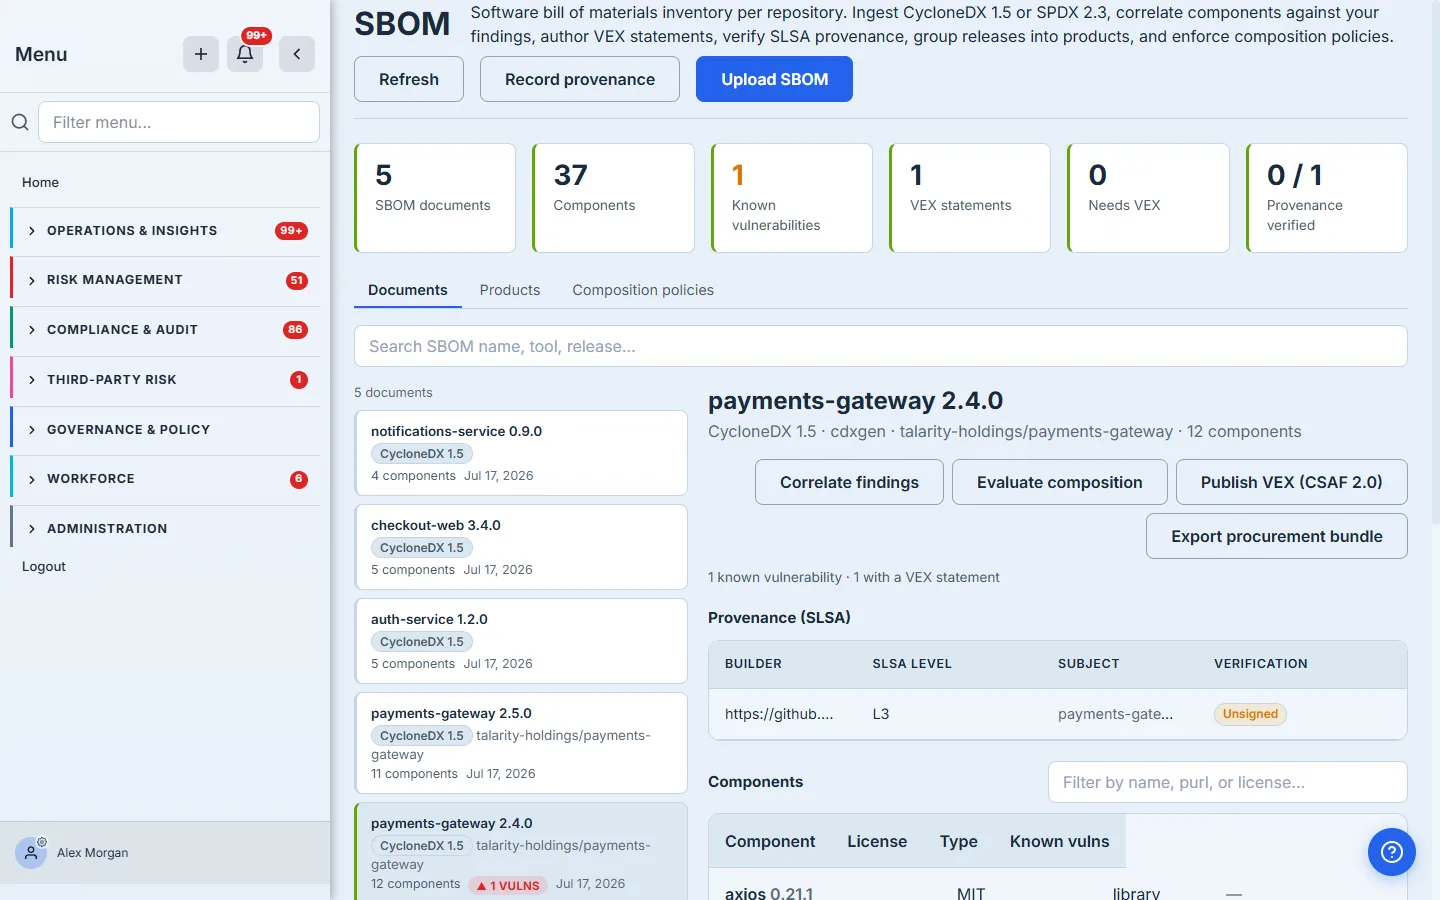
Step 5 — Record build provenance (SLSA)
Under Record provenance, paste a SLSA / in-toto attestation (DSSE-wrapped or a bare statement). Talarity verifies its structure and, when you supply the artifact digest alongside the attestation, checks that the subject digest matches it — a mismatch fails loudly. The result is recorded honestly, and the unverified states are not interchangeable: Unsigned means no DSSE signature was present on the attestation at all, while Structural only means a signature was present and the structure and subject digest checked out, but the signature itself has not been cryptographically verified — that last step needs your organisation’s builder public keys. Nothing is ever labeled “Verified” that wasn’t.
The level column is headed Asserted level for the same reason: the SLSA level is what the attestation claims, and recording it is not verifying it.
An attestation recorded in error can be withdrawn. The row stays — the trail is the evidence, and a row that vanished would read as “never recorded” — but it stops counting towards the totals, loses its verification colour, and carries the reason and date it was withdrawn.
Step 6 — Enforce composition policy
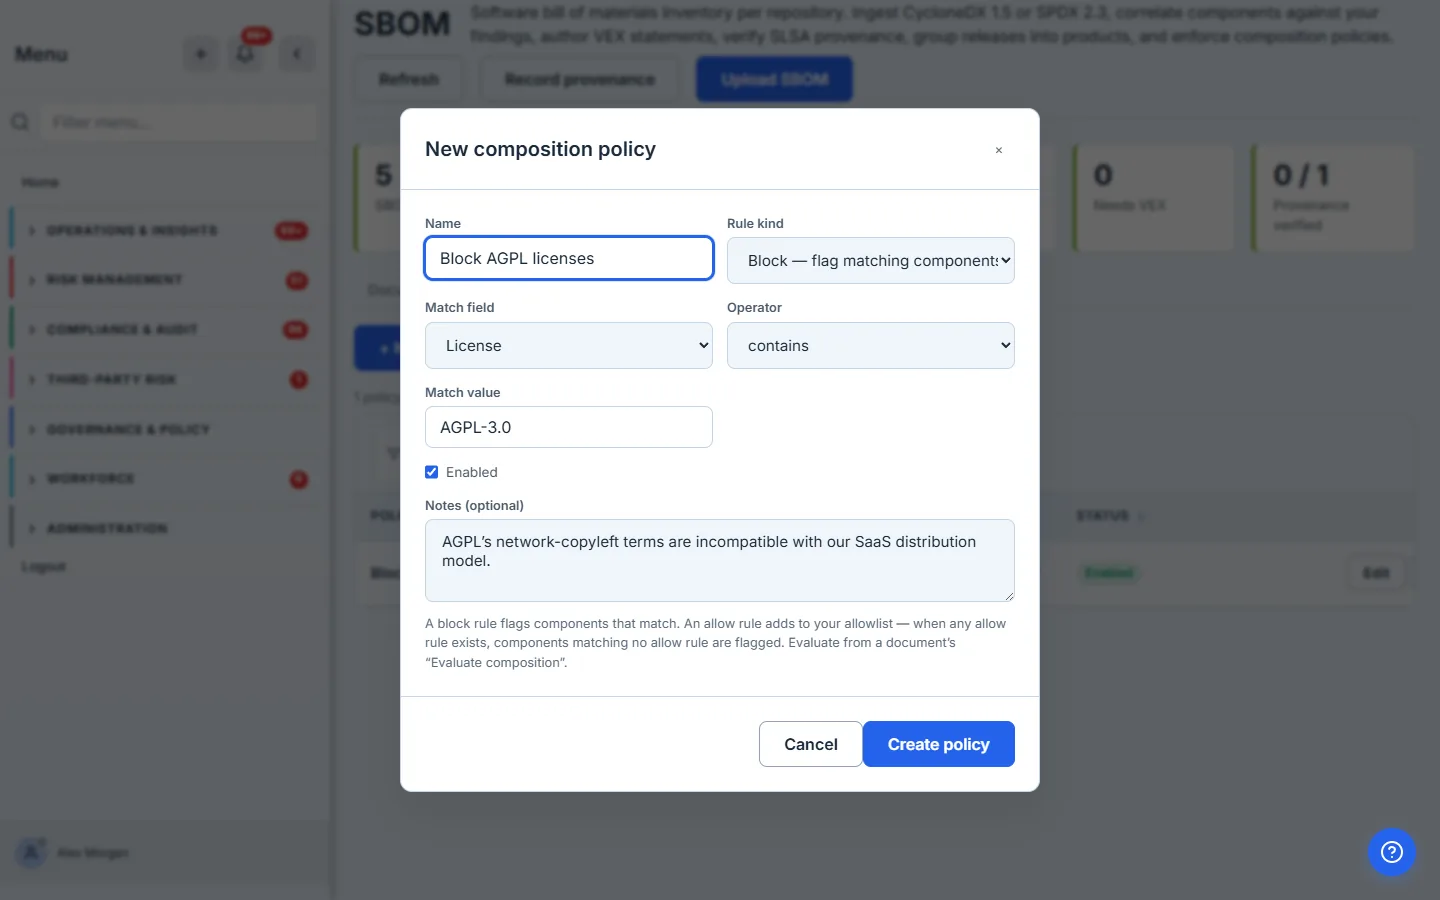
Beyond CVEs, you often care about what licenses you’re shipping. Composition policies flag components by license, package name, ecosystem, or purl. A block rule flags anything that matches; an allow rule builds an allowlist, so anything matching no allow rule is flagged.
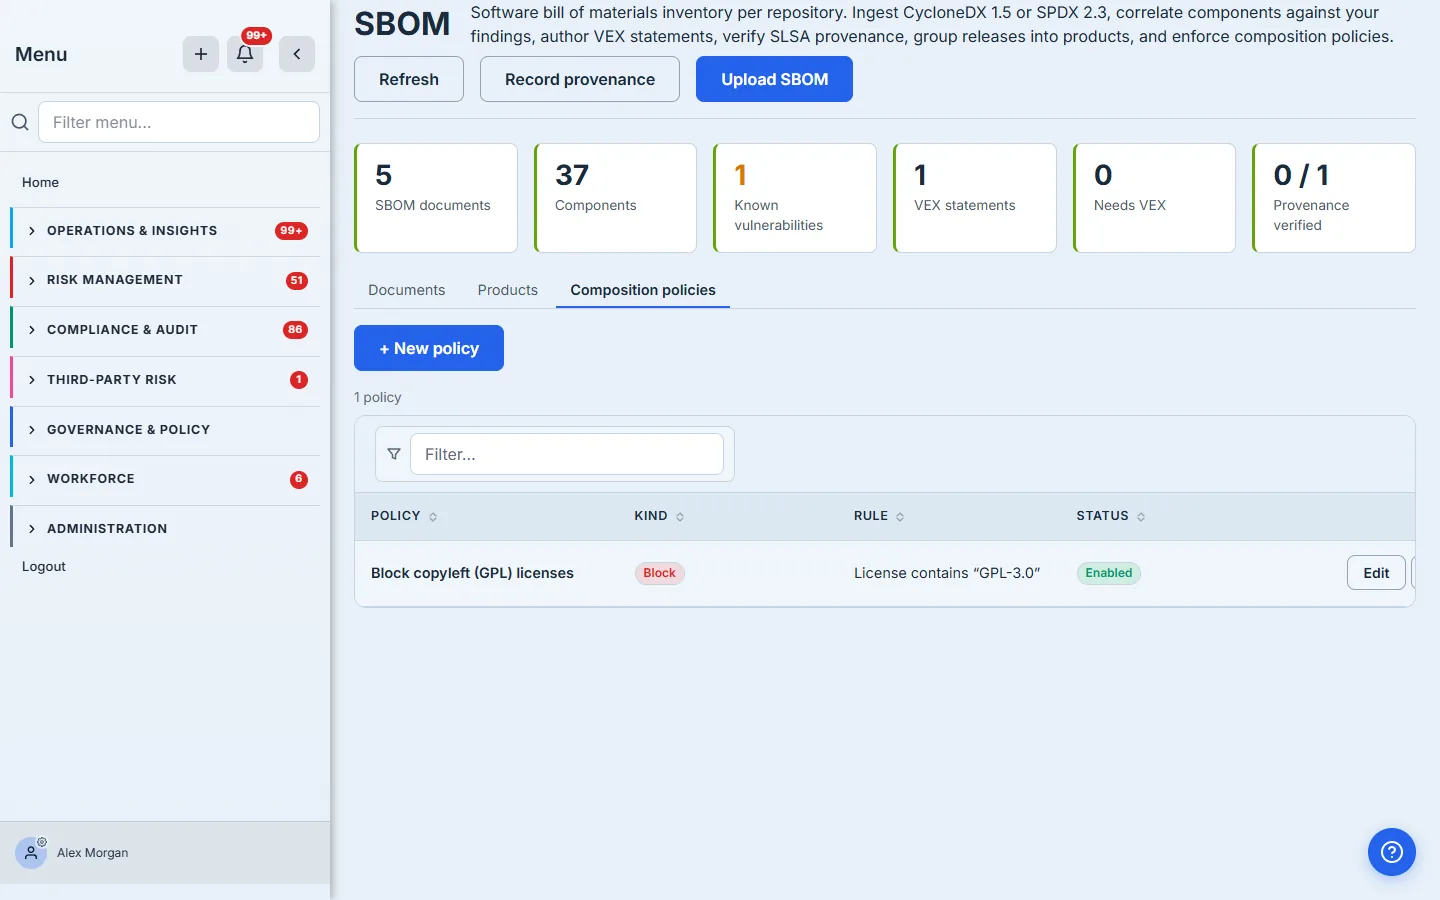
Choose the operator deliberately. Licence identifiers are a family, not a single string: a rule written as License equals “GPL-3.0” matches nothing in a release that declares GPL-3.0-or-later, while contains catches the whole family. The dialog opens on equals, so this is a choice you make rather than one you inherit.
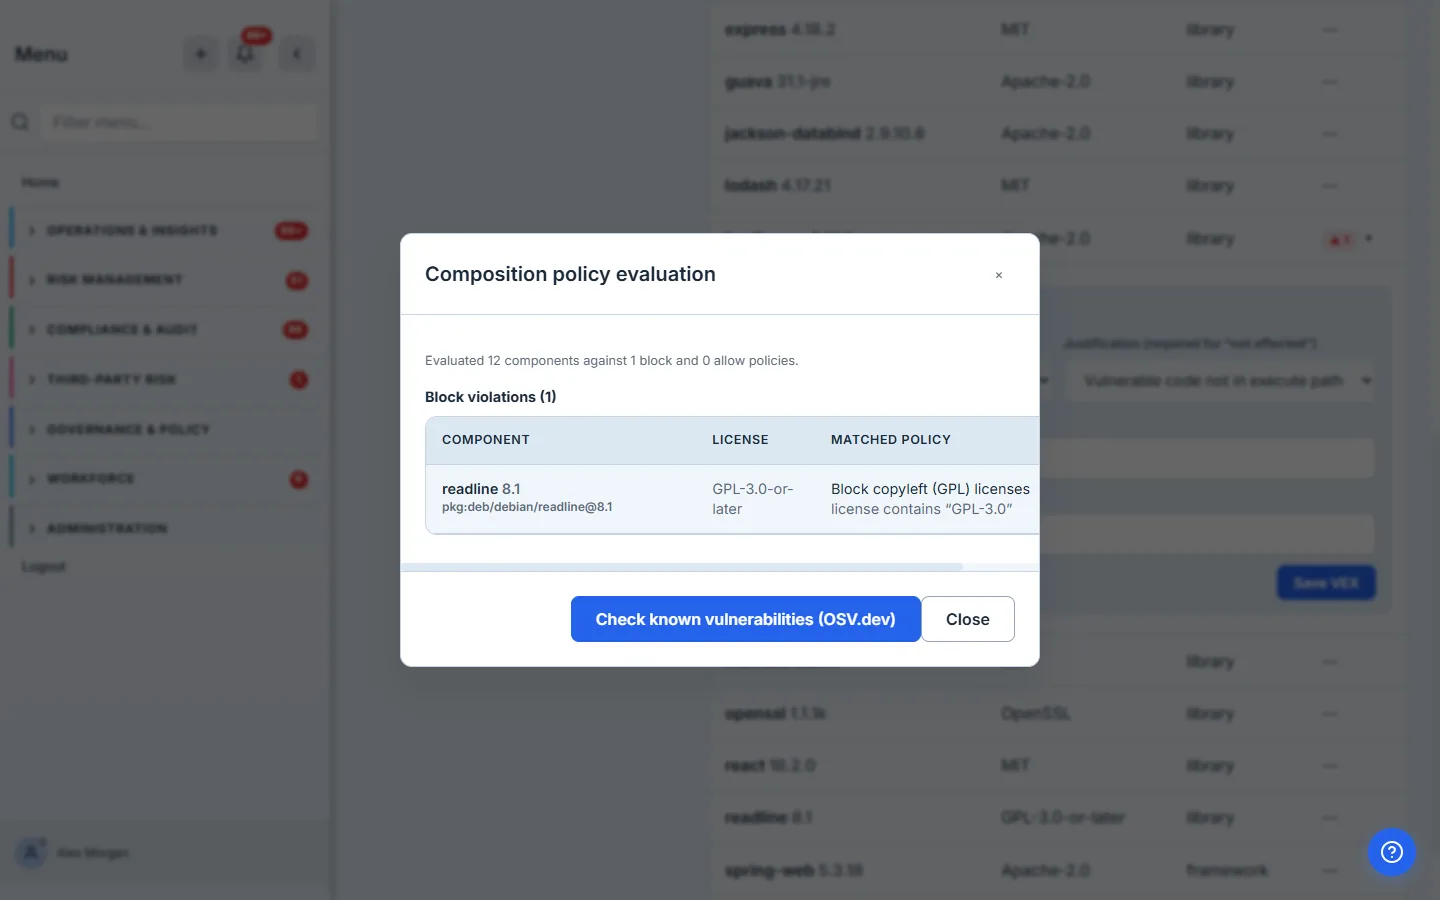
Run the policies from a document’s Evaluate composition. Here twelve components are checked against one block policy and no allow policies, and the GPL-licensed readline is flagged. When something is flagged, the results offer a Check known vulnerabilities (OSV.dev) button — a single live lookup against the public OSV.dev database, read-only, covering the components the policy flagged rather than the whole release.
Step 7 — Diff two releases
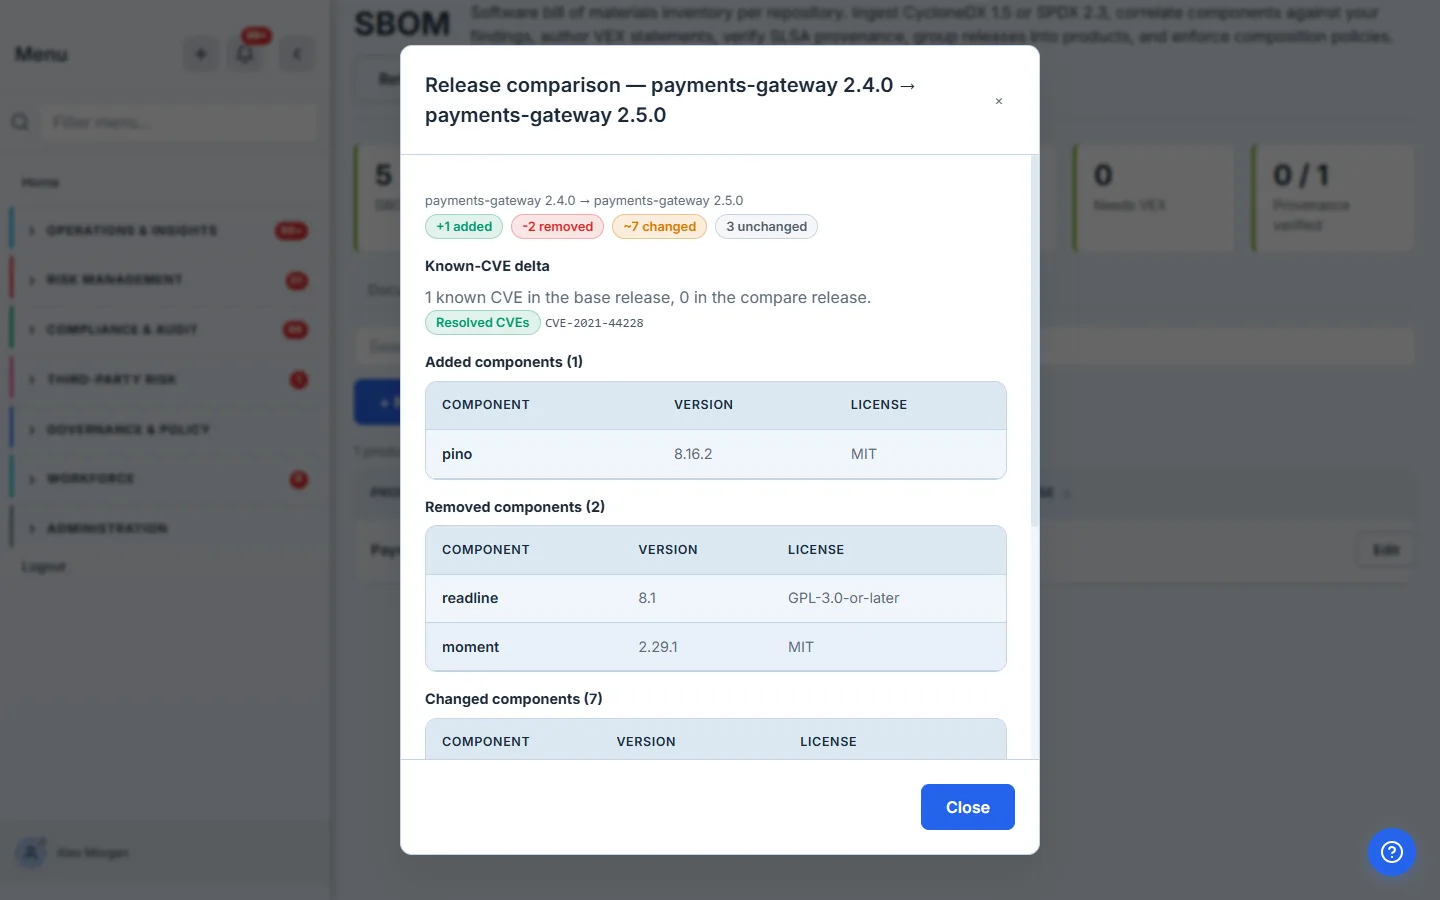
Group releases into a Product, then Compare releases to see exactly what changed between any two — added, removed, changed and unchanged components, plus the known-CVE delta. The picker only offers releases of the product you opened it from, so a comparison is always like for like.
This is where the security story of an upgrade becomes obvious: moving from 2.4.0 to 2.5.0 resolves CVE-2021-44228 — the log4j upgrade shown in steps 3 and 4 — and drops the GPL-licensed readline that step 6 flagged.
Step 8 — Hand the buyer one bundle
Finally, Export procurement bundle assembles the SBOM, the CSAF-VEX, and the SLSA provenance into a single JSON bundle — the artifact a federal buyer asks for under EO 14028 and OMB M-22-18. One download answers “what’s in it, what’s exploitable, and how was it built.”
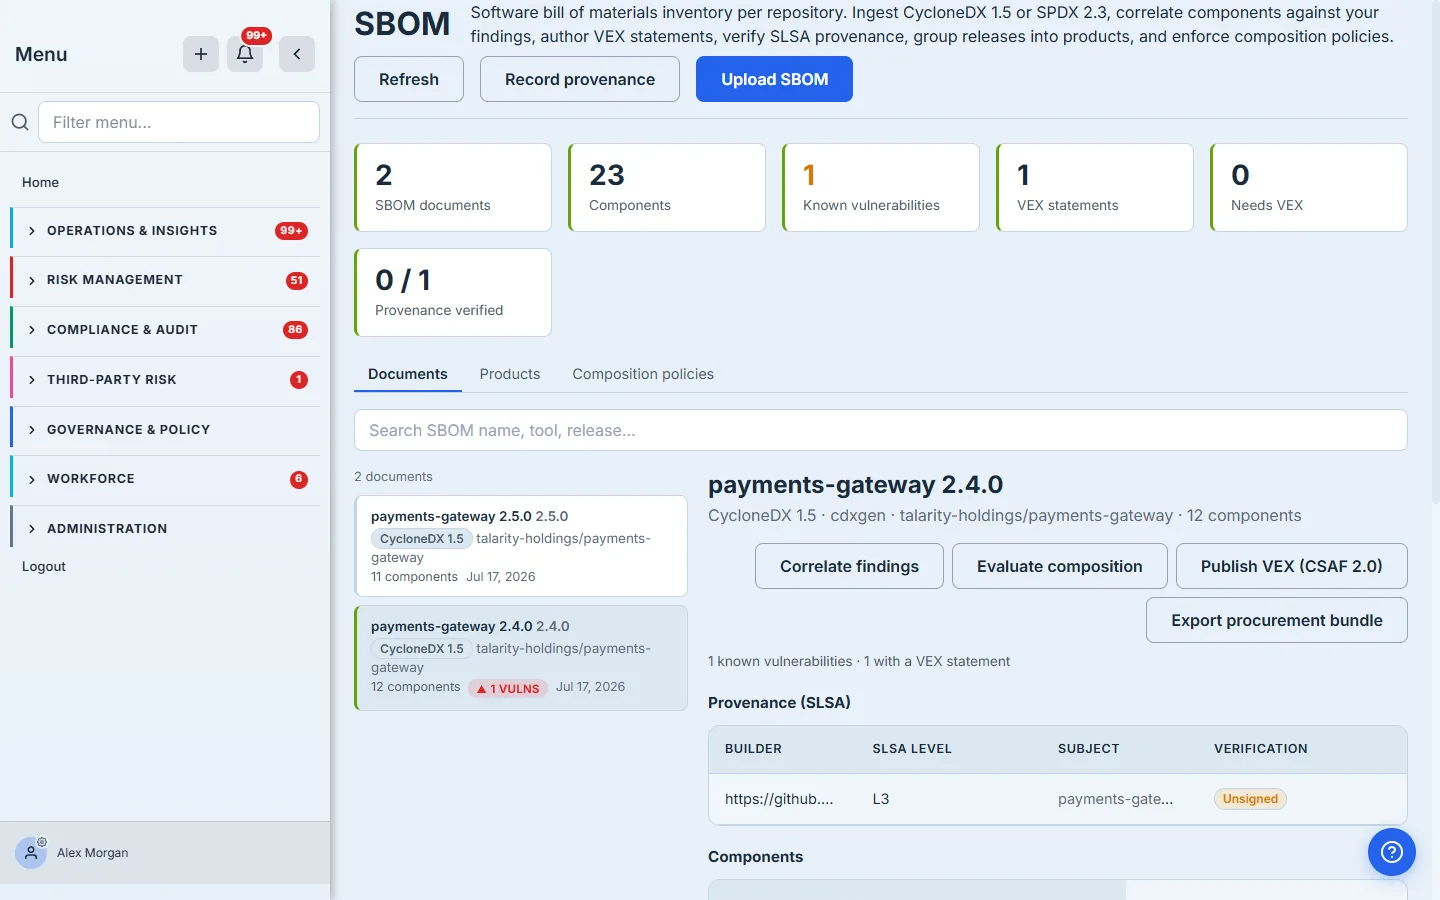
Which release you hand over is your decision, and it is a separate one from publishing: a product can nominate a single release for your public Trust Center, and nothing is exposed there until you choose it.
What you walk away with
A supply-chain program that lives in one place instead of five: ingest → inventory → correlate → VEX → provenance → policy → diff → procurement bundle. Every claim on the page is one the product actually keeps — correlation only surfaces CVEs you already track and only when the versions agree, VEX is real CSAF 2.0, provenance states say what they mean and can be withdrawn when they are wrong, and the procurement bundle is a genuine assembly of the three. Generate the SBOM in your pipeline; do everything after it here.