A surprising amount of a security and compliance program is asking other people to do things by email. You send a vendor a security assessment. You ask an employee to acknowledge a policy. You request evidence from a partner ahead of an audit. Those emails are the outward face of your program — and they land in inboxes that have been trained to distrust exactly that shape of message: “click here to complete a security assessment.”
An unbranded, generic email is the one a vendor’s security team flags as phishing and never opens. A co-branded one — your logo, your colors, a note in your words, sitting next to a recognizable platform mark — is the one that gets completed. ISO 27001:2022 puts communicating security requirements to suppliers front and center (A.5.19–A.5.22), and SOC 2’s CC2.2/CC2.3 expect your program to communicate clearly with internal and external parties. Co-branding is how you make those communications look like they actually came from you.
This is co-branding, not white-labeling — an important distinction. Talarity’s mark stays on every email; your brand appears alongside it. Recipients see that the message is from your organization and that it runs on a platform they can trust. (White-labeling generated PDF reports is a separate, licensed feature further down the same page — this article is about the emails.)
Who’s involved
- Org admin / GRC lead — sets the branding once, under Settings. Everything downstream inherits it.
- The recipient — a vendor, an employee, an auditor. Gets a branded email they recognize and act on, instead of one they second-guess.
- Your brand / marketing team — cares that the logo, colors, and voice are represented correctly on outbound mail. This is the screen that lets them.
What’s on the page
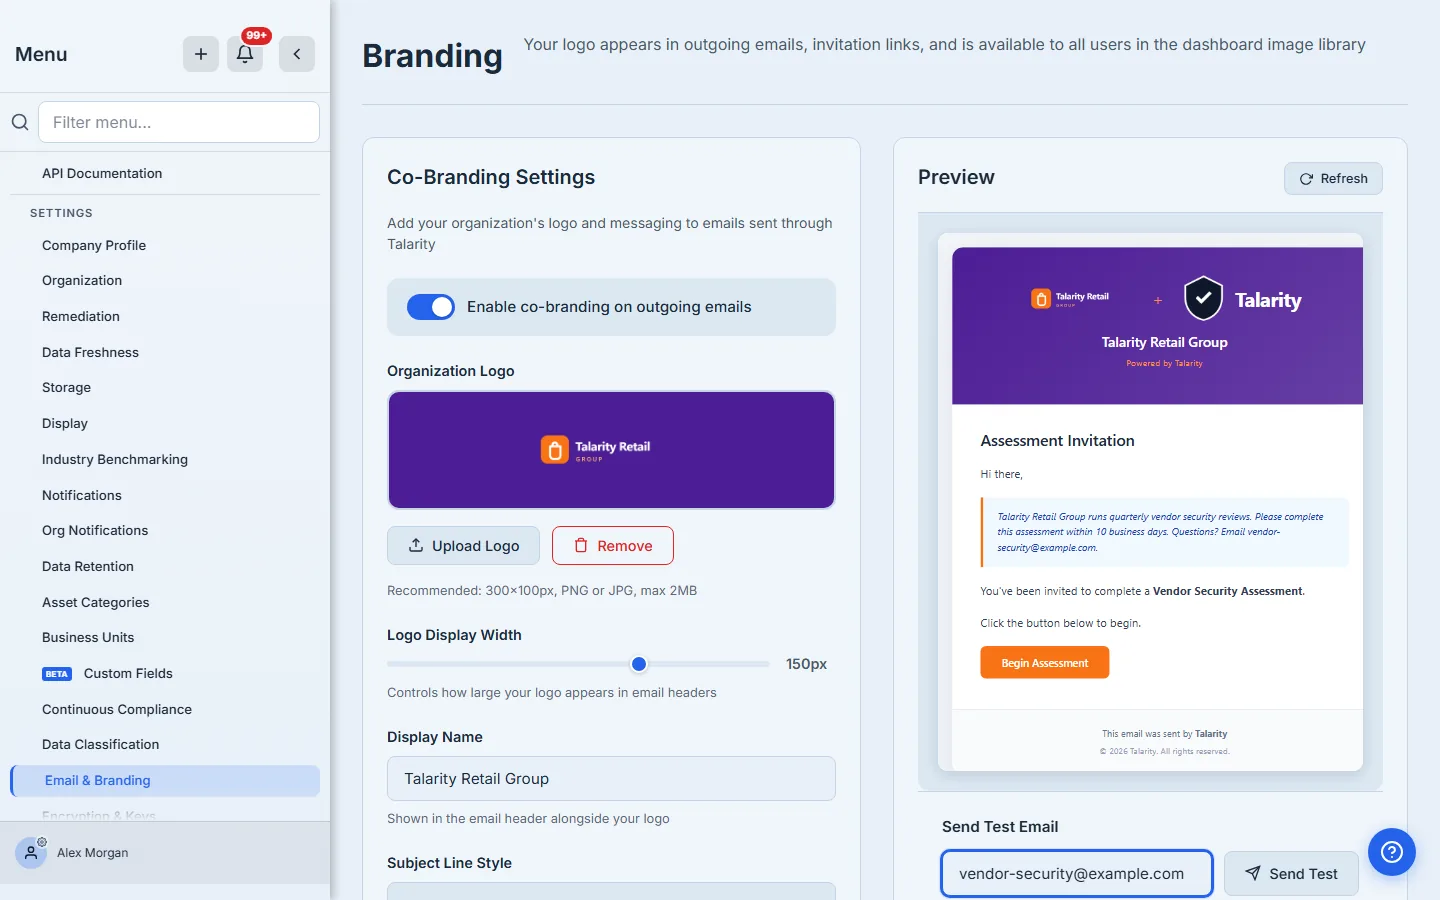
Everything lives at /app/settings/email-branding, reached from Administration → Organization Settings in the sidebar, where it is the Email & Branding tab on the Organization row. The page has two panels side by side: the Co-Branding Settings form on the left, and a live Preview of the resulting email on the right, with a Send Test Email box beneath it.
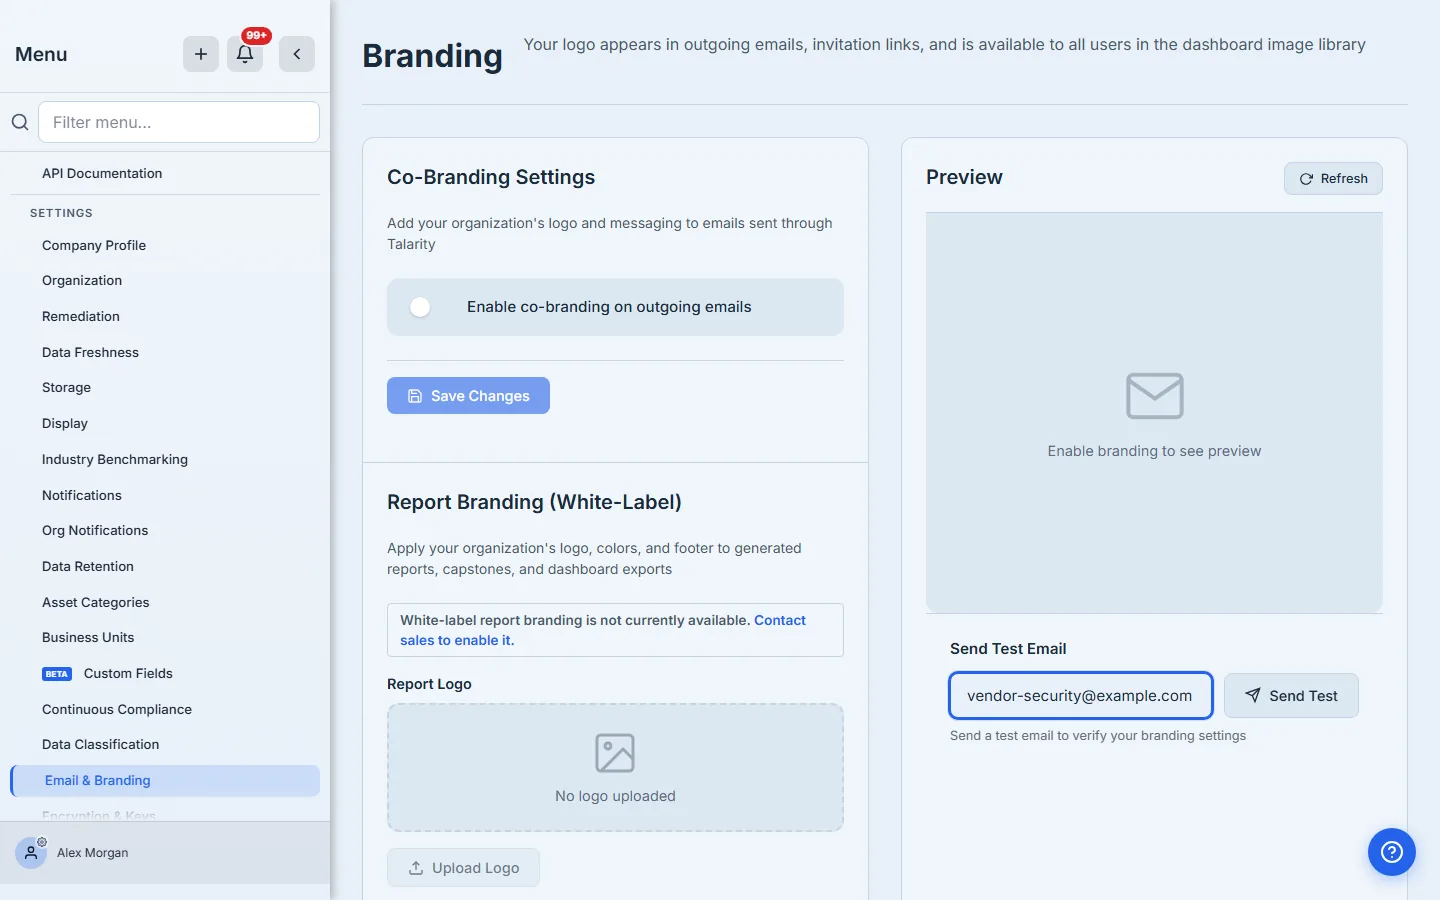
Step 1 — Turn on co-branding
Flip Enable co-branding on outgoing emails. The settings form unfolds, and the Preview panel wakes up. Nothing is live yet — the master toggle is also the kill switch, so you can build everything out, preview it, test it, and only then commit.
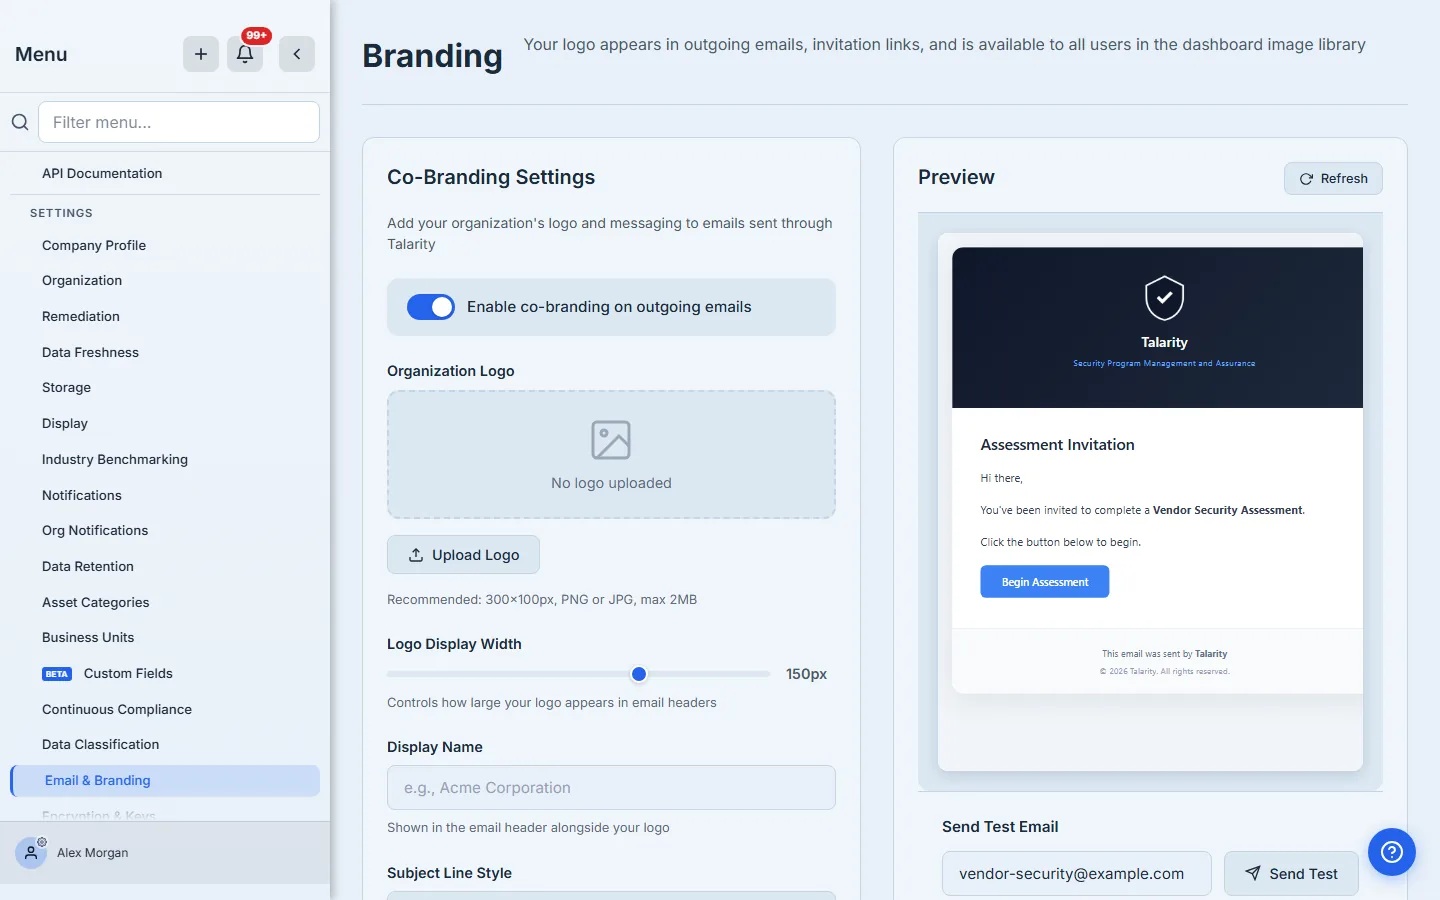
Behind the scenes, this single flag is what every outgoing email checks. Talarity routes all mail — assessment invitations, policy reminders, evidence requests — through one send path, and that path applies your branding only when this toggle is on. Turn it off and the very next email reverts to plain Talarity, no other change required.
Step 2 — Upload your logo
Click Upload Logo and pick a PNG or JPG (up to 2 MB). Talarity stores it, reads its true pixel dimensions, and drops it straight into the header preview.
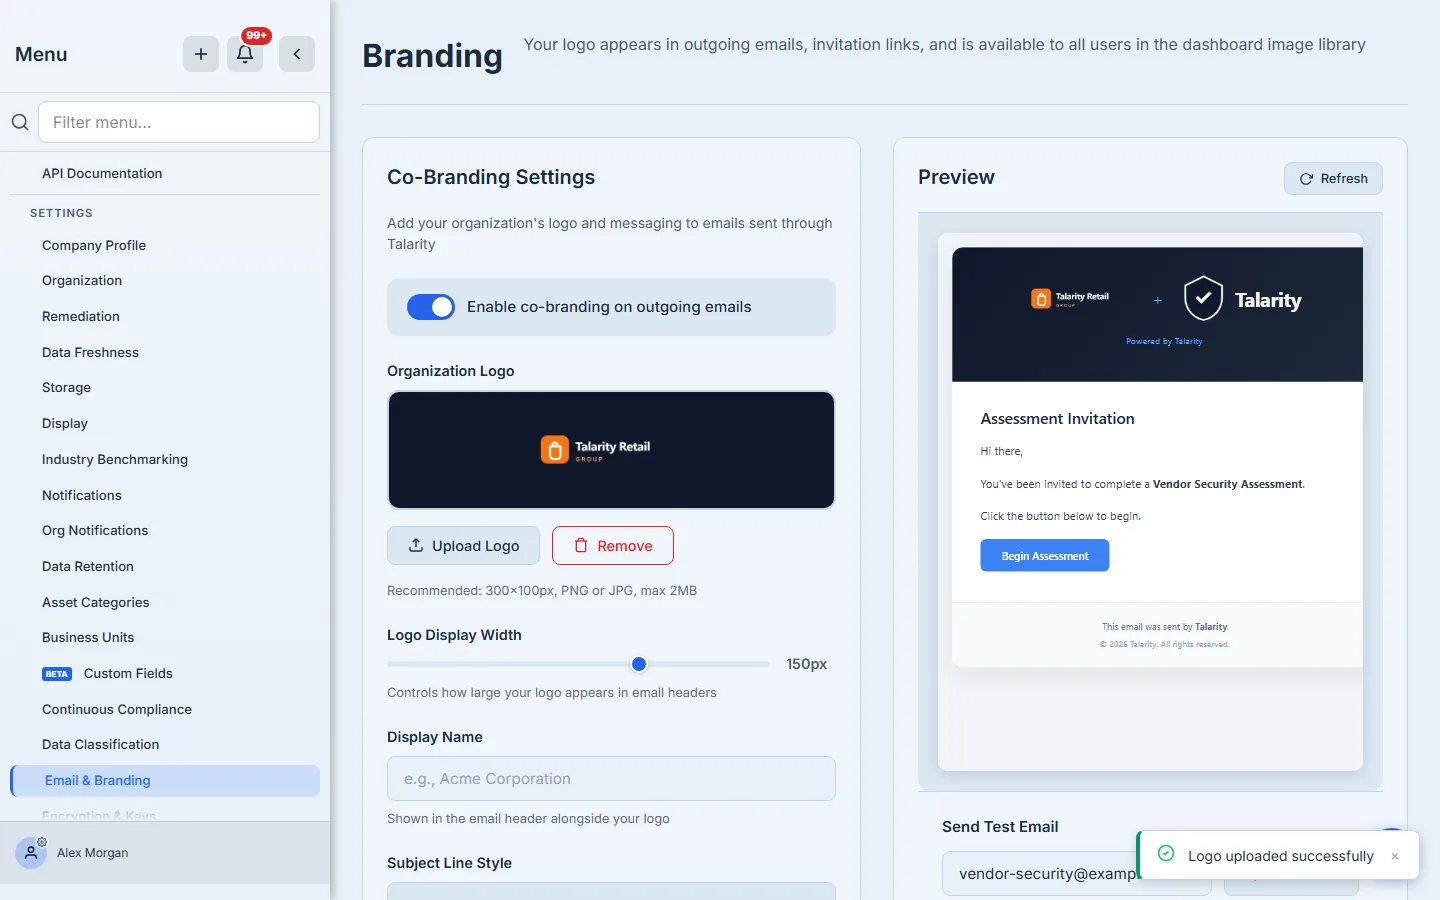
Two details worth knowing:
- The upload swatch matches your email header, not the page. Logos built for email are usually light, because the default header is dark — so the swatch takes on the header color and shows your logo the way a recipient will actually see it, rather than washing a white logo out on a light background.
- Logo Display Width caps how wide your logo may get in the header. Talarity pairs it with your logo and the Talarity mark at a shared height, so the two always line up as one lockup — whatever the aspect ratio you upload. The mark is stored as a real PNG (not an SVG) precisely because Outlook and Gmail refuse to render SVG; your logo shows up in real inboxes, not just in this browser preview.
Use a logo that reads on a dark background. The default email header is deep navy, and most brand marks ship in a light-on-transparent variant for exactly this reason. If your only logo is dark-on-white, either upload a white version or set a light custom header color in Step 5 — the swatch will show you immediately whether it reads.
Step 3 — Set your display name and choose a subject-line style
Your Display Name appears in the email header next to your logo. It’s also what co-branding puts into the subject line — so it’s doing double duty.
Subject Line Style is the decision most teams skip and shouldn’t:
- Talarity only —
Action Required: Complete Assessment - Talarity. Neutral, platform-forward. - Co-branded —
Action Required: Complete Assessment - Talarity Retail Group via Talarity. Your name is right there in the subject, before the recipient even opens the message.
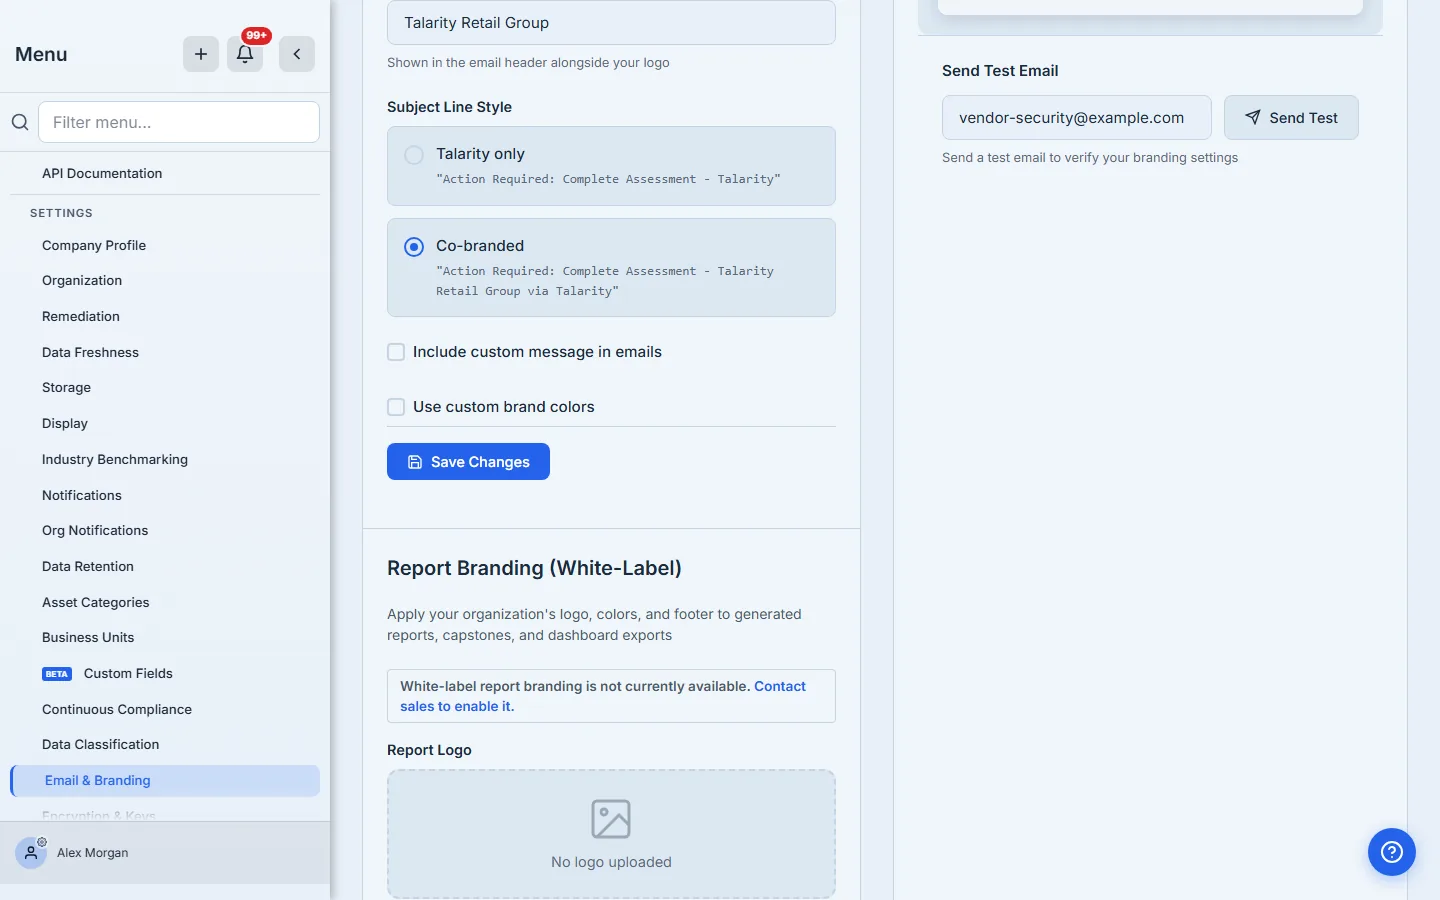
For vendor-facing mail, co-branded subjects are worth it: a subject line that names your company is far less likely to be mistaken for a phishing attempt than a generic one. One dependency to know — co-branding the subject needs a Display Name. Leave the name blank and the subject falls back to plain, no matter which radio is selected, because there’s nothing to write in.
Step 4 — Add a custom message
Tick Include custom message in emails and write a short note — instructions, a deadline, a contact address. It’s inserted right after the greeting in every branded email, in a call-out box, so it reads as a message from you rather than boilerplate.
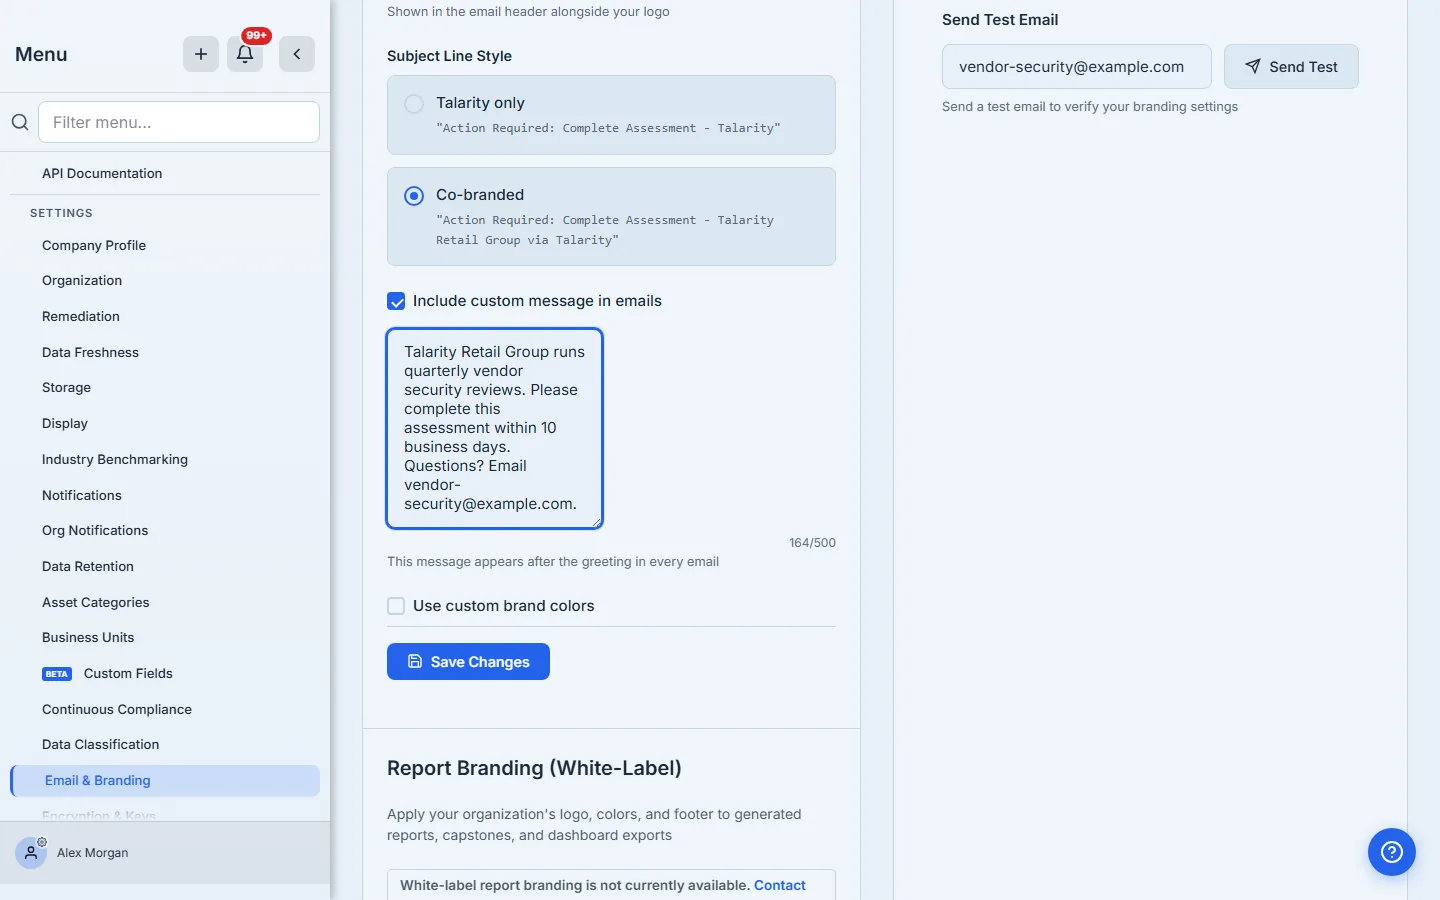
This is where you set expectations once instead of in a hundred one-off follow-ups: “complete this within 10 business days,” “questions go to our security team at this address.” The counter caps you at 500 characters — long enough to be useful, short enough to stay a note and not a wall of text the recipient skips.
Step 5 — Apply your brand colors
Tick Use custom brand colors and set two:
- Primary — the email header’s background. This is the biggest visual lever; it’s what turns a navy Talarity email into your color.
- Accent — the call-to-action button, the divider between the two logos, the “Powered by Talarity” line, and the left border of your custom-message box.
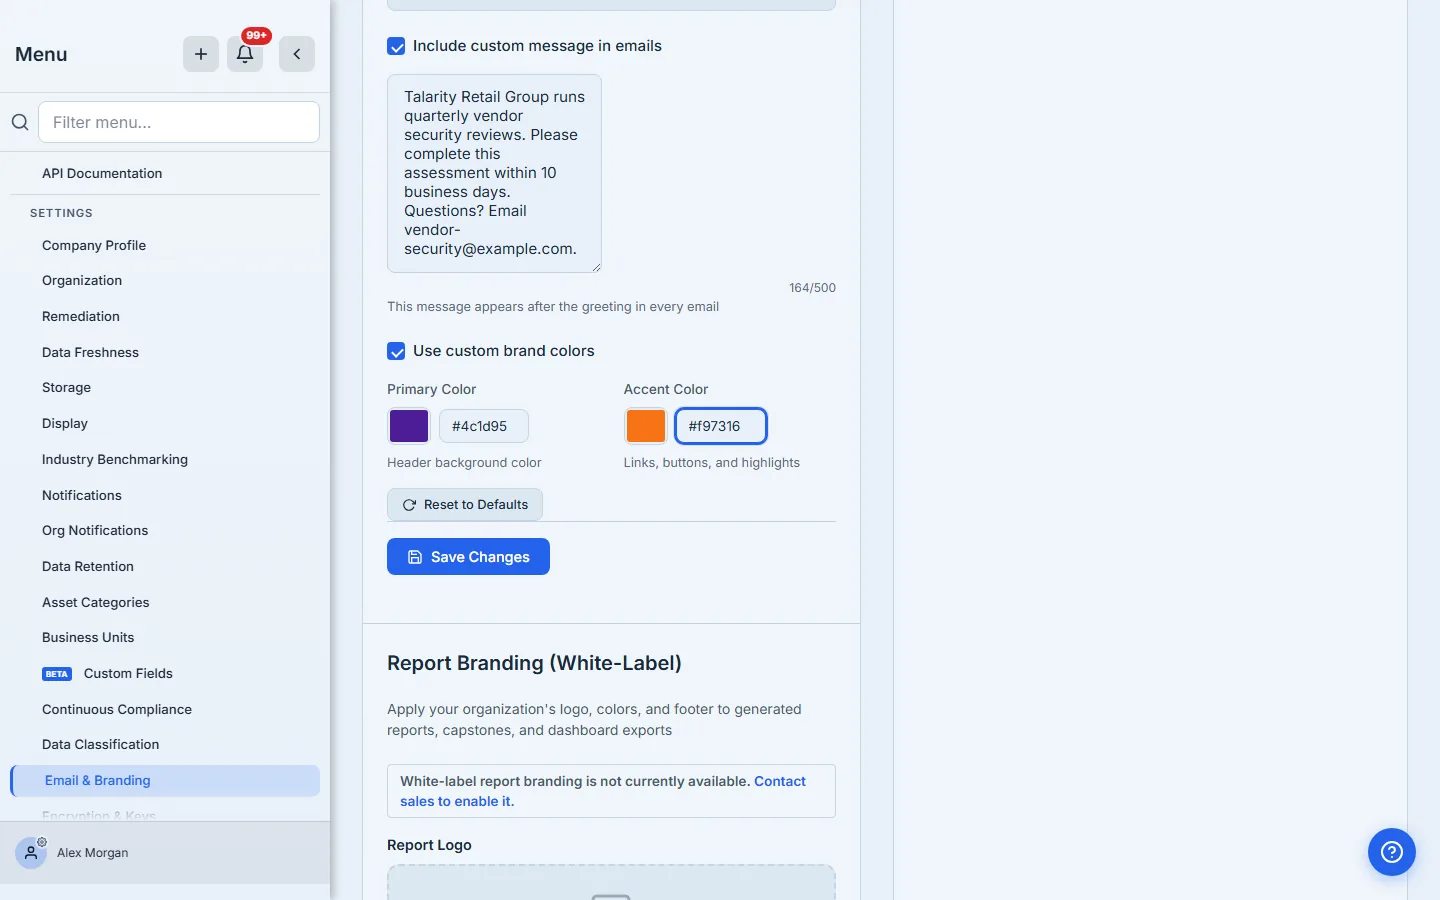
You can type a hex value or use the color picker; the two stay in sync. Pick a primary dark enough for a light logo to read on (or light enough for a dark one) — the logo swatch up in Step 2 updates live to the header color you choose, so you can see the pairing before you send anything.
Under the hood, the colors you type never reach the email as raw text — every value is validated as a real hex color before it’s rendered, so a stray keystroke can’t break the email or inject anything into it. Non-hex input simply falls back to the Talarity default.
Step 6 — Read the live preview
The Preview panel is a real render of your header, message, and colors on a representative email — the same header, message block, and color logic Talarity uses when it sends the real thing. It updates live as you edit; the Refresh button forces a re-render if you ever need one.
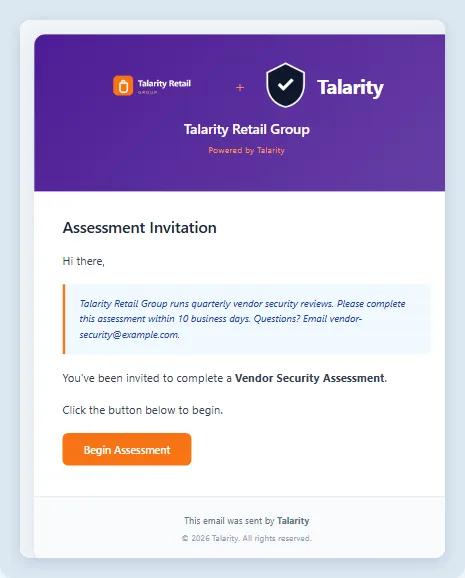
Read it the way a recipient will. The header carries your logo on your color, then a small ”+” and the Talarity mark — the co-branding lockup. Below it, the email body opens with the greeting, then your custom message in its accent-bordered box, then the actual content. The preview honors the master toggle too: switch co-branding off and it shows the plain Talarity email recipients would get instead — so it never flatters you with a co-branded sample you aren’t actually sending.
Step 7 — Send yourself a test
Before you commit, put a real branded email in a real inbox. The Send Test Email box is pre-filled with your address; change it to wherever you want to check it and click Send Test.
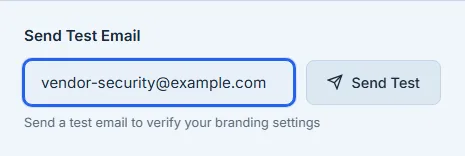
This isn’t a simulation — Talarity queues a genuine email through the same pipeline your assessment invitations use, with your exact current settings (even unsaved ones), and delivers it. Open it in Outlook, in Gmail, on your phone; confirm the logo loads and the colors read the way they did in the preview. Test emails are rate-limited to a handful per hour, so you’re checking, not blasting.
Step 8 — Save, and every email after that is branded
Click Save Changes and you’re done. From that moment, every email Talarity sends on your organization’s behalf carries your branding — no per-email setup, no template to maintain.
Your settings persist against your organization, so they survive reloads and apply org-wide. Change your logo or your message six months from now and the change takes effect on the next email — there’s nothing to redeploy and no batch to reprocess. And because branding is applied at send time, it never blocks mail: if anything about the branding ever failed, Talarity would send the email plain rather than not send it at all.
What you walk away with
- One master toggle that brands — or un-brands — every outgoing email at once, with nothing else to change.
- Your logo in a real lockup with the Talarity mark, at a shared height so the two always line up, delivered as a PNG that renders in Outlook and Gmail (not just in a browser).
- A co-branded subject line that puts your name in front of a recipient before they open the message — the single biggest lever against your assessment requests being mistaken for phishing.
- A custom message that sets expectations once, inserted after the greeting in every email.
- Your brand colors on the header and accents, hex-validated so a typo can never break or inject into an email.
- A live preview and a real test email so you see exactly what recipients get — and prove it in your own inbox — before a single message goes out.
Set yours up this afternoon. Open Administration → Organization Settings → Organization, on the Email & Branding tab, flip the toggle, drag in your logo. The first pass takes about three minutes. After that, every assessment invitation, every policy reminder, every evidence request Talarity sends looks like it came from you — because it did.