Every request for a new vendor, a software seat, or a company laptop is an access-and-procurement event your auditors care about. SOC 2 leans on it in CC6.1 and CC6.2 — how access is requested, approved, and provisioned — and CC9.2, how new vendors enter the program; ISO 27001:2022 covers it in A.5.16 (identity management), A.5.18 (access rights), and A.5.19 (supplier relationships). The control isn’t “did someone get a laptop.” It’s “was it requested, approved by the right person, and recorded — with the resulting vendor or license under management from day one.”
Most teams run this over Slack messages, email threads, and a ticket queue that never links back to anything. Talarity gives your extended team a single guest portal — a login-gated page at /portal/<your-org> where they submit against a catalog you control, and every approved request flows into the vendor register, the license pool, or the provisioning queue automatically. This is the setup: from a portal that’s off to your first guest signing in. It takes about ten minutes, once.
Who’s involved
- You, the admin — turn the portal on, decide how guests get in, and stock the catalog. That’s this article.
- Requesters (guests) — contractors, new hires before day one, anyone you grant access. They sign in and submit; the requester’s-eye view is its own walkthrough.
- Approvers — whoever a request routes to. They decide it in a queue, and Talarity fulfills the rest — covered in From request to reality.
- Auditor — pulls the request trail: who asked, what for, who approved, and the record it produced.
Step 1 — Turn the portal on
Open Guest Management (/app/guests) and switch to the Portal Settings tab. Check Portal enabled and the portal comes alive at its URL — copy it with the Copy button and that’s the link you’ll hand out. Until you enable it, the address returns a neutral “not available” page, indistinguishable from an org that never had a portal — so nobody can probe for it.
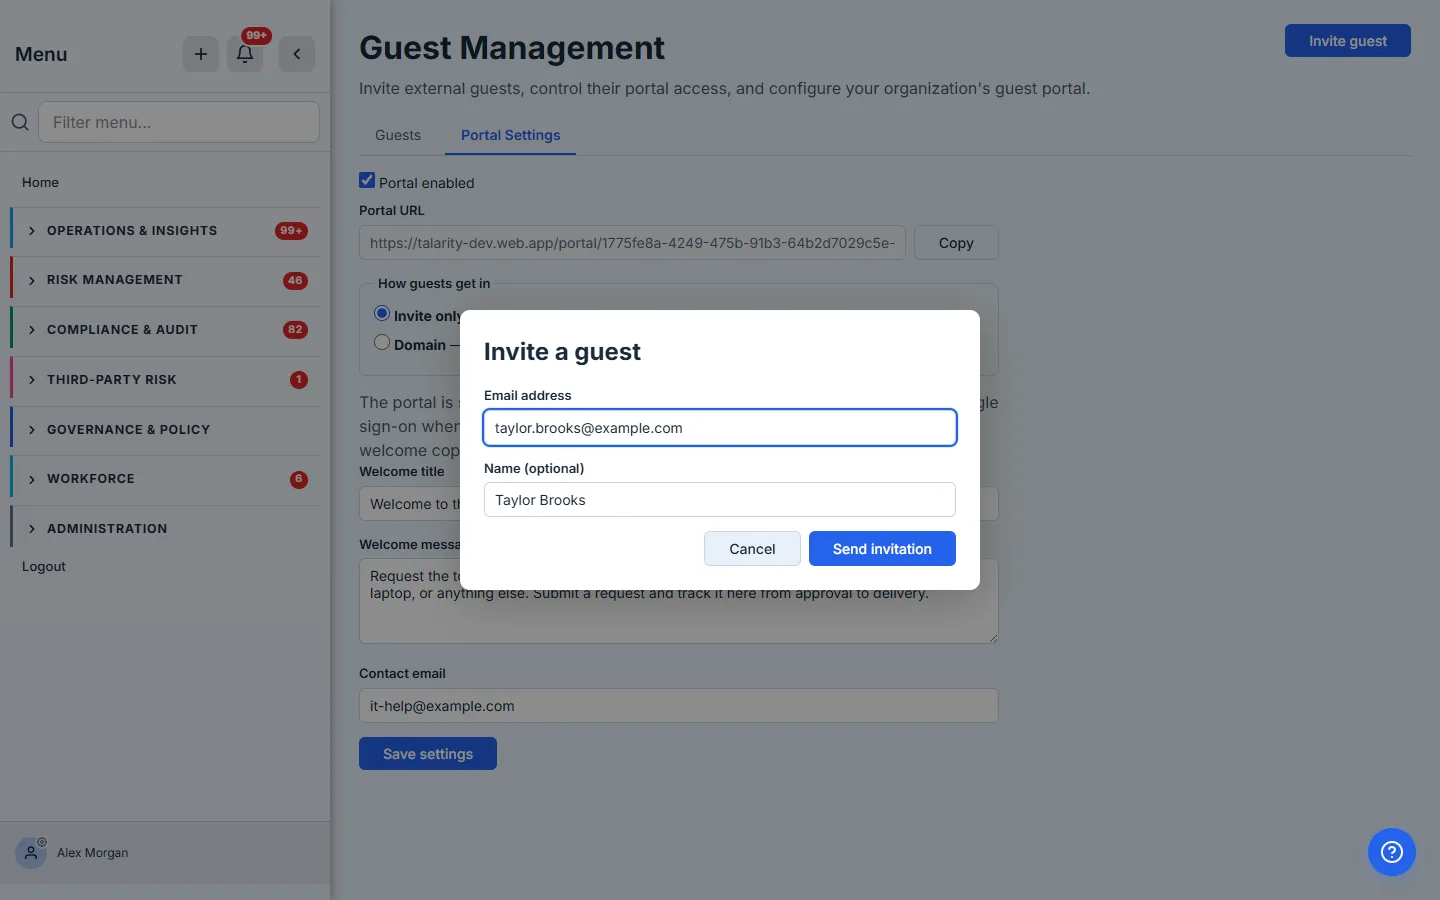
Behind the scenes, enabling the portal is per-organization: the settings live on a guest_portal_configs row keyed to your org, and the public page reads only what you flag here. Nothing about your catalog, your users, or your data is reachable at that URL until a guest authenticates.
Step 2 — Decide how guests get in
Two ways in, and the choice is one radio button:
- Invite only (the default) — only guests you provision can sign in. Best when your guest list is known and small: contractors on a named project, candidates in a hiring pipeline.
- Domain — anyone with an email at a domain you list can request a link and is auto-provisioned as a guest on first sign-in, seat permitting. Best when you want a whole partner firm or a class of contractors to self-serve without you inviting each one.
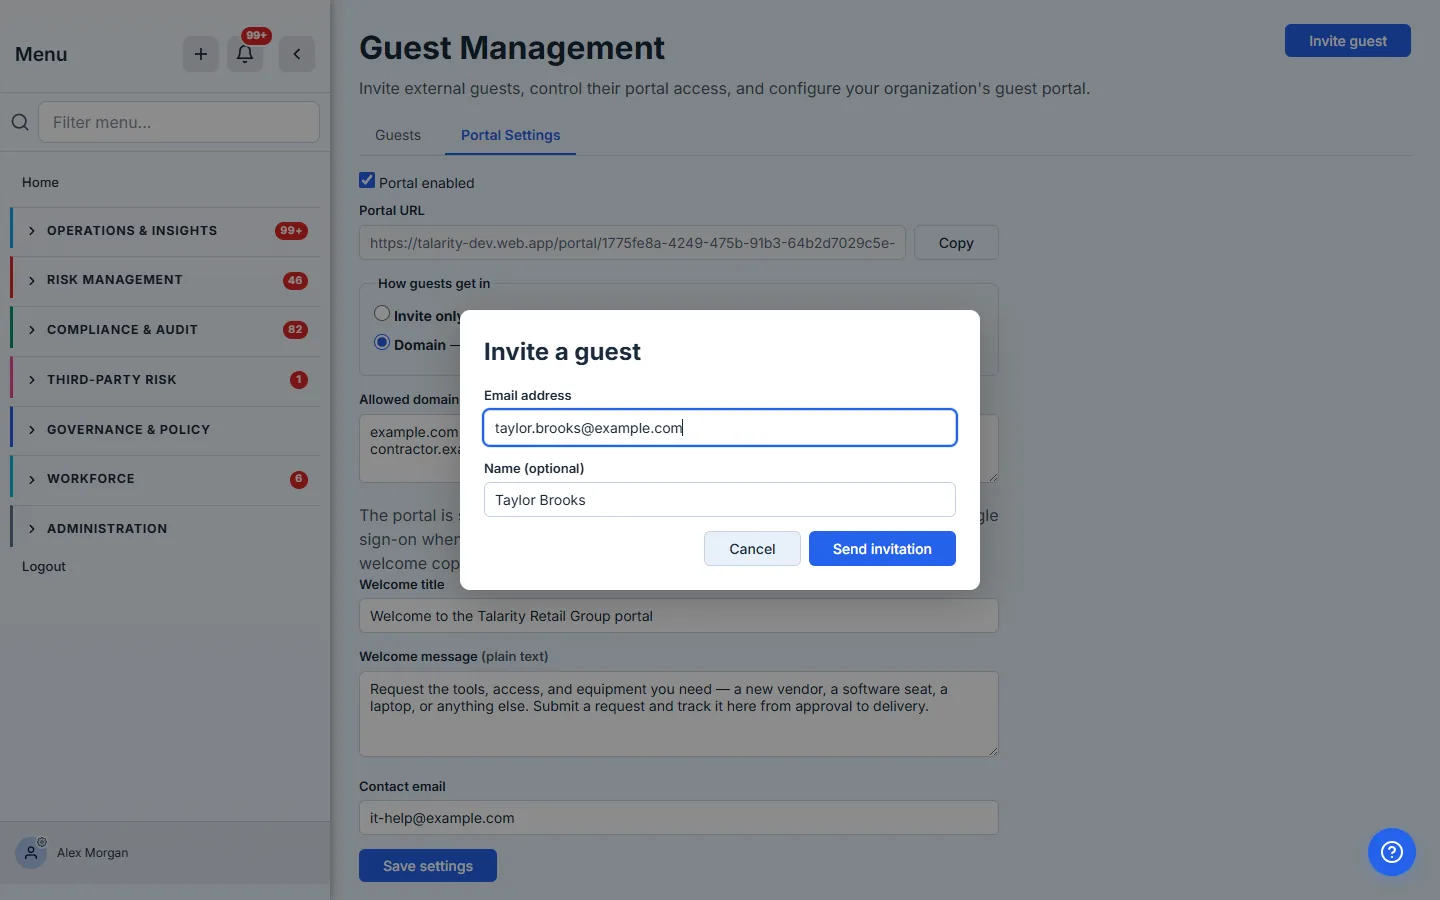
Domain mode has a guardrail worth knowing: guests draw from your organization’s guest seat pool, and if the pool is exhausted when a new domain visitor tries to sign up, the visitor still sees the same neutral “a link is on its way” message — no “you’re out of seats” leak — while you get a notification that a signup was blocked so you can add seats. Nobody self-provisions their way past your seat count.
Step 3 — Write the sign-in screen
The portal is sign-in only, so the sign-in screen is the entire public face of it. The Welcome title and Welcome message (plain text — no HTML to sanitize) are what an unauthenticated visitor reads, and the Contact email becomes a “Questions? Contact…” link for anyone who’s stuck. Write the welcome message like an instruction, not a slogan: “Request the tools, access, and equipment you need — submit a request and track it here from approval to delivery.”
One line on that same screen tells guests how to sign in: a one-time email link, or your single sign-on when it’s configured. If your organization has SSO set up (Settings → SSO Configuration), a Sign in with SSO button appears on the portal automatically — no extra portal configuration. SSO is only a sign-in method, never a membership grant: someone who authenticates through your identity provider but hasn’t been given portal access sees a clear no-access message and is never issued a seat.
Step 4 — Stock the catalog
Switch to Request Portal (/app/portal-requests) → Catalog & Routing. The catalog ships stocked: seven built-in request types, each already wired to the right outcome.
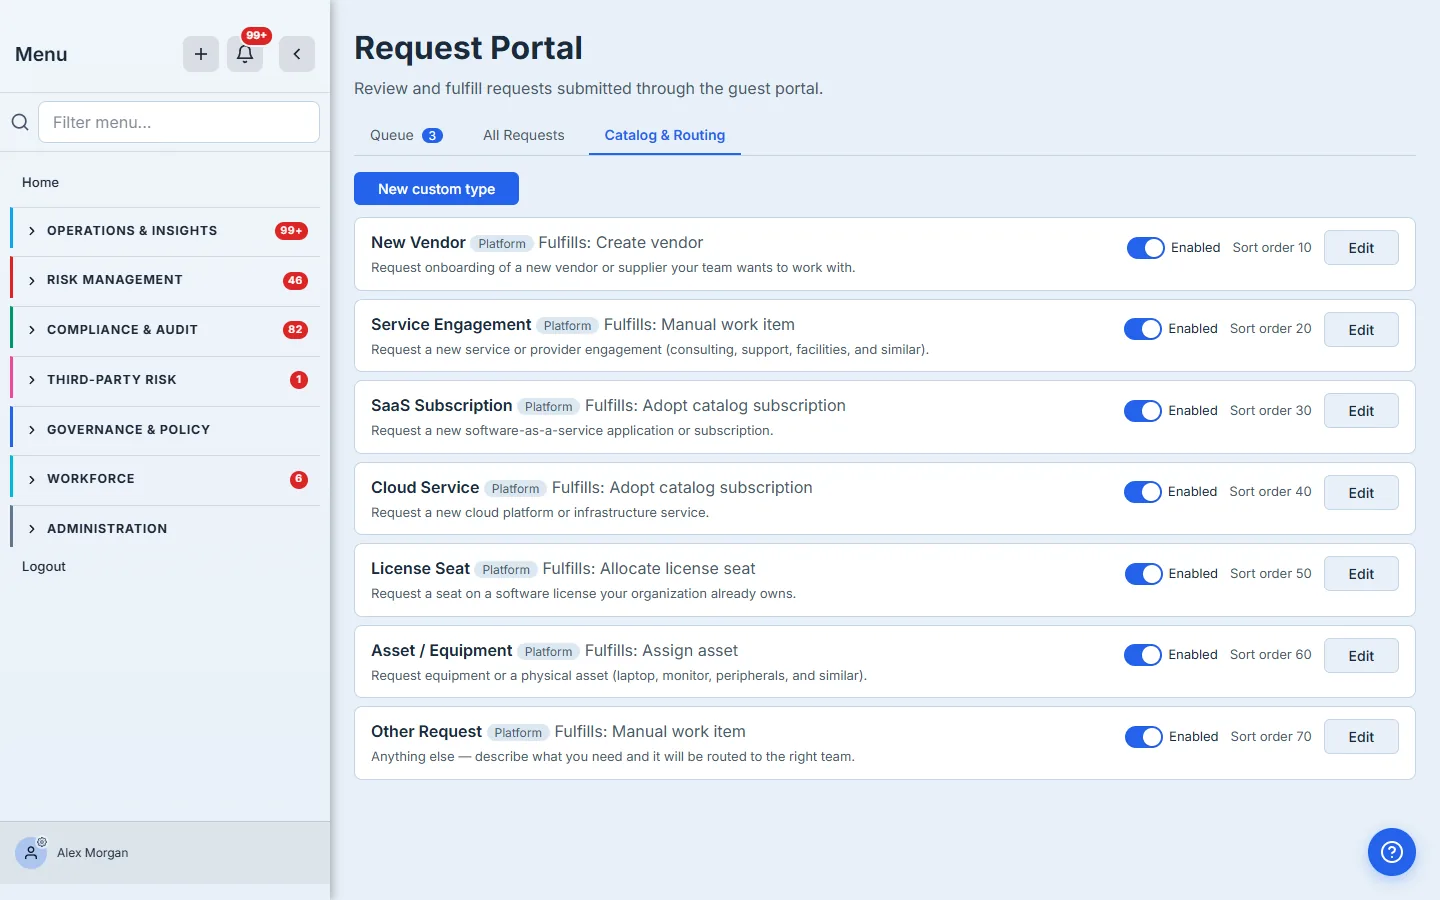
Read the second column on each row — that’s the fulfillment kind, the thing Talarity does when the request is approved:
- New Vendor → creates a vendor record in your TPRM funnel (deduped against vendors you already have).
- SaaS Subscription and Cloud Service → adopt a tracked entry into your workforce catalog.
- License Seat → allocates a seat from a license pool.
- Asset / Equipment → enters the provisioning queue.
- Service Engagement and Other → become a staff work item for a human to fulfill.
For launch, the only decision is which types to offer — flip the Enabled toggle off for anything you don’t want guests requesting yet. Everything deeper — editing a type’s form fields, wiring multi-step approval routing, or building a fully custom request type — is its own walkthrough: Design your request catalog and approval routing.
Step 5 — Invite your first guest
Back on Guest Management → Guests, hit Invite guest. All it takes is an email; a name is optional. The guest receives a one-time invitation link — no password to set, no account to manage — and they land as a portal guest the moment they open it.
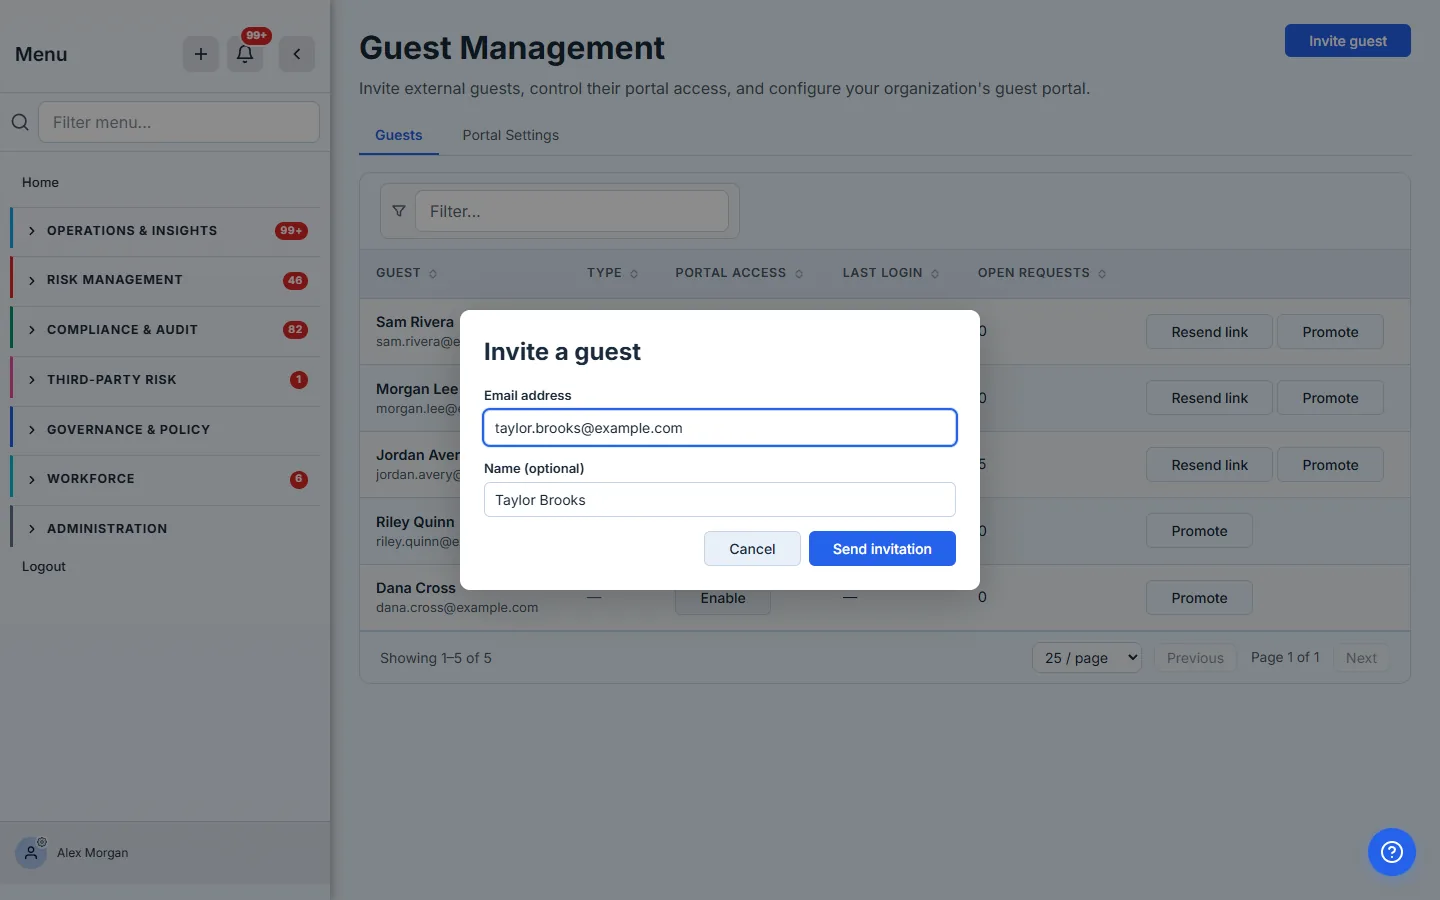
Every guest you invite shows up on the Guests tab with the levers you’ll use day to day: a Portal Access toggle that revokes access on the guest’s very next click (not “at next session expiry” — immediately), their Last Login, a running Open Requests count, and Resend link / Promote actions.
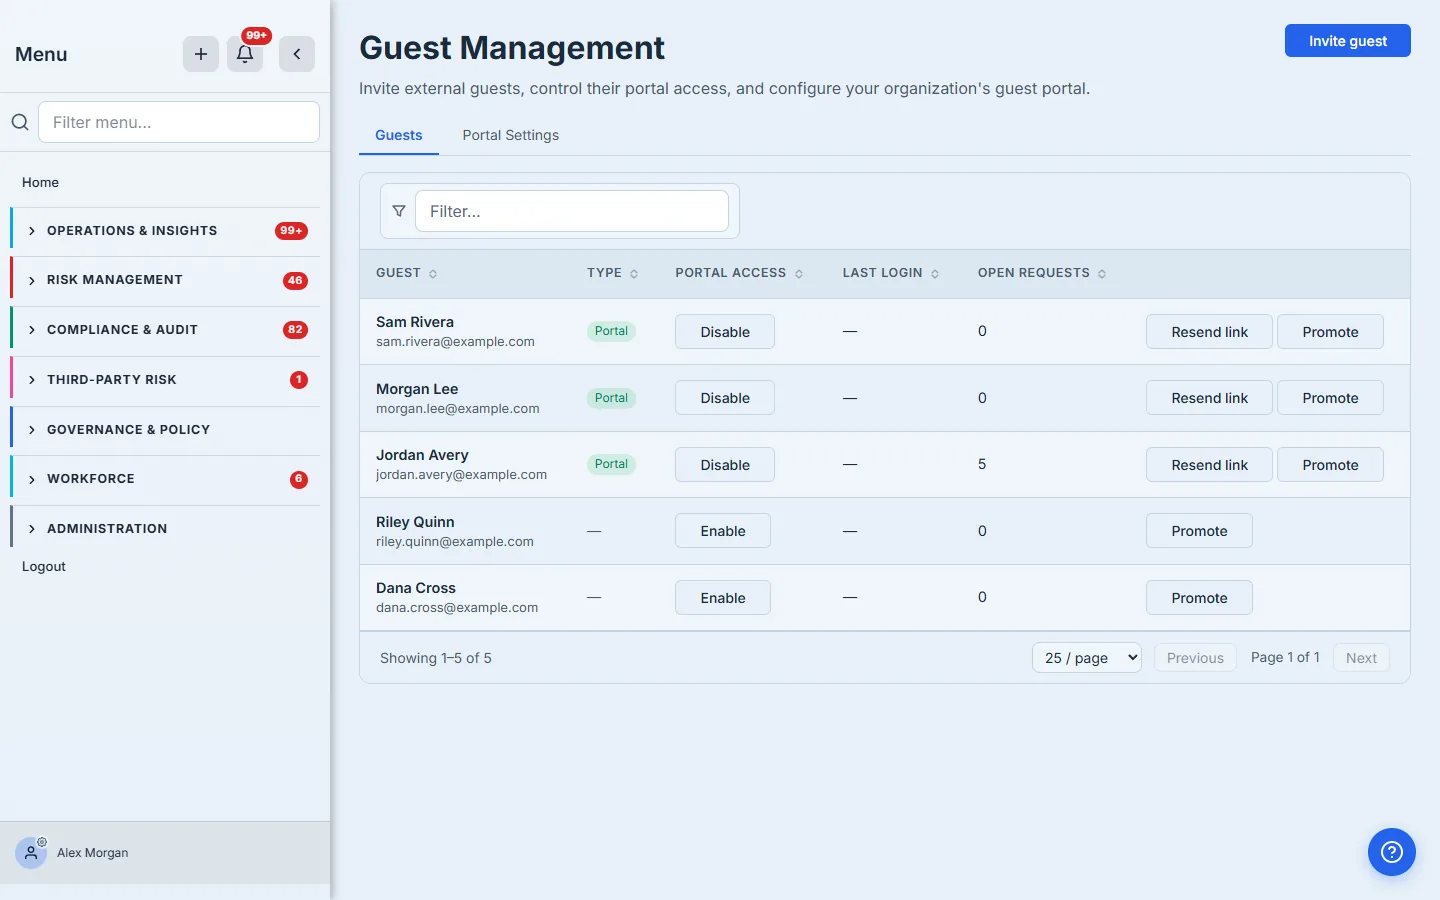
Guests draw from your guest seat pool, not your standard seats, so onboarding a dozen contractors doesn’t touch your paid application headcount. When a guest becomes a real hire, Promote converts them to a standard seat in one step — history intact, guest seat freed. Managing guests over their whole lifecycle is covered in Guests, without the sprawl.
Step 6 — See it as a guest
Open your portal URL in a private window and you’ll see exactly what a guest sees before they sign in: your branding, your welcome message, a one-time-link sign-in box, and your contact link. Nothing else.
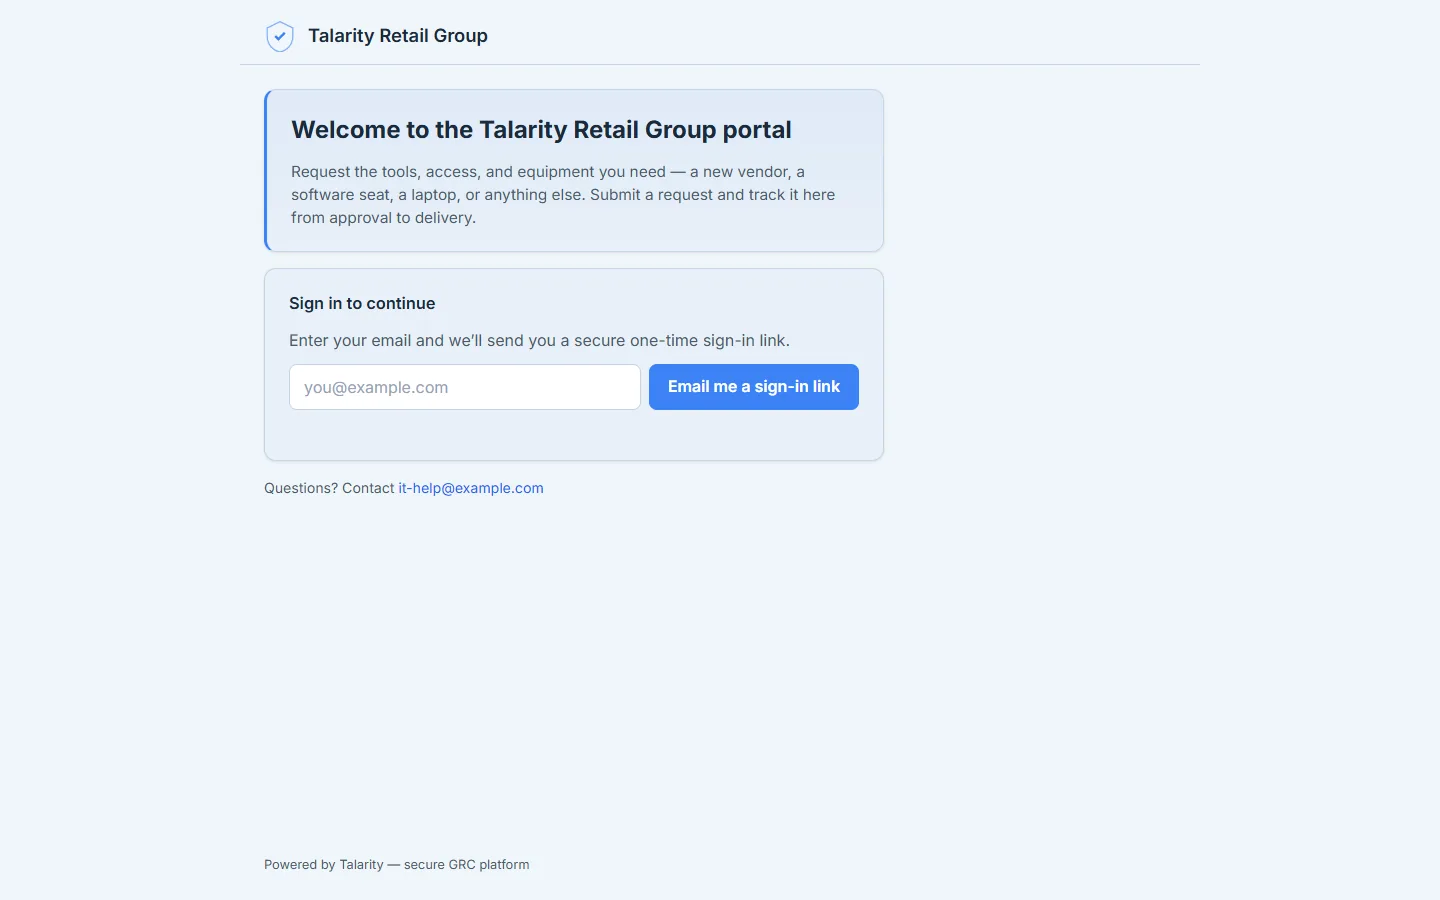
That’s the whole front door. A guest enters their email, gets a secure single-use link (256-bit, expires in fifteen minutes, replay-proof), and lands on the catalog you stocked in Step 4. From there they submit and track requests — the requester walkthrough picks up the story from the guest’s side, and From request to reality follows what happens after they hit submit.
What you walk away with
- One login-gated portal at
/portal/<your-org>, live and branded, with nothing exposed before sign-in. - A deliberate access boundary — invite-only or domain-based — with seat exhaustion handled quietly and safely.
- A stocked catalog where every request type is already wired to the register it fulfills into.
- A guest seat pool that keeps contractors off your paid application headcount, with one-click promotion when they’re hired.
- A control surface — the Guests tab — with instant revocation, last-login visibility, and open-request counts.
Stand yours up this afternoon. Open /app/guests, check Portal enabled, copy the URL, and invite one guest. The first setup takes about ten minutes; after that, the portal runs itself and every approved request lands where it belongs.